Yamaha AW16G Owner's Manual - Page 119
Switching the playback mode for each pad
 |
View all Yamaha AW16G manuals
Add to My Manuals
Save this manual to your list of manuals |
Page 119 highlights
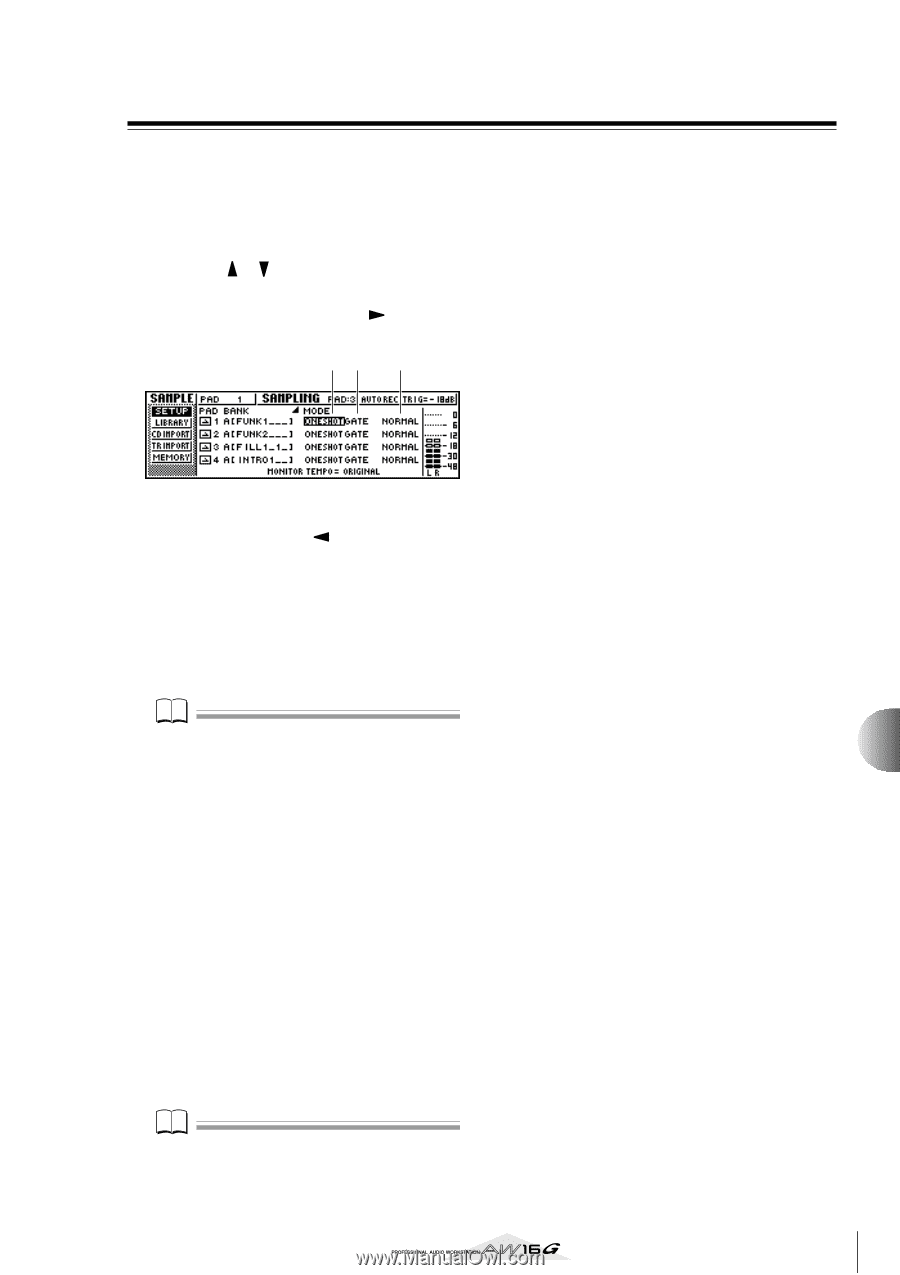
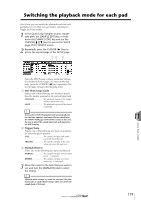
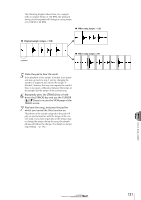
Switching the playback mode for each pad Here's how you can switch the playback mode for each pad between One Shot or Loop modes, and between Trigger and Gate modes. 1 In the Quick Loop Sampler section, repeatedly press the [SAMPLE EDIT] key or hold down the [SAMPLE EDIT] key and use the CURSOR [ ]/[ ] keys to access the SETUP page of the SAMPLE screen. 2 Repeatedly press the CURSOR [ ] key to access the second page of the SETUP page. 12 3 Since the SETUP page contains numerous settings, it is divided into two pages. (To return to the first page, press the CURSOR [ ] key repeatedly.) The second page contains the following items. 1 One Shot/Loop mode Selects one of the following two modes to specify how the sample assigned to the pad will play back. ONE SHOT The playback region of the sample will be played only once. LOOP The playback region will be played repeatedly. Note If you select LOOP, the playback will automatically follow the time signature and tempo that are specified in the TEMPO MAP page of the SONG screen. In this case, the way in which the sample plays back will depend on the SLICE setting. B Trigger/Gate Selects one of the following two types of operation for when the pad is pressed. GATE The sample will play only while you hold down the pad. TRIGGER The sample will play to the end when you press the pad once. C Normal/Reverse Select one of the following two types of playback. NORMAL The sample will play forward (start point → end point). REVERSE The sample will play in reverse (end point → start point). 3 Move the cursor to the item that you want to set, and turn the [DATA/JOG] dial to select the setting. Note Playback mode settings are made for each pad. The playback mode of a pad will not change when you switch the sample bank of that pad. 11 119 Quick loop sampler
-
 1
1 -
2
-
3
-
4
-
5
-
6
-
7
-
8
-
9
-
10
-
11
-
12
-
13
-
14
-
15
-
16
-
17
-
18
-
19
-
20
-
21
-
22
-
23
-
24
-
25
-
26
-
27
-
28
-
29
-
30
-
31
-
32
-
33
-
34
-
35
-
36
-
37
-
38
-
39
-
40
-
41
-
42
-
43
-
44
-
45
-
46
-
47
-
48
-
49
-
50
-
51
-
52
-
53
-
54
-
55
-
56
-
57
-
58
-
59
-
60
-
61
-
62
-
63
-
64
-
65
-
66
-
67
-
68
-
69
-
70
-
71
-
72
-
73
-
74
-
75
-
76
-
77
-
78
-
79
-
80
-
81
-
82
-
83
-
84
-
85
-
86
-
87
-
88
-
89
-
90
-
91
-
92
-
93
-
94
-
95
-
96
-
97
-
98
-
99
-
100
-
101
-
102
-
103
-
104
-
105
-
106
-
107
-
108
-
109
-
110
-
111
-
112
-
113
-
 114
114 -
 115
115 -
 116
116 -
 117
117 -
 118
118 -
 119
119 -
 120
120 -
 121
121 -
 122
122 -
 123
123 -
 124
124 -
125
-
126
-
127
-
128
-
129
-
130
-
131
-
132
-
133
-
134
-
135
-
136
-
137
-
138
-
139
-
140
-
141
-
142
-
143
-
144
-
145
-
146
-
147
-
148
-
149
-
150
-
151
-
152
-
153
-
154
-
155
-
156
-
157
-
158
-
159
-
160
-
161
-
162
-
163
-
164
-
165
-
166
-
167
-
168
-
169
-
170
-
171
-
172
-
173
-
174
-
175
-
176
-
177
-
178
-
179
-
180
-
181
-
182
-
183
-
184
-
185
-
186
-
187
-
188
-
189
-
190
-
191
-
192
-
193
-
194
-
195
-
196
-
197
-
198
-
199
-
200
-
201
-
202
-
203
-
204
-
205
-
206
-
207
-
208
-
209
-
210
-
211
-
212
-
213
-
214
-
215
-
216
-
217
-
218
-
219
 |
 |