Yamaha AW16G Owner's Manual - Page 23
Basic operation on the AW16G, Viewing the display, Accessing a screen/ channel
 |
View all Yamaha AW16G manuals
Add to My Manuals
Save this manual to your list of manuals |
Page 23 highlights
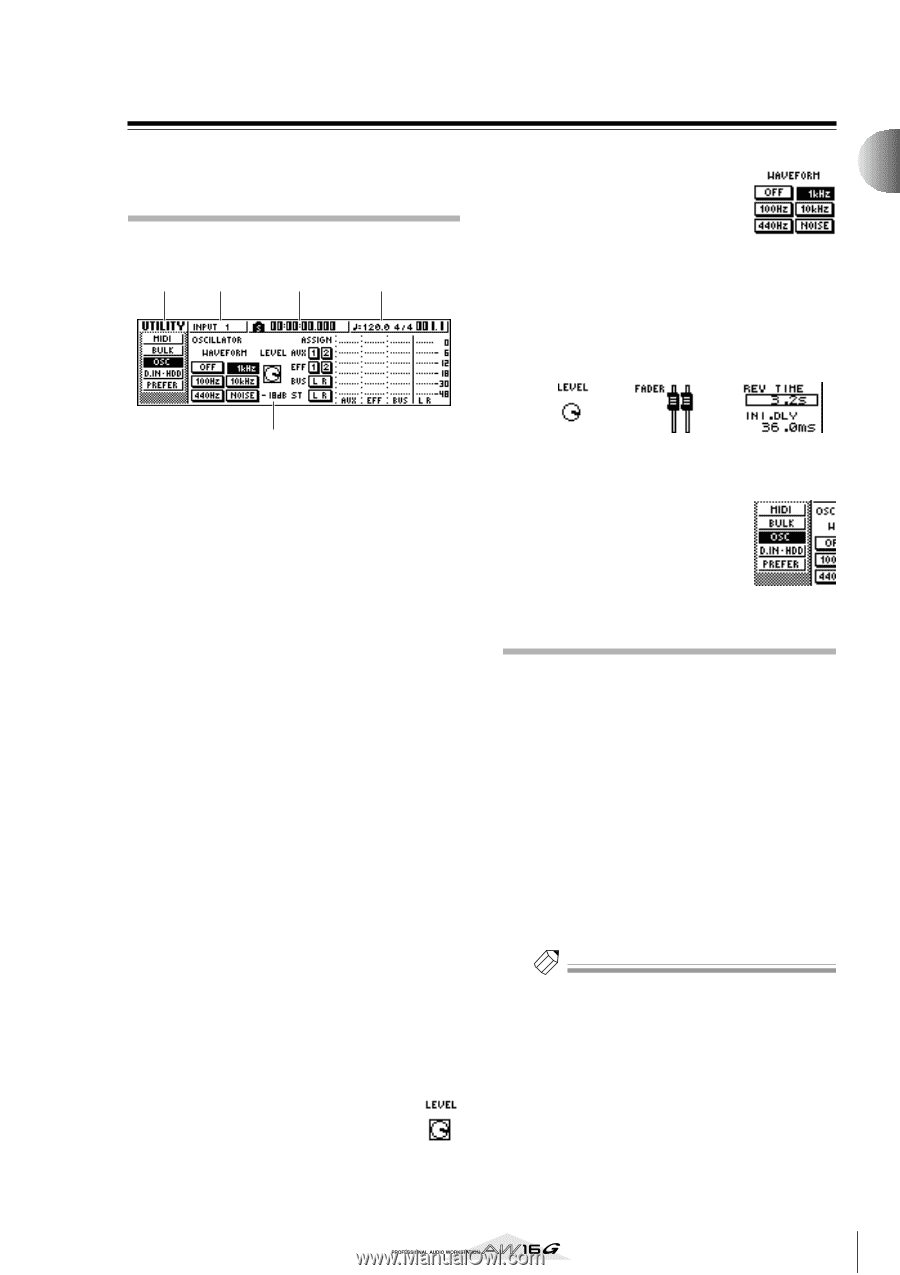
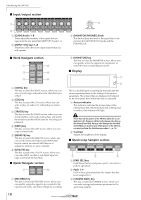
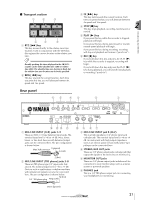
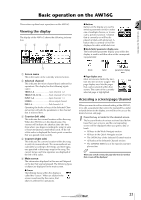
Introducing the AW16G Basic operation on the AW16G This section explains basic operations on the AW16G. Viewing the display The display of the AW16G shows the following information. 1 2 3 4 ● Buttons Buttons in the display are used to switch a parameter on/off, to select one of multiple choices, or to execute a specific function. A button that is currently on will be displayed in black with white text. A button that is currently off will be displayed in white with black text. ● Knob/fader/parameter display area The knob/fader/parameter display area within the display is used to edit the value of the corresponding parameter. 2 5 1 Screen name This is the name of the currently selected screen. B Selected channel This indicates the mixer channel that is selected for operations. The display has the following significance. TRACK 1-8 Track channels 1-8 TRACK 9/10-15/16 Track channels 9/10-15/16 INPUT 1-8 Input channels 1-8 STEREO Stereo output channel PAD 1-4 Pad channels 1-4 Operating the knobs or keys of the Selected Channel section will edit the parameters of the channel that is selected here. C Counter (left side) This indicates the current location within the song. When the AW16G is in the default state, this counter will indicate the absolute time (the time from where you began recording the song) in units of hours/minutes/seconds/milliseconds. At the left of this value is displayed the locate point or marker that was passed most recently. D Counter (right side) This indicates the current location within the song in units of measures/beats. The measures/beats are calculated according to the tempo and time signature specified in the tempo map for the song. The current tempo and time signature are displayed at the left of this value. E Main screen The information displayed in this area will depend on the key that was last pressed. The following types of object are displayed in the main screen. ● Cursor The blinking frame within the display is called the "cursor." When an object in the screen is enclosed by the cursor, that object is selected for operations. Knob fader parameter display area ● Page display area Most screens are divided by function into two or more "pages." The page display area lists the pages that can be selected within that screen. The name of the currently selected page is highlighted. Accessing a screen/page/channel When you want to edit an internal setting of the AW16G, or to edit a parameter that cannot be operated by a fader or knob shown in the display, you will need to access the desired screen and page. 1 Press the key or knob for the desired screen. The keys and knobs of various sections listed below have their own screens, and the corresponding screen will be displayed when you press a key or knob. • All keys in the Work Navigate section • All keys in the Quick Navigate section • The [VIEW] key of the Selected Channel section • All knobs of the Selected Channel section • The [SAMPLE EDIT] key of the Quick Loop Sampler section Tip! When you switch screens, the page that was last used in that screen will be displayed. 23
-
 1
1 -
2
-
3
-
4
-
5
-
6
-
7
-
8
-
9
-
10
-
11
-
12
-
13
-
14
-
15
-
16
-
17
-
 18
18 -
 19
19 -
 20
20 -
 21
21 -
 22
22 -
 23
23 -
 24
24 -
 25
25 -
 26
26 -
 27
27 -
 28
28 -
29
-
30
-
31
-
32
-
33
-
34
-
35
-
36
-
37
-
38
-
39
-
40
-
41
-
42
-
43
-
44
-
45
-
46
-
47
-
48
-
49
-
50
-
51
-
52
-
53
-
54
-
55
-
56
-
57
-
58
-
59
-
60
-
61
-
62
-
63
-
64
-
65
-
66
-
67
-
68
-
69
-
70
-
71
-
72
-
73
-
74
-
75
-
76
-
77
-
78
-
79
-
80
-
81
-
82
-
83
-
84
-
85
-
86
-
87
-
88
-
89
-
90
-
91
-
92
-
93
-
94
-
95
-
96
-
97
-
98
-
99
-
100
-
101
-
102
-
103
-
104
-
105
-
106
-
107
-
108
-
109
-
110
-
111
-
112
-
113
-
114
-
115
-
116
-
117
-
118
-
119
-
120
-
121
-
122
-
123
-
124
-
125
-
126
-
127
-
128
-
129
-
130
-
131
-
132
-
133
-
134
-
135
-
136
-
137
-
138
-
139
-
140
-
141
-
142
-
143
-
144
-
145
-
146
-
147
-
148
-
149
-
150
-
151
-
152
-
153
-
154
-
155
-
156
-
157
-
158
-
159
-
160
-
161
-
162
-
163
-
164
-
165
-
166
-
167
-
168
-
169
-
170
-
171
-
172
-
173
-
174
-
175
-
176
-
177
-
178
-
179
-
180
-
181
-
182
-
183
-
184
-
185
-
186
-
187
-
188
-
189
-
190
-
191
-
192
-
193
-
194
-
195
-
196
-
197
-
198
-
199
-
200
-
201
-
202
-
203
-
204
-
205
-
206
-
207
-
208
-
209
-
210
-
211
-
212
-
213
-
214
-
215
-
216
-
217
-
218
-
219
 |
 |