Yamaha AW16G Owner's Manual - Page 25
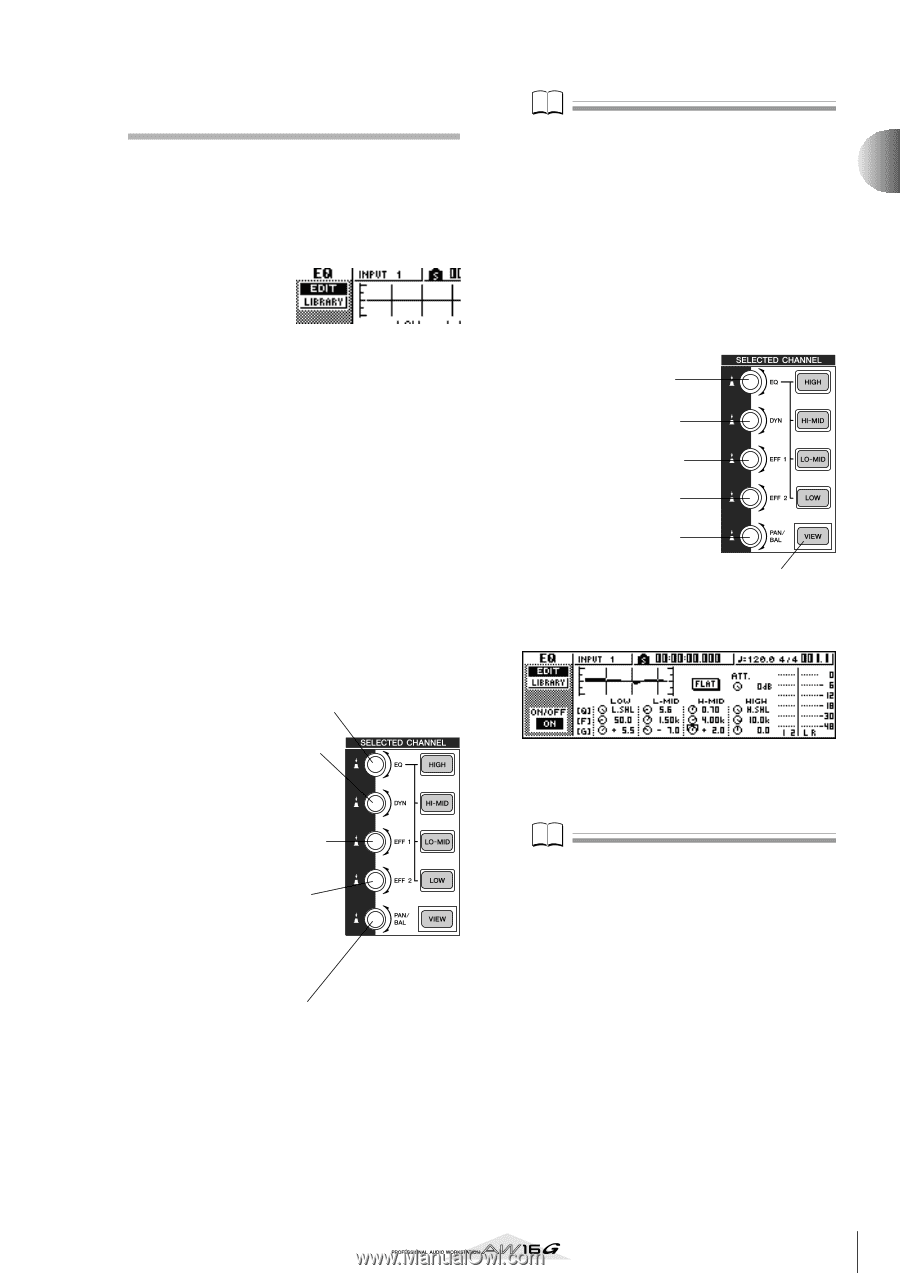
Using the Selected Channel EQ screen EDIT
 |
View all Yamaha AW16G manuals
Add to My Manuals
Save this manual to your list of manuals |
Page 25 highlights
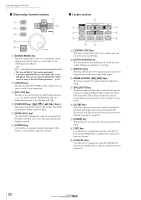
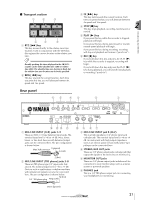
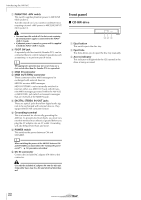
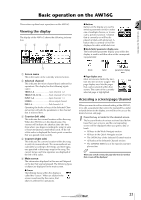
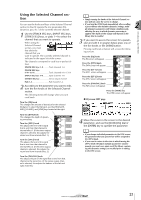
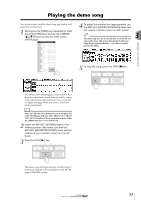
Introducing the AW16G Using the Selected Channel section You can use the knobs and keys of the Selected Channel section to directly operate the mix parameters (EQ, dynamics, pan, etc.) of the currently selected channel. 1 Use the [TRACK SEL] keys, [INPUT SEL] keys, [STEREO SEL] keys, or pads 1-4 to select the channel that you want to operate. When using the Selected Channel section, you must first select the channel that you want to operate. The currently selected channel is indicated in the upper left of the screen. The channels correspond to each key or pad as follows. [TRACK SEL] keys 1-8 ...........Track channels 1-8 [TRACK SEL] keys 9/10-15/16 Track channels 9/10-15/16 [INPUT SEL] keys 1-8 ...........Input channels 1-8 [STEREO SEL] key Stereo output channel Pads 1-4 Pad channels 1-4 2 According to the parameter you want to edit, turn the five knobs of the Selected Channel section. The following items will change when you turn each knob. Turn the [EQ] knob This changes the amount of boost/cut for the selected EQ band. To select the EQ band, use the [HIGH], [HIMID], [LO-MID], and [LOW] keys located at the right. Turn the [DYN] knob This changes the depth of dynamics processing. Turn the [EFF 1] knob This adjusts the level of the signal that is sent from that channel to internal effect 1. (If the stereo output channel is selected, this adjusts the return level from internal effect 1.) Turn the [EFF 2] knob This adjusts the level of the signal that is sent from that channel to internal effect 2. (If the stereo output channel is selected, this adjusts the return level from internal effect 2.) Turn the [PAN/BAL] knob This adjusts the pan of the signal that is sent from that channel to the stereo bus. (If the stereo output channel is selected, this adjusts the balance of the left and right channels.) Note • Simply turning the knobs of the Selected Channel section will not cause the screen to change. • If you turn the [DYN] knob immediately after recalling a preset library that includes dynamics settings, multiple dynamics parameters will change simultaneously, affecting the way in which dynamics processing is applied. The depth of this change will depend on the library that is recalled. 3 If you want to access the screen for a parameter and edit it in greater detail, press one of the five knobs or the [VIEW] button. Pressing each knob or button will access the following screens. 2 Press the [EQ] knob The EQ screen will appear. Press the [DYN] knob The DYN screen will appear. Press the [EFF 1] knob The EFF 1 screen will appear. Press the [EFF 2] knob The EFF 2 screen will appear. Press the [PAN/BAL] knob The PAN screen will appear. Press the [VIEW] key The VIEW screen will appear. ● EQ screen EDIT page 4 Move the cursor in the screen to the desired parameter, and use the [DATA/JOG] dial or the [ENTER] key to operate the parameter. Note • If you change individual parameters in the DYN screen, the parameter that you operate last will be assigned to the [DYN] knob. • If you want to return to the state in which turning the [DYN] knob will adjust multiple parameters simultaneously, you must once again recall the library containing the dynamics settings you recalled prior to editing in the DYN screen. 25
-
 1
1 -
2
-
3
-
4
-
5
-
6
-
7
-
8
-
9
-
10
-
11
-
12
-
13
-
14
-
15
-
16
-
17
-
18
-
19
-
 20
20 -
 21
21 -
 22
22 -
 23
23 -
 24
24 -
 25
25 -
 26
26 -
 27
27 -
 28
28 -
 29
29 -
 30
30 -
31
-
32
-
33
-
34
-
35
-
36
-
37
-
38
-
39
-
40
-
41
-
42
-
43
-
44
-
45
-
46
-
47
-
48
-
49
-
50
-
51
-
52
-
53
-
54
-
55
-
56
-
57
-
58
-
59
-
60
-
61
-
62
-
63
-
64
-
65
-
66
-
67
-
68
-
69
-
70
-
71
-
72
-
73
-
74
-
75
-
76
-
77
-
78
-
79
-
80
-
81
-
82
-
83
-
84
-
85
-
86
-
87
-
88
-
89
-
90
-
91
-
92
-
93
-
94
-
95
-
96
-
97
-
98
-
99
-
100
-
101
-
102
-
103
-
104
-
105
-
106
-
107
-
108
-
109
-
110
-
111
-
112
-
113
-
114
-
115
-
116
-
117
-
118
-
119
-
120
-
121
-
122
-
123
-
124
-
125
-
126
-
127
-
128
-
129
-
130
-
131
-
132
-
133
-
134
-
135
-
136
-
137
-
138
-
139
-
140
-
141
-
142
-
143
-
144
-
145
-
146
-
147
-
148
-
149
-
150
-
151
-
152
-
153
-
154
-
155
-
156
-
157
-
158
-
159
-
160
-
161
-
162
-
163
-
164
-
165
-
166
-
167
-
168
-
169
-
170
-
171
-
172
-
173
-
174
-
175
-
176
-
177
-
178
-
179
-
180
-
181
-
182
-
183
-
184
-
185
-
186
-
187
-
188
-
189
-
190
-
191
-
192
-
193
-
194
-
195
-
196
-
197
-
198
-
199
-
200
-
201
-
202
-
203
-
204
-
205
-
206
-
207
-
208
-
209
-
210
-
211
-
212
-
213
-
214
-
215
-
216
-
217
-
218
-
219
 |
 |