Yamaha AW16G Owner's Manual - Page 45
Assigning input signals to tracks (Bus recording
 |
View all Yamaha AW16G manuals
Add to My Manuals
Save this manual to your list of manuals |
Page 45 highlights
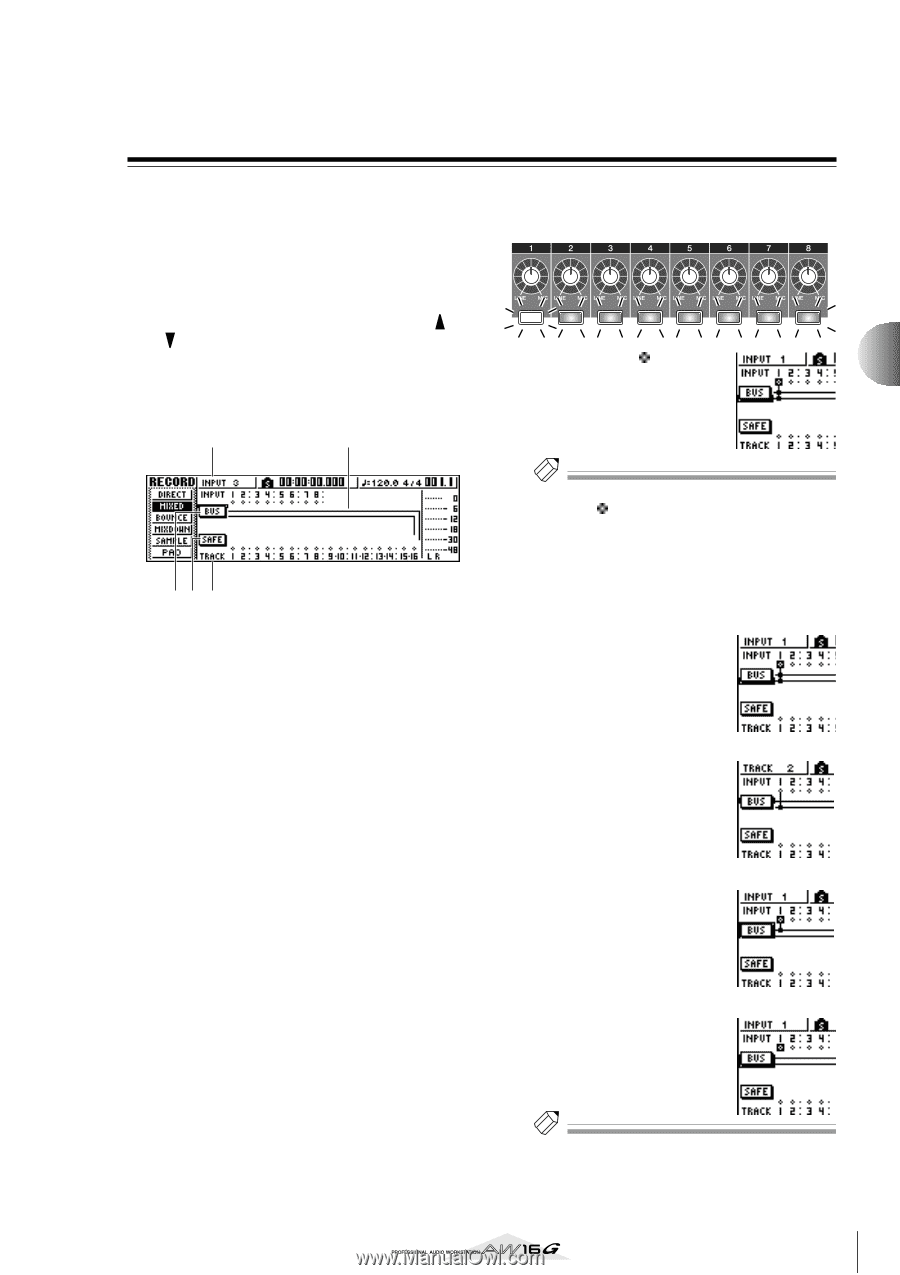
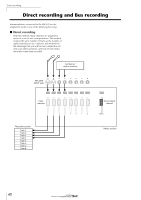
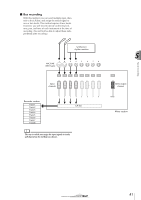
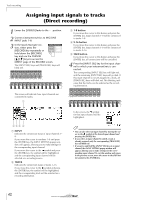
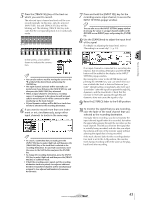
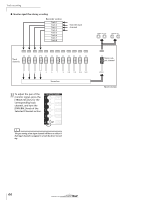
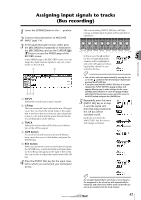
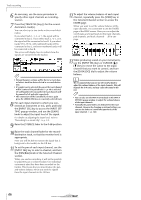
Track recording Assigning input signals to tracks (Bus recording) 1 Lower the [STEREO] fader to the -∞ position. 2 Connect instruments/mics to MIC/LINE INPUT jacks 1-8. 3 In the Quick Navigate section, either press the [RECORD] key repeatedly or hold down the [RECORD] key and use the CURSOR [ ]/ [ ] keys to access the MIXED page of the RECORD screen. In the MIXED page of the RECORD screen, you can assign the input channel signals to any one or two tracks via the L/R bus. 1 2 54 3 1 INPUT Selects the record-source input channel. B L/R bus The two horizontal lines indicate the bus L/R signal route. You can check the on/off status of the signal that is sent from the record-source input channel(s) to bus L or R, and check the tracks that will be the record-destination of the L/R bus. C TRACK Selects the track(s) that will be the record-destination of the L/R bus signal. D SAFE button To cancel all record-sources and record-destinations, move the cursor to this button and press the [ENTER] key. E BUS button When you move the cursor to this button and press the [ENTER] key, a dedicated fader and level meter for the L/R bus will appear in the right of the screen. You can use this to adjust the master level of the L/R bus. 4 Press the [INPUT SEL] key for the input channel to which you connected your instrument or mic. The current setting [INPUT SEL] key will light orange, and that input channel will be selected for operations. In the screen, the symbol for the corresponding input channel will be highlighted, and a line will appear, indicating that this channel is connected to the bus. 5 Tip! • You can also select an input channel by moving the cursor to the symbol for the desired input channel and pressing the [ENTER] key. • If you press and hold the [INPUT SEL] key of an input channel, the INPUT SETTING popup window will appear, allowing you to make settings for the corresponding input channel. To close this popup window and return to the previous screen, move the cursor to the EXIT button and press the [ENTER] key. 5 Repeatedly press the same [INPUT SEL] key as in step 4, and the signal sent from that input channel to the L/R bus will be switched on/off. Each time you press the [INPUT SEL] key, the screen will change as follows. Tip! For an input channel that is selected as a record-source, the assignment to the stereo bus will automatically be turned off, and connections will be made so that the signal can be monitored via the track channel. 45
-
 1
1 -
2
-
3
-
4
-
5
-
6
-
7
-
8
-
9
-
10
-
11
-
12
-
13
-
14
-
15
-
16
-
17
-
18
-
19
-
20
-
21
-
22
-
23
-
24
-
25
-
26
-
27
-
28
-
29
-
30
-
31
-
32
-
33
-
34
-
35
-
36
-
37
-
38
-
39
-
 40
40 -
 41
41 -
 42
42 -
 43
43 -
 44
44 -
 45
45 -
 46
46 -
 47
47 -
 48
48 -
 49
49 -
 50
50 -
51
-
52
-
53
-
54
-
55
-
56
-
57
-
58
-
59
-
60
-
61
-
62
-
63
-
64
-
65
-
66
-
67
-
68
-
69
-
70
-
71
-
72
-
73
-
74
-
75
-
76
-
77
-
78
-
79
-
80
-
81
-
82
-
83
-
84
-
85
-
86
-
87
-
88
-
89
-
90
-
91
-
92
-
93
-
94
-
95
-
96
-
97
-
98
-
99
-
100
-
101
-
102
-
103
-
104
-
105
-
106
-
107
-
108
-
109
-
110
-
111
-
112
-
113
-
114
-
115
-
116
-
117
-
118
-
119
-
120
-
121
-
122
-
123
-
124
-
125
-
126
-
127
-
128
-
129
-
130
-
131
-
132
-
133
-
134
-
135
-
136
-
137
-
138
-
139
-
140
-
141
-
142
-
143
-
144
-
145
-
146
-
147
-
148
-
149
-
150
-
151
-
152
-
153
-
154
-
155
-
156
-
157
-
158
-
159
-
160
-
161
-
162
-
163
-
164
-
165
-
166
-
167
-
168
-
169
-
170
-
171
-
172
-
173
-
174
-
175
-
176
-
177
-
178
-
179
-
180
-
181
-
182
-
183
-
184
-
185
-
186
-
187
-
188
-
189
-
190
-
191
-
192
-
193
-
194
-
195
-
196
-
197
-
198
-
199
-
200
-
201
-
202
-
203
-
204
-
205
-
206
-
207
-
208
-
209
-
210
-
211
-
212
-
213
-
214
-
215
-
216
-
217
-
218
-
219
 |
 |