Yamaha AW16G Owner's Manual - Page 56
Assigning the input signal to a track, Instantly recalling an EQ library
 |
View all Yamaha AW16G manuals
Add to My Manuals
Save this manual to your list of manuals |
Page 56 highlights
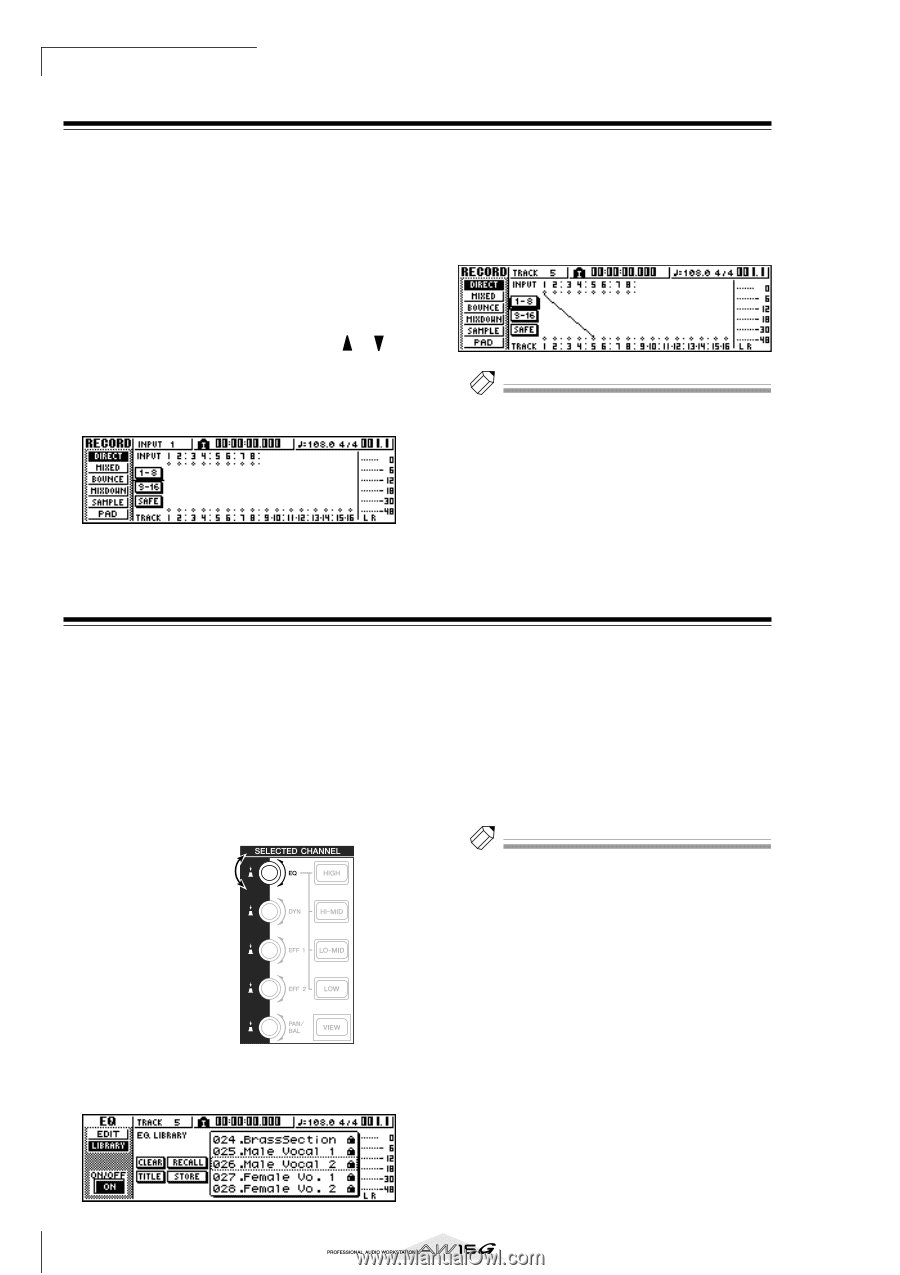
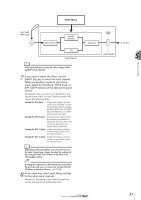
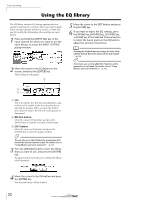
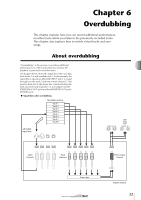
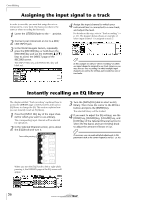
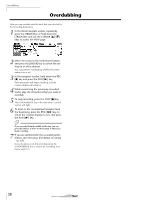
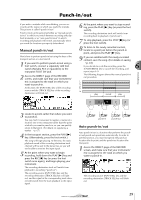
Overdubbing Assigning the input signal to a track In order to overdub, you must first assign the mic or instrument to a new track. The basic procedure is the same as when recording the first track. 1 Lower the [STEREO] fader to the -∞ position. 2 Connect your instrument or mic to a MIC/ LINE INPUT jack. 3 In the Work Navigate Section, repeatedly press the [RECORD] key or hold down the [RECORD] key and use the CURSOR [ ]/[ ] keys to access the DIRECT page of the RECORD screen. The [INPUT SEL] key and [TRACK SEL] key will blink red. 4 Assign the input channel to which your instrument/mic is connected to a new track, and adjust the level. For details on this step, refer to "Track recording" (→ p. 39). The diagram below shows an example of when input channel 1 is assigned to track 5. Tip! In this example we will use "direct recording," in which one input channel is assigned to one track. However, you may also use "bus recording," in which multiple input channels are sent to the L/R bus and recorded on one or two tracks. Instantly recalling an EQ library The chapter entitled "Track recording" explained how to access the LIBRARY page of the EQ screen and load an EQ library to change the EQ. This section explains how you can instantly recall an EQ library. 1 Press the [INPUT SEL] key of the input channel for which you want to use a library. The corresponding input channel will be selected for operations. 2 In the Selected Channel section, press down the [EQ] knob and turn it. Turn while pressing 3 Turn the [DATA/JOG] dial to select an EQ library. Then move the cursor to the RECALL button and press the [ENTER] key. The selected library will be loaded. 4 If you want to adjust the EQ settings, use the [HIGH] key, [HI-MID] key, [LO-MID] key, and [LOW] key of the Selected Channel section to select the EQ band, and turn the [EQ] knob to adjust the amount of boost or cut. Tip! If necessary, you can make detailed adjustments to EQ parameters such as the center frequency and Q (→ p. 92). When you turn the [EQ] knob to left or right while pressing it, the LIBRARY page of the EQ screen will appear. 56
-
 1
1 -
2
-
3
-
4
-
5
-
6
-
7
-
8
-
9
-
10
-
11
-
12
-
13
-
14
-
15
-
16
-
17
-
18
-
19
-
20
-
21
-
22
-
23
-
24
-
25
-
26
-
27
-
28
-
29
-
30
-
31
-
32
-
33
-
34
-
35
-
36
-
37
-
38
-
39
-
40
-
41
-
42
-
43
-
44
-
45
-
46
-
47
-
48
-
49
-
50
-
 51
51 -
 52
52 -
 53
53 -
 54
54 -
 55
55 -
 56
56 -
 57
57 -
 58
58 -
 59
59 -
 60
60 -
 61
61 -
62
-
63
-
64
-
65
-
66
-
67
-
68
-
69
-
70
-
71
-
72
-
73
-
74
-
75
-
76
-
77
-
78
-
79
-
80
-
81
-
82
-
83
-
84
-
85
-
86
-
87
-
88
-
89
-
90
-
91
-
92
-
93
-
94
-
95
-
96
-
97
-
98
-
99
-
100
-
101
-
102
-
103
-
104
-
105
-
106
-
107
-
108
-
109
-
110
-
111
-
112
-
113
-
114
-
115
-
116
-
117
-
118
-
119
-
120
-
121
-
122
-
123
-
124
-
125
-
126
-
127
-
128
-
129
-
130
-
131
-
132
-
133
-
134
-
135
-
136
-
137
-
138
-
139
-
140
-
141
-
142
-
143
-
144
-
145
-
146
-
147
-
148
-
149
-
150
-
151
-
152
-
153
-
154
-
155
-
156
-
157
-
158
-
159
-
160
-
161
-
162
-
163
-
164
-
165
-
166
-
167
-
168
-
169
-
170
-
171
-
172
-
173
-
174
-
175
-
176
-
177
-
178
-
179
-
180
-
181
-
182
-
183
-
184
-
185
-
186
-
187
-
188
-
189
-
190
-
191
-
192
-
193
-
194
-
195
-
196
-
197
-
198
-
199
-
200
-
201
-
202
-
203
-
204
-
205
-
206
-
207
-
208
-
209
-
210
-
211
-
212
-
213
-
214
-
215
-
216
-
217
-
218
-
219
 |
 |