Yamaha AW16G Owner's Manual - Page 83
Preparing for mixdown
 |
View all Yamaha AW16G manuals
Add to My Manuals
Save this manual to your list of manuals |
Page 83 highlights
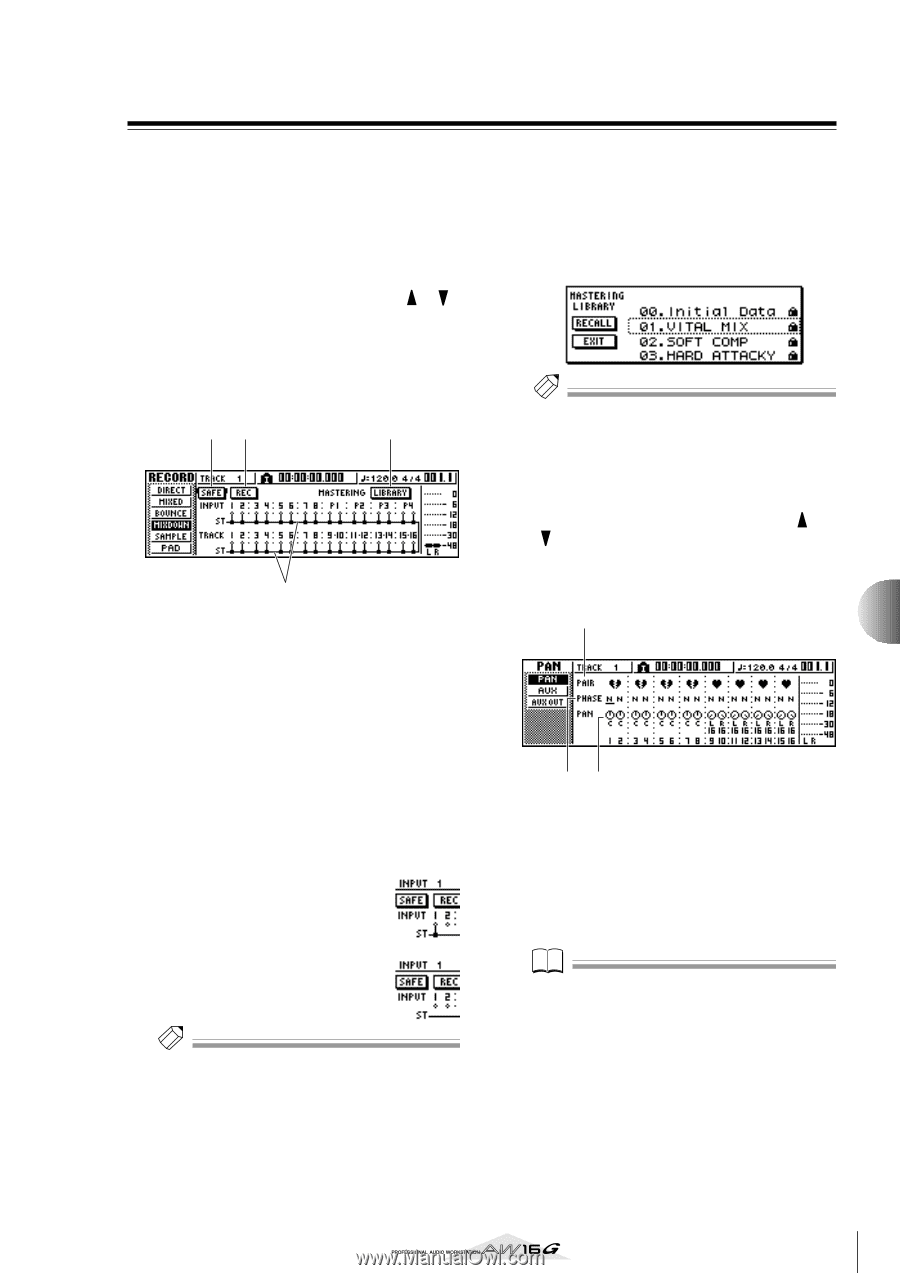
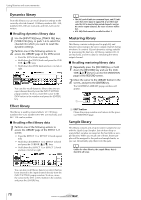
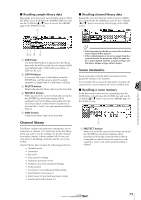
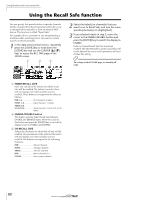
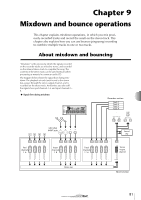
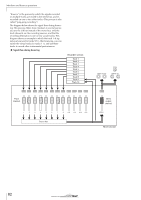
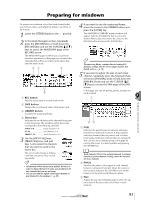
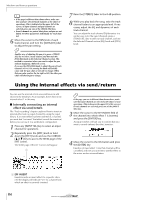
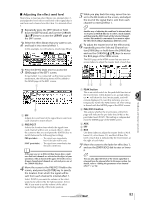
Preparing for mixdown Mixdown and bounce operations To prepare for mixdown, select the track channels that you will mix down, and adjust the balance and tone of each track. 1 Lower the [STEREO] fader to the -∞ position. 2 In the Quick Navigate section, repeatedly press the [RECORD] key or hold down the [RECORD] key and use the CURSOR [ ]/[ ] keys to access the MIXDOWN page of the RECORD screen. The MIXDOWN page is where you can perform mixdown operations. In this page you can select the channels that will be recorded via the stereo bus onto the stereo track. 21 3 4 1 REC button Puts the stereo track in record-ready mode. B SAFE button Defeats the record-ready state of the stereo track. C LIBRARY button Accesses the mastering library. D Stereo bus Indicates the on/off status of the channels being sent to the stereo bus. The numbers within the screen correspond to the following channels. INPUT 1-8 Input channels 1-8 P1-P4 Pad channels 1-4 TRACK 1-16 Track channels 1-16 3 Use the [INPUT SEL] keys, [TRACK SEL] keys, and pad keys 1-4 to select the channels that you want to send to the stereo bus. The screen will change as follows each time you press a key or pad repeatedly. Tip! • All channels will be turned on by default. However in order to obtain the best S/N ratio, you should turn off any channels that you are not using. • You can also add the signals of the input channels or pad channels to the mixdown (→ p. 89). 4 If you want to use the mastering library, move the cursor to the LIBRARY button and press the [ENTER] key. The MASTERING LIBRARY popup window will appear. Turn the [DATA/JOG] dial to select the desired library data, then move the cursor to the RECALL button and press the [ENTER] key. Tip! The mastering library contains data for loading EQ/ dynamics settings into the stereo output channel. (For details, refer to → p. 78) 5 If you want to adjust the pan of each track channel, repeatedly press the Selected Channel section [PAN/BAL] knob or hold down the [PAN/BAL] knob and use the CURSOR [ ]/ [ ] keys to access the PAN page of the PAN screen. In this page you can set pairing, phase, and pan for each channel. 1 9 23 1 PAIR Indicates the paired status of adjacent odd-numbered/even-numbered channels. A heart symbol indicates channels that are paired, and a broken heart symbol indicates channels that are not paired. You can also set or defeat pairing in this page by moving the cursor to a heart symbol and pressing the [ENTER] key. Note Track channels 9/10-15/16 and pad channels 1-4 always function as paired channels. Pairing cannot be defeated for these channels. B PHASE Switches the phase of the signal of each channel between normal and reversed. Move the cursor to this location and press the [ENTER] key to switch between N (Normal) and R (Reverse) phase. C PAN Adjusts the pan (the left/right position when the signal is sent to the stereo bus or L/R bus) of each channel. 83
-
 1
1 -
2
-
3
-
4
-
5
-
6
-
7
-
8
-
9
-
10
-
11
-
12
-
13
-
14
-
15
-
16
-
17
-
18
-
19
-
20
-
21
-
22
-
23
-
24
-
25
-
26
-
27
-
28
-
29
-
30
-
31
-
32
-
33
-
34
-
35
-
36
-
37
-
38
-
39
-
40
-
41
-
42
-
43
-
44
-
45
-
46
-
47
-
48
-
49
-
50
-
51
-
52
-
53
-
54
-
55
-
56
-
57
-
58
-
59
-
60
-
61
-
62
-
63
-
64
-
65
-
66
-
67
-
68
-
69
-
70
-
71
-
72
-
73
-
74
-
75
-
76
-
77
-
 78
78 -
 79
79 -
 80
80 -
 81
81 -
 82
82 -
 83
83 -
 84
84 -
 85
85 -
 86
86 -
 87
87 -
 88
88 -
89
-
90
-
91
-
92
-
93
-
94
-
95
-
96
-
97
-
98
-
99
-
100
-
101
-
102
-
103
-
104
-
105
-
106
-
107
-
108
-
109
-
110
-
111
-
112
-
113
-
114
-
115
-
116
-
117
-
118
-
119
-
120
-
121
-
122
-
123
-
124
-
125
-
126
-
127
-
128
-
129
-
130
-
131
-
132
-
133
-
134
-
135
-
136
-
137
-
138
-
139
-
140
-
141
-
142
-
143
-
144
-
145
-
146
-
147
-
148
-
149
-
150
-
151
-
152
-
153
-
154
-
155
-
156
-
157
-
158
-
159
-
160
-
161
-
162
-
163
-
164
-
165
-
166
-
167
-
168
-
169
-
170
-
171
-
172
-
173
-
174
-
175
-
176
-
177
-
178
-
179
-
180
-
181
-
182
-
183
-
184
-
185
-
186
-
187
-
188
-
189
-
190
-
191
-
192
-
193
-
194
-
195
-
196
-
197
-
198
-
199
-
200
-
201
-
202
-
203
-
204
-
205
-
206
-
207
-
208
-
209
-
210
-
211
-
212
-
213
-
214
-
215
-
216
-
217
-
218
-
219
 |
 |