Cisco SA520-K9 Administration Guide - Page 191
Administration, > Authentication, Upload, Browse, Delete, Generate CSR, Active Self, Certificates
 |
UPC - 882658266744
View all Cisco SA520-K9 manuals
Add to My Manuals
Save this manual to your list of manuals |
Page 191 highlights
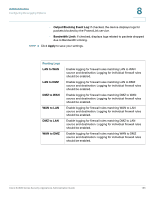
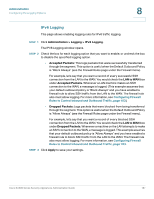
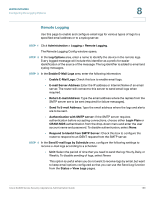
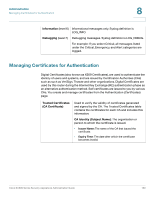
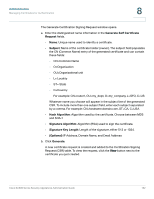
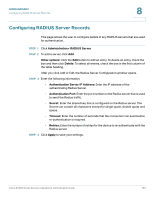
Administration Managing Certificates for Authentication 8 Active Self Certificates Certification Signing Request (CSR) Lists the certificates issued to you by a trusted CA and are available for use by the remote IKE servers. The remote IKE server validates the router by using these certificates. To use a self certificate you must first request a certificate from the CA and then download and activate the certificate on your system. The Active Self Certificates table for each certificate includes this information: • Name. Name used to identify this certificate. • Subject Name. Name which other organizations will see as the holder (owner) of this certificate. Enter the registered business name or official company name. • Serial Number: Serial number maintained by the CA and used for identification purposes. • Issuer Name: Name of the CA that issued the certificate. • Expiry Time: Date on which the certificate expires. It is advisable to renew the certificate before it expires. Contains all the information required to create your digital certificate including the contact information, the common name for which the signed certificate is issued, and the public key of the server that will use the certificate. The Certificate Signing Request table lists the name of the certificates you request and the certificate status. STEP 1 : Click Administration > Authentication. The Authentication (Certificates) window opens. STEP 2 For each type of certificate, perform the following actions, as needed: • To add a certificate, click Upload. You can upload the certificate from the PC or the USB device. Click Browse, find and select the certificate, and then click Upload. • To delete a certificate, check the box to select the certificate, and then click Delete. • To download the router's certificate (.pem file), click the Download button under the Download Settings area. STEP 3 To request a certificate from the CA, click Generate CSR. Cisco SA500 Series Security Appliances Administration Guide 191
-
 1
1 -
2
-
3
-
4
-
5
-
6
-
7
-
8
-
9
-
10
-
11
-
12
-
13
-
14
-
15
-
16
-
17
-
18
-
19
-
20
-
21
-
22
-
23
-
24
-
25
-
26
-
27
-
28
-
29
-
30
-
31
-
32
-
33
-
34
-
35
-
36
-
37
-
38
-
39
-
40
-
41
-
42
-
43
-
44
-
45
-
46
-
47
-
48
-
49
-
50
-
51
-
52
-
53
-
54
-
55
-
56
-
57
-
58
-
59
-
60
-
61
-
62
-
63
-
64
-
65
-
66
-
67
-
68
-
69
-
70
-
71
-
72
-
73
-
74
-
75
-
76
-
77
-
78
-
79
-
80
-
81
-
82
-
83
-
84
-
85
-
86
-
87
-
88
-
89
-
90
-
91
-
92
-
93
-
94
-
95
-
96
-
97
-
98
-
99
-
100
-
101
-
102
-
103
-
104
-
105
-
106
-
107
-
108
-
109
-
110
-
111
-
112
-
113
-
114
-
115
-
116
-
117
-
118
-
119
-
120
-
121
-
122
-
123
-
124
-
125
-
126
-
127
-
128
-
129
-
130
-
131
-
132
-
133
-
134
-
135
-
136
-
137
-
138
-
139
-
140
-
141
-
142
-
143
-
144
-
145
-
146
-
147
-
148
-
149
-
150
-
151
-
152
-
153
-
154
-
155
-
156
-
157
-
158
-
159
-
160
-
161
-
162
-
163
-
164
-
165
-
166
-
167
-
168
-
169
-
170
-
171
-
172
-
173
-
174
-
175
-
176
-
177
-
178
-
179
-
180
-
181
-
182
-
183
-
184
-
185
-
 186
186 -
 187
187 -
 188
188 -
 189
189 -
 190
190 -
 191
191 -
 192
192 -
 193
193 -
 194
194 -
 195
195 -
 196
196 -
197
-
198
-
199
-
200
-
201
-
202
-
203
-
204
-
205
-
206
-
207
-
208
-
209
-
210
-
211
-
212
-
213
-
214
-
215
-
216
-
217
-
218
-
219
-
220
-
221
-
222
-
223
-
224
-
225
-
226
-
227
-
228
-
229
-
230
-
231
-
232
-
233
-
234
-
235
-
236
-
237
-
238
-
239
-
240
 |
 |
