Cisco SA520-K9 Administration Guide - Page 49
Assigning VLANs to LAN Ports, Networking, Assigning, VLANs to LAN Ports,
 |
UPC - 882658266744
View all Cisco SA520-K9 manuals
Add to My Manuals
Save this manual to your list of manuals |
Page 49 highlights
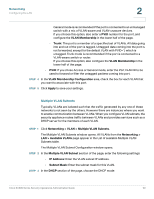
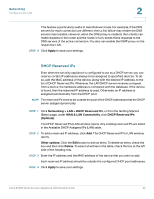
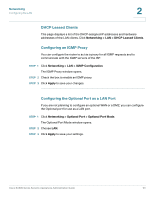
Networking Configuring the LAN 2 NOTE VLAN ID 1 is reserved for the default VLAN, which is used for untagged frames received on the interface. VLAN IDs 4092 is reserved and cannot be used. • Inter VLAN Routing Enable: Check the box if you want to allow the SA500 to route traffic between this VLAN and other VLANs that also have interVLAN routing enabled. Uncheck the box to disable inter-VLAN routing for this VLAN. STEP 4 Click Apply to save your settings. NOTE Next steps: • Assign the VLANs to LAN ports. For more information, see Assigning VLANs to LAN Ports, page 49. • Set up VLAN subnets. For more information, see Multiple VLAN Subnets, page 50. Assigning VLANs to LAN Ports To assign a VLAN to a LAN port, choose the mode and assign VLAN membership. STEP 1 Click Networking > LAN > Port VLAN. The Port VLANs window opens. The existing port VLAN settings appear in the Port VLANs table. STEP 2 To update the settings for a port, click the Edit button. STEP 3 In the VLAN Configuration area, enter the following information: • Mode: Choose one of the following options: - Access: The access port is a member of a single VLAN. All data going into and out of the access port is untagged. By default, all VLAN ports are in access mode. Access mode is recommended if the port is connected to a single end-user device which is VLAN unaware. If you choose this option, also enter a VLAN ID for the port, in the PVID field. - General: The port is a member of a specified set of VLANs. The port sends and receives both tagged and untagged data. Untagged data coming into the port is assigned the specified PVID. Data that is sent out of the port from the same PVID is untagged. All other data is tagged. Cisco SA500 Series Security Appliances Administration Guide 49
-
 1
1 -
2
-
3
-
4
-
5
-
6
-
7
-
8
-
9
-
10
-
11
-
12
-
13
-
14
-
15
-
16
-
17
-
18
-
19
-
20
-
21
-
22
-
23
-
24
-
25
-
26
-
27
-
28
-
29
-
30
-
31
-
32
-
33
-
34
-
35
-
36
-
37
-
38
-
39
-
40
-
41
-
42
-
43
-
 44
44 -
 45
45 -
 46
46 -
 47
47 -
 48
48 -
 49
49 -
 50
50 -
 51
51 -
 52
52 -
 53
53 -
 54
54 -
55
-
56
-
57
-
58
-
59
-
60
-
61
-
62
-
63
-
64
-
65
-
66
-
67
-
68
-
69
-
70
-
71
-
72
-
73
-
74
-
75
-
76
-
77
-
78
-
79
-
80
-
81
-
82
-
83
-
84
-
85
-
86
-
87
-
88
-
89
-
90
-
91
-
92
-
93
-
94
-
95
-
96
-
97
-
98
-
99
-
100
-
101
-
102
-
103
-
104
-
105
-
106
-
107
-
108
-
109
-
110
-
111
-
112
-
113
-
114
-
115
-
116
-
117
-
118
-
119
-
120
-
121
-
122
-
123
-
124
-
125
-
126
-
127
-
128
-
129
-
130
-
131
-
132
-
133
-
134
-
135
-
136
-
137
-
138
-
139
-
140
-
141
-
142
-
143
-
144
-
145
-
146
-
147
-
148
-
149
-
150
-
151
-
152
-
153
-
154
-
155
-
156
-
157
-
158
-
159
-
160
-
161
-
162
-
163
-
164
-
165
-
166
-
167
-
168
-
169
-
170
-
171
-
172
-
173
-
174
-
175
-
176
-
177
-
178
-
179
-
180
-
181
-
182
-
183
-
184
-
185
-
186
-
187
-
188
-
189
-
190
-
191
-
192
-
193
-
194
-
195
-
196
-
197
-
198
-
199
-
200
-
201
-
202
-
203
-
204
-
205
-
206
-
207
-
208
-
209
-
210
-
211
-
212
-
213
-
214
-
215
-
216
-
217
-
218
-
219
-
220
-
221
-
222
-
223
-
224
-
225
-
226
-
227
-
228
-
229
-
230
-
231
-
232
-
233
-
234
-
235
-
236
-
237
-
238
-
239
-
240
 |
 |
