Cisco SA520-K9 Administration Guide - Page 54
Configuring the Optional WAN, Networking, Creating PPPoE Profiles,
 |
UPC - 882658266744
View all Cisco SA520-K9 manuals
Add to My Manuals
Save this manual to your list of manuals |
Page 54 highlights
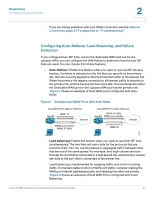
Networking Configuring the Optional WAN 2 Configuring the Optional WAN You can configure the Optional port for use as an optional WAN, allowing you to set up two ISP links for your network. You can use one link as the primary link and one for backup purposes, or you can configure load balancing to use both links at the same time. STEP 1 First configure the Optional port for use as a WAN port: a. Click Networking > Optional Port > Optional Port Mode, or from the Getting Started (Advanced) page, under Secondary WAN Port, click Set Optional Port to WAN. The Optional Port Mode window opens. b. Choose WAN. c. Click Apply to save your settings. If you are using the Getting Started (Advanced) page, click Getting Started > Advanced to return to the list of configuration tasks. STEP 2 Click Networking > Optional Port > WAN, or from the Getting Started (Advanced) page, under Secondary WAN Port, click Configure WAN settings for Optional Port. STEP 3 The WAN Configuration window opens.In the ISP Configuration area, check the Internet Connection Require a Login box if your ISP requires a login every time you connect to the Internet. • If you checked the box, complete the fields in the ISP Connection Type area. • If you did not check the box, continue complete the fields in the Internet (IP) Address area and Dynamic Name System (DNS) Servers area. STEP 4 If your Internet connection requires a login, enter the settings in ISP Connection Type area: • ISP Connection Type: Choose the connection type, as specified by your service provider: PPTP, PPPoE, or L2TP. Then complete all fields that are highlighted with white backgrounds. • PPPoE Profile Name: Choose a PPPoE profile. To manage the profiles in the drop-down list, see Creating PPPoE Profiles, page 40. • User Name: The user name that is required to log in Cisco SA500 Series Security Appliances Administration Guide 54
-
 1
1 -
2
-
3
-
4
-
5
-
6
-
7
-
8
-
9
-
10
-
11
-
12
-
13
-
14
-
15
-
16
-
17
-
18
-
19
-
20
-
21
-
22
-
23
-
24
-
25
-
26
-
27
-
28
-
29
-
30
-
31
-
32
-
33
-
34
-
35
-
36
-
37
-
38
-
39
-
40
-
41
-
42
-
43
-
44
-
45
-
46
-
47
-
48
-
 49
49 -
 50
50 -
 51
51 -
 52
52 -
 53
53 -
 54
54 -
 55
55 -
 56
56 -
 57
57 -
 58
58 -
 59
59 -
60
-
61
-
62
-
63
-
64
-
65
-
66
-
67
-
68
-
69
-
70
-
71
-
72
-
73
-
74
-
75
-
76
-
77
-
78
-
79
-
80
-
81
-
82
-
83
-
84
-
85
-
86
-
87
-
88
-
89
-
90
-
91
-
92
-
93
-
94
-
95
-
96
-
97
-
98
-
99
-
100
-
101
-
102
-
103
-
104
-
105
-
106
-
107
-
108
-
109
-
110
-
111
-
112
-
113
-
114
-
115
-
116
-
117
-
118
-
119
-
120
-
121
-
122
-
123
-
124
-
125
-
126
-
127
-
128
-
129
-
130
-
131
-
132
-
133
-
134
-
135
-
136
-
137
-
138
-
139
-
140
-
141
-
142
-
143
-
144
-
145
-
146
-
147
-
148
-
149
-
150
-
151
-
152
-
153
-
154
-
155
-
156
-
157
-
158
-
159
-
160
-
161
-
162
-
163
-
164
-
165
-
166
-
167
-
168
-
169
-
170
-
171
-
172
-
173
-
174
-
175
-
176
-
177
-
178
-
179
-
180
-
181
-
182
-
183
-
184
-
185
-
186
-
187
-
188
-
189
-
190
-
191
-
192
-
193
-
194
-
195
-
196
-
197
-
198
-
199
-
200
-
201
-
202
-
203
-
204
-
205
-
206
-
207
-
208
-
209
-
210
-
211
-
212
-
213
-
214
-
215
-
216
-
217
-
218
-
219
-
220
-
221
-
222
-
223
-
224
-
225
-
226
-
227
-
228
-
229
-
230
-
231
-
232
-
233
-
234
-
235
-
236
-
237
-
238
-
239
-
240
 |
 |
