Cisco SA520-K9 Administration Guide - Page 200
Configuring SNMP, Configuring SNMP System Info, Network Management, > SNMP > SNMP, Delete
 |
UPC - 882658266744
View all Cisco SA520-K9 manuals
Add to My Manuals
Save this manual to your list of manuals |
Page 200 highlights
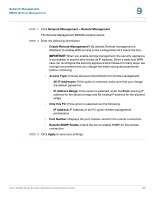
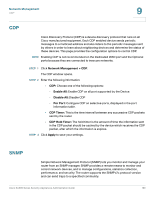
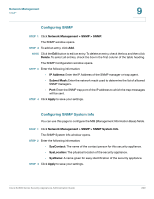
Network Management SNMP 9 Configuring SNMP STEP 1 Click Network Management > SNMP > SNMP. The SNMP window opens. STEP 2 To add an entry, click Add. NOTE Click the Edit button to edit an entry. To delete an entry, check the box and then click Delete. To select all entries, check the box in the first column of the table heading. The SNMP Configuration window opens. STEP 3 Enter the following information: • IP Address: Enter the IP Address of the SNMP manager or trap agent. • Subnet Mask: Enter the network mask used to determine the list of allowed SNMP managers. • Port: Enter the SNMP trap port of the IP address to which the trap messages will be sent. STEP 4 Click Apply to save your settings. Configuring SNMP System Info You can use this page to configure the MIB (Management Information Base) fields. STEP 1 Click Network Management > SNMP > SNMP System Info. The SNMP System Info window opens. STEP 2 Enter the following information: • SysContact: The name of the contact person for this security appliance. • SysLocation: The physical location of the security appliance. • SysName: A name given for easy identification of the security appliance. STEP 3 Click Apply to save your settings. Cisco SA500 Series Security Appliances Administration Guide 200
-
 1
1 -
2
-
3
-
4
-
5
-
6
-
7
-
8
-
9
-
10
-
11
-
12
-
13
-
14
-
15
-
16
-
17
-
18
-
19
-
20
-
21
-
22
-
23
-
24
-
25
-
26
-
27
-
28
-
29
-
30
-
31
-
32
-
33
-
34
-
35
-
36
-
37
-
38
-
39
-
40
-
41
-
42
-
43
-
44
-
45
-
46
-
47
-
48
-
49
-
50
-
51
-
52
-
53
-
54
-
55
-
56
-
57
-
58
-
59
-
60
-
61
-
62
-
63
-
64
-
65
-
66
-
67
-
68
-
69
-
70
-
71
-
72
-
73
-
74
-
75
-
76
-
77
-
78
-
79
-
80
-
81
-
82
-
83
-
84
-
85
-
86
-
87
-
88
-
89
-
90
-
91
-
92
-
93
-
94
-
95
-
96
-
97
-
98
-
99
-
100
-
101
-
102
-
103
-
104
-
105
-
106
-
107
-
108
-
109
-
110
-
111
-
112
-
113
-
114
-
115
-
116
-
117
-
118
-
119
-
120
-
121
-
122
-
123
-
124
-
125
-
126
-
127
-
128
-
129
-
130
-
131
-
132
-
133
-
134
-
135
-
136
-
137
-
138
-
139
-
140
-
141
-
142
-
143
-
144
-
145
-
146
-
147
-
148
-
149
-
150
-
151
-
152
-
153
-
154
-
155
-
156
-
157
-
158
-
159
-
160
-
161
-
162
-
163
-
164
-
165
-
166
-
167
-
168
-
169
-
170
-
171
-
172
-
173
-
174
-
175
-
176
-
177
-
178
-
179
-
180
-
181
-
182
-
183
-
184
-
185
-
186
-
187
-
188
-
189
-
190
-
191
-
192
-
193
-
194
-
 195
195 -
 196
196 -
 197
197 -
 198
198 -
 199
199 -
 200
200 -
 201
201 -
 202
202 -
 203
203 -
 204
204 -
 205
205 -
206
-
207
-
208
-
209
-
210
-
211
-
212
-
213
-
214
-
215
-
216
-
217
-
218
-
219
-
220
-
221
-
222
-
223
-
224
-
225
-
226
-
227
-
228
-
229
-
230
-
231
-
232
-
233
-
234
-
235
-
236
-
237
-
238
-
239
-
240
 |
 |
