D-Link DGS-3200-10 Product Manual - Page 202
Apply, Show Details, Access Profile, Add/View Rules, Delete Rules, Add Rule
 |
UPC - 790069306310
View all D-Link DGS-3200-10 manuals
Add to My Manuals
Save this manual to your list of manuals |
Page 202 highlights
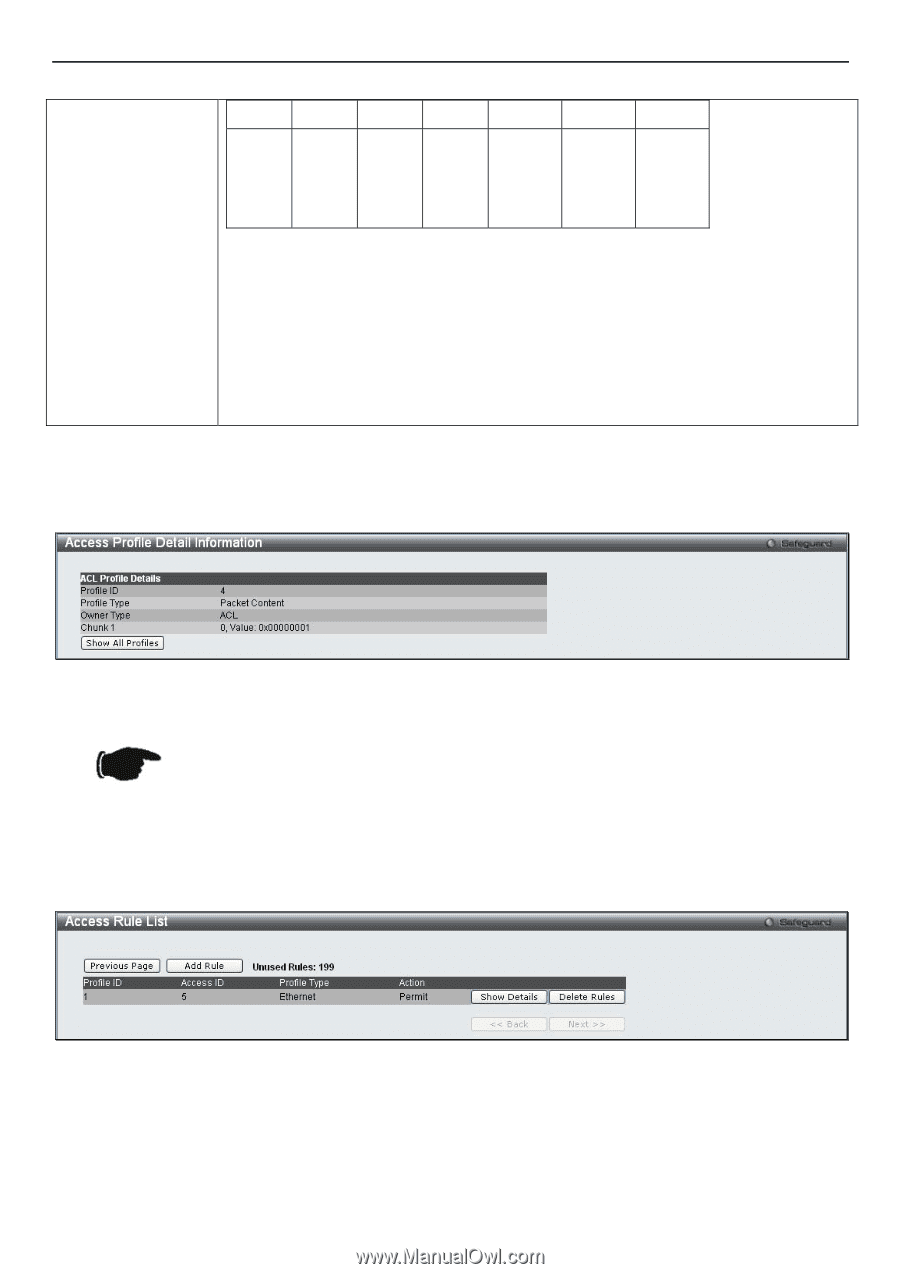
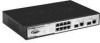
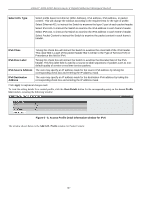
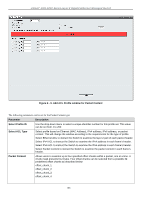
xStack® DGS-3200 Series Layer 2 Gigabit Ethernet Managed Switch chunk0 chunk1 chunk2 ...... chunk29 chunk30 chunk31 B126, B2, B6, ...... B114, B118, B122, B127, B3, B7, B115, B119, B123, B0, B4, B8, B116, B120, B124, B1 B5 B9 B117 B121 B125 Example: offset_chunk_1 0 0xffffffff will match packet byte offset 126, 127, 0, 1 offset_chunk_1 0 0x0000ffff will match packet byte offset, 0,1 Note: Only one packet content mask profile can be created at a time. Use of the D-Link xStack switch family's advanced Packet Content Mask (also known as Packet Content Access Control List - ACL) feature can effectively mitigate common network attacks such as ARP Spoofing. The Switch's implementation of Packet Content ACL enables inspection of any packet's specified content regardless of the protocol layer. Click Apply to implement changes made. To view the setting details for a created profile, click th e Show Details button for the corresponding entry on the Access Profile List window, revealing the following window: Figure 6 - 10. Access Profile Detail Information window for Packet Content NOTE: Address Resolution Protocol (ARP) is the standard for finding a host's hardware address (MAC address). However, ARP is vulnerable as it can be easily spoofed and utilized to attack a LAN (i.e. an ARP spoofing attack). For a more detailed explanation on how ARP protocol works and how to employ D-Link's unique Packet Content ACL to prevent ARP spoofing attack, please see Appendix E at the end of this manual. To establish the rule for a previously created Access Profile: To c onfigure t he Acce ss Rul es for Ethe rnet, open t he Access Pr ofile List window and click Add/View Rules for an Ethernet entry. This will open the following window: Figure 6 - 11. Access Rule List window for Ethernet To remove a previously created rule, click the corresponding Delete Rules button. To add a new Access Rule, click the Add Rule button: 189
-
 1
1 -
2
-
3
-
4
-
5
-
6
-
7
-
8
-
9
-
10
-
11
-
12
-
13
-
14
-
15
-
16
-
17
-
18
-
19
-
20
-
21
-
22
-
23
-
24
-
25
-
26
-
27
-
28
-
29
-
30
-
31
-
32
-
33
-
34
-
35
-
36
-
37
-
38
-
39
-
40
-
41
-
42
-
43
-
44
-
45
-
46
-
47
-
48
-
49
-
50
-
51
-
52
-
53
-
54
-
55
-
56
-
57
-
58
-
59
-
60
-
61
-
62
-
63
-
64
-
65
-
66
-
67
-
68
-
69
-
70
-
71
-
72
-
73
-
74
-
75
-
76
-
77
-
78
-
79
-
80
-
81
-
82
-
83
-
84
-
85
-
86
-
87
-
88
-
89
-
90
-
91
-
92
-
93
-
94
-
95
-
96
-
97
-
98
-
99
-
100
-
101
-
102
-
103
-
104
-
105
-
106
-
107
-
108
-
109
-
110
-
111
-
112
-
113
-
114
-
115
-
116
-
117
-
118
-
119
-
120
-
121
-
122
-
123
-
124
-
125
-
126
-
127
-
128
-
129
-
130
-
131
-
132
-
133
-
134
-
135
-
136
-
137
-
138
-
139
-
140
-
141
-
142
-
143
-
144
-
145
-
146
-
147
-
148
-
149
-
150
-
151
-
152
-
153
-
154
-
155
-
156
-
157
-
158
-
159
-
160
-
161
-
162
-
163
-
164
-
165
-
166
-
167
-
168
-
169
-
170
-
171
-
172
-
173
-
174
-
175
-
176
-
177
-
178
-
179
-
180
-
181
-
182
-
183
-
184
-
185
-
186
-
187
-
188
-
189
-
190
-
191
-
192
-
193
-
194
-
195
-
196
-
 197
197 -
 198
198 -
 199
199 -
 200
200 -
 201
201 -
 202
202 -
 203
203 -
 204
204 -
 205
205 -
 206
206 -
 207
207 -
208
-
209
-
210
-
211
-
212
-
213
-
214
-
215
-
216
-
217
-
218
-
219
-
220
-
221
-
222
-
223
-
224
-
225
-
226
-
227
-
228
-
229
-
230
-
231
-
232
-
233
-
234
-
235
-
236
-
237
-
238
-
239
-
240
-
241
-
242
-
243
-
244
-
245
-
246
-
247
-
248
-
249
-
250
-
251
-
252
-
253
-
254
-
255
-
256
-
257
-
258
-
259
-
260
-
261
-
262
-
263
-
264
-
265
-
266
-
267
-
268
-
269
-
270
-
271
-
272
-
273
-
274
-
275
-
276
-
277
-
278
-
279
-
280
-
281
-
282
-
283
-
284
-
285
-
286
-
287
-
288
-
289
-
290
-
291
-
292
-
293
-
294
-
295
-
296
-
297
-
298
-
299
-
300
-
301
-
302
 |
 |