Dell V505w All In One Wireless Inkjet Printer User Guide - Page 103
Networking Problems, Memory Card Problems, Remove and reinstall the network adapter
 |
View all Dell V505w All In One Wireless Inkjet Printer manuals
Add to My Manuals
Save this manual to your list of manuals |
Page 103 highlights
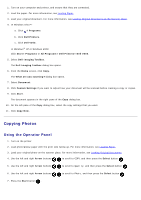
If the quality of the fax is poor, set the quality of the outgoing fax to Ultrafine. 1. From the main menu, use the left and right Arrow buttons button . to scroll to FAX, and then press the Select 2. From the Enter Fax Number display, press the Select button . 3. Use the left and right Arrow buttons to scroll to Quality, and then press the Select button . 4. Use the left and right Arrow buttons to scroll to Ultrafine. 5. Press the Select button to save settings. If the quality of the received fax is still poor, the fax machine at the receiving end may be limiting the fax quality. Any adjustments that you make on your printer do not affect the quality of faxes received at the other end. Networking Problems Check power Make sure the printer power light is on. Check cable Make sure the power cable is connected to the printer and to the electrical outlet. Make sure the USB cable is not connected. Check your network connection. Make sure the printer is connected to a working network connection. Reboot the computer Turn off and restart the computer. Remove and reinstall the network adapter 1. Turn off the printer, and unplug the power cable from the electrical outlet. 2. Grasp the adapter by the side tabs-not the antenna-and pull to remove it. For more information, see Removing and Reinstalling the Adapter. 3. Reinstall the adapter following the installation instructions. For more information, see Installing the Dell Internal Network Adapter 1150. Check the network adapter documentation for setup and usage information. Memory Card Problems Make sure that the type of memory card you are using can be used in the printer.
-
 1
1 -
2
-
3
-
4
-
5
-
6
-
7
-
8
-
9
-
10
-
11
-
12
-
13
-
14
-
15
-
16
-
17
-
18
-
19
-
20
-
21
-
22
-
23
-
24
-
25
-
26
-
27
-
28
-
29
-
30
-
31
-
32
-
33
-
34
-
35
-
36
-
37
-
38
-
39
-
40
-
41
-
42
-
43
-
44
-
45
-
46
-
47
-
48
-
49
-
50
-
51
-
52
-
53
-
54
-
55
-
56
-
57
-
58
-
59
-
60
-
61
-
62
-
63
-
64
-
65
-
66
-
67
-
68
-
69
-
70
-
71
-
72
-
73
-
74
-
75
-
76
-
77
-
78
-
79
-
80
-
81
-
82
-
83
-
84
-
85
-
86
-
87
-
88
-
89
-
90
-
91
-
92
-
93
-
94
-
95
-
96
-
97
-
 98
98 -
 99
99 -
 100
100 -
 101
101 -
 102
102 -
 103
103 -
 104
104 -
 105
105 -
 106
106 -
 107
107 -
 108
108 -
109
-
110
-
111
-
112
-
113
-
114
-
115
-
116
-
117
-
118
-
119
-
120
-
121
-
122
-
123
-
124
-
125
-
126
-
127
-
128
-
129
-
130
-
131
-
132
-
133
-
134
-
135
-
136
-
137
-
138
-
139
-
140
-
141
-
142
-
143
-
144
-
145
-
146
-
147
-
148
-
149
-
150
-
151
-
152
-
153
-
154
-
155
-
156
-
157
-
158
-
159
-
160
-
161
-
162
-
163
-
164
-
165
 |
 |