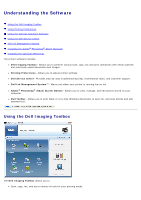
Dell V505w All In One Wireless Inkjet Printer User Guide - Page 8
Use Color Cartridge for all Black Printing, Print Last First - cartridges
 |
View all Dell V505w All In One Wireless Inkjet Printer manuals
Add to My Manuals
Save this manual to your list of manuals |
Page 8 highlights
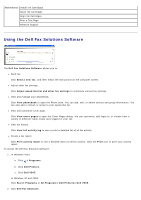
2. Click Preferences, Properties, Options, or Setup (depending on the program or operating system). The Printing Preferences dialog box opens. To access Printing Preferences when a document is not open: 1. In Windows Vista: a. Click ® Control Panel. b. Click Hardware and Sound. c. Click Printers. In Windows XP, click Start® Settings® Control Panel® Printers and Other Hardware® Printers and Faxes. In Windows 2000, click Start® Settings® Printers. 2. Right-click the Dell V505 icon. 3. Click Printing Preferences. NOTE: Changes made to the printer settings from the Printers folder become the default settings for most programs. The Printing Preferences dialog box has three sections: Tab Options Print Setup Quality/Speed - Select Automatic, Draft, Normal, or Photo depending on your desired output quality. Draft is the fastest option but should not be selected if you have a photo cartridge installed. Media Type - Allows you to set the paper type manually, or have the printer detect the paper type automatically. Paper Size - Select the size of your paper. Print in black and white - Print your color images in black and white to save the ink in your color cartridge. NOTE: You cannot select this setting if you have selected Use Color Cartridge for all Black Printing. Borderless - Select the check box if you want to print borderless photos. Orientation - Select how the document is arranged on the printed page. You can print using portrait or landscape orientation. Envelope - Select the check box if you want to print an envelope. The Paper Size area lists the envelope sizes available for printing. Copies - Customize how the printer prints several copies of a single print job: Collated, Normal, or Print Last Page First. Advanced 2-sided printing - Select this to print on both sides of the paper. Select from Automatic, Manual, or Print Duplex. Extend dry time - Select this option if you notice ink is smeared on the bottom of the pages of your duplex print jobs. This allows the ink on the paper to dry before the duplex unit feeds it back into the printer, and prints on the other side. NOTE: You will need to wait a few seconds longer for your duplex jobs to finish if you turn this feature on. Layout - Select Normal, Banner, Mirror, N-up, Poster, Booklet, or Borderless. Automatic Image Sharpening - Automatically select the best image-sharpening level based on image content. Dell Customer Experience Improvement Program - Allows you to access information about, and change your status in, the Dell Customer Experience Improvement Program. More Options - Allows you to specify Appearance Mode and Complete-A-Print settings. You can also view the paper type that the printer detects.
-
 1
1 -
2
-
 3
3 -
 4
4 -
 5
5 -
 6
6 -
 7
7 -
 8
8 -
 9
9 -
 10
10 -
 11
11 -
 12
12 -
 13
13 -
14
-
15
-
16
-
17
-
18
-
19
-
20
-
21
-
22
-
23
-
24
-
25
-
26
-
27
-
28
-
29
-
30
-
31
-
32
-
33
-
34
-
35
-
36
-
37
-
38
-
39
-
40
-
41
-
42
-
43
-
44
-
45
-
46
-
47
-
48
-
49
-
50
-
51
-
52
-
53
-
54
-
55
-
56
-
57
-
58
-
59
-
60
-
61
-
62
-
63
-
64
-
65
-
66
-
67
-
68
-
69
-
70
-
71
-
72
-
73
-
74
-
75
-
76
-
77
-
78
-
79
-
80
-
81
-
82
-
83
-
84
-
85
-
86
-
87
-
88
-
89
-
90
-
91
-
92
-
93
-
94
-
95
-
96
-
97
-
98
-
99
-
100
-
101
-
102
-
103
-
104
-
105
-
106
-
107
-
108
-
109
-
110
-
111
-
112
-
113
-
114
-
115
-
116
-
117
-
118
-
119
-
120
-
121
-
122
-
123
-
124
-
125
-
126
-
127
-
128
-
129
-
130
-
131
-
132
-
133
-
134
-
135
-
136
-
137
-
138
-
139
-
140
-
141
-
142
-
143
-
144
-
145
-
146
-
147
-
148
-
149
-
150
-
151
-
152
-
153
-
154
-
155
-
156
-
157
-
158
-
159
-
160
-
161
-
162
-
163
-
164
-
165
 |
 |