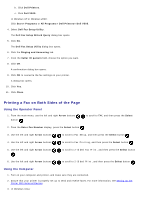
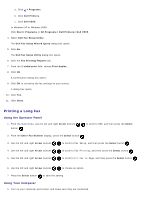
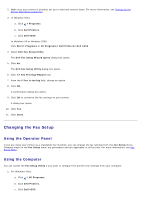
Dell V505w All In One Wireless Inkjet Printer User Guide - Page 149
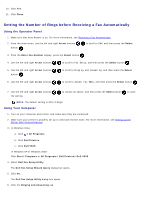
Dell Fax Setup Utility Wizard Query
 |
View all Dell V505w All In One Wireless Inkjet Printer manuals
Add to My Manuals
Save this manual to your list of manuals |
Page 149 highlights
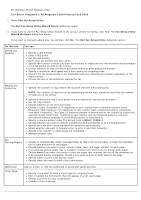
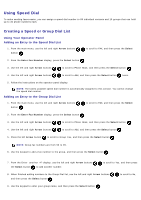
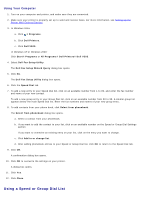
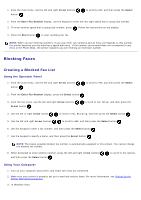
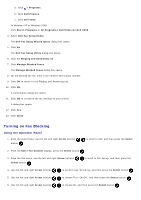
For Windows XP and Windows 2000: Click Start® Programs or All Programs® Dell Printers® Dell V505. 2. Select Dell Fax Setup Utility. The Dell Fax Setup Utility Wizard Query dialog box opens. 3. If you want to use the Fax Setup Utility Wizard to set up your printer for faxing, click Yes. The Fax Setup Utility Wizard Welcome dialog box opens. If you want to manually adjust your fax settings, click No. The Dell Fax Setup Utility dialog box opens. On this tab: Dialing and Sending You can: Specify a dial method. Enter a dial prefix. Set the dial volume. Enter your fax number and your name. Specify the number of times you want the machine to redial and the time between those attempts if the fax cannot be sent on the first try. Choose whether to scan the entire document before or after dialing the number. Specify a maximum send speed and a print quality for outgoing faxes. Convert the fax automatically to be compatible with the receiving fax machine regardless of the send settings. Choose the size of the document scanned for fax. Ringing and Answering Specify the number of rings before the machine receives the incoming fax. NOTE: The number of rings set on the answering machine must always be less than the number of rings set on the printer. Specify a distinctive ring if your phone line has distinctive ring service activated. Set the ring volume. Choose whether to use error correction. Choose a Caller ID pattern (1 if telephones in your country have a detection pattern using Frequency Shift Keying or 2 if telephones in your country have a detection pattern using Dualtone Multi-frequency). The Caller ID detection pattern is determined by the country or region you selected during initial setup. If phones in your country use two detection patterns, call your telecommunications company to know which pattern it subscribes to. Specify a manual answer code. The default code is DELL# (3355#). Choose whether you want to answer incoming faxes automatically or at a scheduled time. Specify the time when incoming faxes are answered automatically. Select whether you want to forward a fax, or print it and then forward it. Specify a fax number to which faxes are forwarded. Manage blocked faxes. Fax Printing/Reports Choose to automatically resize oversized faxes so they print on one page, or keep the oversized fax to scale and print on two pages. Choose whether you want to print a footer (date, time, and page number) on each page. If an optional second paper tray is installed, choose from which tray the printer picks paper. Choose Auto if you want the printer to pick the paper that matches the size of the incoming fax. If an optional duplex is installed, choose if you want to print on both sides of the page. Specify when to print a fax activity report. Specify when you want to print a fax confirmation. Speed Dial Cover Page Add to, create, or edit the speed dial or group dial speed dial lists. Specify if you want to send a cover page for outgoing faxes. Edit or update the information that will appear on your cover page. Choose a priority for your outgoing fax. Include a short message.
-
 1
1 -
2
-
3
-
4
-
5
-
6
-
7
-
8
-
9
-
10
-
11
-
12
-
13
-
14
-
15
-
16
-
17
-
18
-
19
-
20
-
21
-
22
-
23
-
24
-
25
-
26
-
27
-
28
-
29
-
30
-
31
-
32
-
33
-
34
-
35
-
36
-
37
-
38
-
39
-
40
-
41
-
42
-
43
-
44
-
45
-
46
-
47
-
48
-
49
-
50
-
51
-
52
-
53
-
54
-
55
-
56
-
57
-
58
-
59
-
60
-
61
-
62
-
63
-
64
-
65
-
66
-
67
-
68
-
69
-
70
-
71
-
72
-
73
-
74
-
75
-
76
-
77
-
78
-
79
-
80
-
81
-
82
-
83
-
84
-
85
-
86
-
87
-
88
-
89
-
90
-
91
-
92
-
93
-
94
-
95
-
96
-
97
-
98
-
99
-
100
-
101
-
102
-
103
-
104
-
105
-
106
-
107
-
108
-
109
-
110
-
111
-
112
-
113
-
114
-
115
-
116
-
117
-
118
-
119
-
120
-
121
-
122
-
123
-
124
-
125
-
126
-
127
-
128
-
129
-
130
-
131
-
132
-
133
-
134
-
135
-
136
-
137
-
138
-
139
-
140
-
141
-
142
-
143
-
 144
144 -
 145
145 -
 146
146 -
 147
147 -
 148
148 -
 149
149 -
 150
150 -
 151
151 -
 152
152 -
 153
153 -
 154
154 -
155
-
156
-
157
-
158
-
159
-
160
-
161
-
162
-
163
-
164
-
165
 |
 |