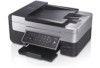
Dell V505w All In One Wireless Inkjet Printer User Guide - Page 23
Configuring the Printer on a Wireless Network Using Ad Hoc, Connection
 |
View all Dell V505w All In One Wireless Inkjet Printer manuals
Add to My Manuals
Save this manual to your list of manuals |
Page 23 highlights
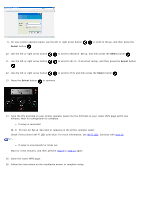
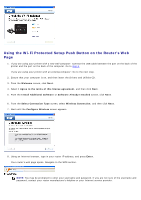
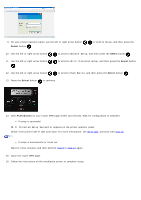
The Wireless Setup Utility steps you through the configuration process. The wizard can automatically detect wireless network settings or allow you to manually enter the network configuration settings. Before configuring the adapter, make sure your printer has been set up correctly: The adapter has been installed correctly in the printer. The ink cartridges are installed correctly. Paper has been loaded into the printer. The USB cable is attached to the printer and the computer. The printer is turned on and ready to be installed. Using Temporary USB Cable to Configure the Printer on a Wireless Network (recommended for most users) Before configuring the printer on a wireless network, ensure that: Your wireless network is set up and working properly. The computer you are using is connected to the same wireless network where you want to set up the printer. 1. If you are using your printer with a new Dell computer: Connect the USB cable between the port on the back of the printer and the port on the back of the computer. Go to step 5. If you are using your printer with an existing computer: Go to the next step. 2. Ensure that your computer is on, and then insert the Drivers and Utilities CD. 3. From the Welcome screen, click Next. 4. Select I Agree to the terms of this license agreement, and then click Next. 5. From the Select Connection Type screen, select Wireless Connection, and then click Next. The Configure Wireless screen appears. 6. Follow the instructions on your screen to complete setup. Configuring the Printer on a Wireless Network Using Ad Hoc Connection By default, your WPS-enabled printer connects to a wireless network through infrastructure mode. To connect your printer to a wireless network through ad hoc mode, you have to first create an ad hoc profile on your computer. For help creating an ad hoc profile, see the installed Help, or refer to the manual that came with your external network adapter CD. 1. Ensure that your computer is on, and then insert the printer Drivers and Utilities CD. 2. From the Welcome screen, click Next. 3. Select I Agree to the terms of this license agreement, and then click Next. 4. From the Install Additional Software or Software Already Installed screen, click Next. 5. From the Select Connection Type screen, select Wireless Connection, and then click Next.
-
 1
1 -
2
-
3
-
4
-
5
-
6
-
7
-
8
-
9
-
10
-
11
-
12
-
13
-
14
-
15
-
16
-
17
-
 18
18 -
 19
19 -
 20
20 -
 21
21 -
 22
22 -
 23
23 -
 24
24 -
 25
25 -
 26
26 -
 27
27 -
 28
28 -
29
-
30
-
31
-
32
-
33
-
34
-
35
-
36
-
37
-
38
-
39
-
40
-
41
-
42
-
43
-
44
-
45
-
46
-
47
-
48
-
49
-
50
-
51
-
52
-
53
-
54
-
55
-
56
-
57
-
58
-
59
-
60
-
61
-
62
-
63
-
64
-
65
-
66
-
67
-
68
-
69
-
70
-
71
-
72
-
73
-
74
-
75
-
76
-
77
-
78
-
79
-
80
-
81
-
82
-
83
-
84
-
85
-
86
-
87
-
88
-
89
-
90
-
91
-
92
-
93
-
94
-
95
-
96
-
97
-
98
-
99
-
100
-
101
-
102
-
103
-
104
-
105
-
106
-
107
-
108
-
109
-
110
-
111
-
112
-
113
-
114
-
115
-
116
-
117
-
118
-
119
-
120
-
121
-
122
-
123
-
124
-
125
-
126
-
127
-
128
-
129
-
130
-
131
-
132
-
133
-
134
-
135
-
136
-
137
-
138
-
139
-
140
-
141
-
142
-
143
-
144
-
145
-
146
-
147
-
148
-
149
-
150
-
151
-
152
-
153
-
154
-
155
-
156
-
157
-
158
-
159
-
160
-
161
-
162
-
163
-
164
-
165
 |
 |
