Dell V505w All In One Wireless Inkjet Printer User Guide - Page 144
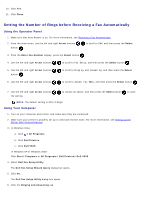
Setting the Number of Rings before Receiving a Fax Automatically
 |
View all Dell V505w All In One Wireless Inkjet Printer manuals
Add to My Manuals
Save this manual to your list of manuals |
Page 144 highlights
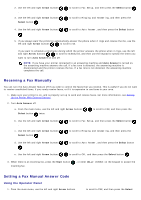
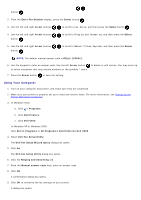
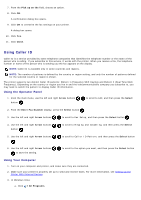
10. Click Yes. 11. Click Close. Setting the Number of Rings before Receiving a Fax Automatically Using the Operator Panel 1. Make sure that Auto Answer is on. For more information, see Receiving a Fax Automatically. 2. From the main menu, use the left and right Arrow buttons button . to scroll to FAX, and then press the Select 3. From the Enter Fax Number display, press the Select button . 4. Use the left and right Arrow buttons to scroll to Fax Setup, and then press the Select button . 5. Use the left and right Arrow buttons button . to scroll to Ringing and Answering, and then press the Select 6. Use the left and right Arrow buttons . to scroll to Answer Fax When, and then press the Select button 7. Use the left and right Arrow buttons the setting. to choose an option, and then press the Select button to save NOTE: The default setting is After 3 Rings. Using Your Computer 1. Turn on your computer and printer, and make sure they are connected. 2. Make sure your printer is properly set up to send and receive faxes. For more information, see Setting Up the Printer With External Devices. 3. In Windows Vista: a. Click ® All Programs. b. Click Dell Printers. c. Click Dell V505. In Windows XP or Windows 2000: Click Start® Programs or All Programs® Dell Printers® Dell V505. 4. Select Dell Fax Setup Utility. The Dell Fax Setup Wizard Query dialog box opens. 5. Click No. The Dell Fax Setup Utility dialog box opens. 6. Click the Ringing and Answering tab.
-
 1
1 -
2
-
3
-
4
-
5
-
6
-
7
-
8
-
9
-
10
-
11
-
12
-
13
-
14
-
15
-
16
-
17
-
18
-
19
-
20
-
21
-
22
-
23
-
24
-
25
-
26
-
27
-
28
-
29
-
30
-
31
-
32
-
33
-
34
-
35
-
36
-
37
-
38
-
39
-
40
-
41
-
42
-
43
-
44
-
45
-
46
-
47
-
48
-
49
-
50
-
51
-
52
-
53
-
54
-
55
-
56
-
57
-
58
-
59
-
60
-
61
-
62
-
63
-
64
-
65
-
66
-
67
-
68
-
69
-
70
-
71
-
72
-
73
-
74
-
75
-
76
-
77
-
78
-
79
-
80
-
81
-
82
-
83
-
84
-
85
-
86
-
87
-
88
-
89
-
90
-
91
-
92
-
93
-
94
-
95
-
96
-
97
-
98
-
99
-
100
-
101
-
102
-
103
-
104
-
105
-
106
-
107
-
108
-
109
-
110
-
111
-
112
-
113
-
114
-
115
-
116
-
117
-
118
-
119
-
120
-
121
-
122
-
123
-
124
-
125
-
126
-
127
-
128
-
129
-
130
-
131
-
132
-
133
-
134
-
135
-
136
-
137
-
138
-
 139
139 -
 140
140 -
 141
141 -
 142
142 -
 143
143 -
 144
144 -
 145
145 -
 146
146 -
 147
147 -
 148
148 -
 149
149 -
150
-
151
-
152
-
153
-
154
-
155
-
156
-
157
-
158
-
159
-
160
-
161
-
162
-
163
-
164
-
165
 |
 |