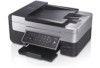
Dell V505w All In One Wireless Inkjet Printer User Guide - Page 22
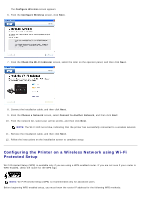
Configuring the Printer on a Wireless Network Using a, Temporary USB Cable recommended for most users
 |
View all Dell V505w All In One Wireless Inkjet Printer manuals
Add to My Manuals
Save this manual to your list of manuals |
Page 22 highlights
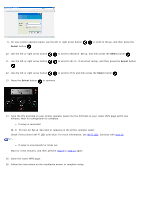
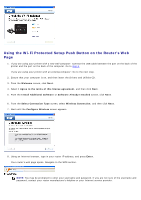
1. Connect your printer to your network using an Ethernet cable (sold separately). 2. Connect the power cable to the wall, and then press the Power button . The Ethernet wired icon appears in the main menu on the operator panel. 3. Ensure that your computer is on, and then insert the Drivers and Utilities CD that came with your printer. The CD launches automatically. NOTE: If you do not have your Drivers and Utilities CD, you can download the appropriate software from support.dell.com . 4. From the Welcome screen, click Next. 5. SelectI Agree to the terms of this license agreement, and then click Next. 6. From the Install Additional Software or Software Already Installed screen, click Next. 7. From the Select Connection Type screen, select Wired Network Connection, and then click Next. 8. Follow the instructions on your screen to complete setup. Configuring the Printer on a Wireless Network Using a Temporary USB Cable (recommended for most users) Configuration Overview Configuring the adapter using the Wireless Setup Utility involves connecting the printer in which the adapter has been installed to a computer by USB cable, and launching the Drivers and Utilities CD. If you need to adjust the wireless adapter settings after installation, the CD is not required. Launch the Wireless Setup Utility. In Windows Vista: 1. Click ® Programs. 2. Click Dell Printers. 3. Click Dell V505. 4. Click Wireless Setup Utility. In Windows XP and Windows 2000: 1. Click Start® Programs or All Programs® Dell Printers® Dell V505. 2. Click Wireless Setup Utility.
-
 1
1 -
2
-
3
-
4
-
5
-
6
-
7
-
8
-
9
-
10
-
11
-
12
-
13
-
14
-
15
-
16
-
 17
17 -
 18
18 -
 19
19 -
 20
20 -
 21
21 -
 22
22 -
 23
23 -
 24
24 -
 25
25 -
 26
26 -
 27
27 -
28
-
29
-
30
-
31
-
32
-
33
-
34
-
35
-
36
-
37
-
38
-
39
-
40
-
41
-
42
-
43
-
44
-
45
-
46
-
47
-
48
-
49
-
50
-
51
-
52
-
53
-
54
-
55
-
56
-
57
-
58
-
59
-
60
-
61
-
62
-
63
-
64
-
65
-
66
-
67
-
68
-
69
-
70
-
71
-
72
-
73
-
74
-
75
-
76
-
77
-
78
-
79
-
80
-
81
-
82
-
83
-
84
-
85
-
86
-
87
-
88
-
89
-
90
-
91
-
92
-
93
-
94
-
95
-
96
-
97
-
98
-
99
-
100
-
101
-
102
-
103
-
104
-
105
-
106
-
107
-
108
-
109
-
110
-
111
-
112
-
113
-
114
-
115
-
116
-
117
-
118
-
119
-
120
-
121
-
122
-
123
-
124
-
125
-
126
-
127
-
128
-
129
-
130
-
131
-
132
-
133
-
134
-
135
-
136
-
137
-
138
-
139
-
140
-
141
-
142
-
143
-
144
-
145
-
146
-
147
-
148
-
149
-
150
-
151
-
152
-
153
-
154
-
155
-
156
-
157
-
158
-
159
-
160
-
161
-
162
-
163
-
164
-
165
 |
 |
