Dell V505w All In One Wireless Inkjet Printer User Guide - Page 47
PictBridge Mode, Arrow, Start, Select, Office, Settings, Main Menu, Mode Main Menu, From this menu
 |
View all Dell V505w All In One Wireless Inkjet Printer manuals
Add to My Manuals
Save this manual to your list of manuals |
Page 47 highlights
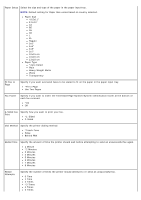
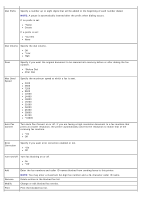
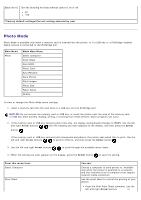
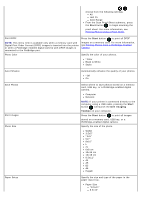
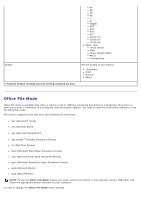
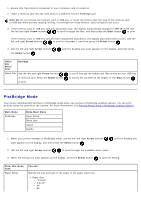
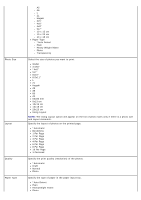
1. Ensure that the printer is connected to your computer, and is turned on. 2. Insert a memory card into the card slots or a USB key into the PictBridge port. NOTICE: Do not remove the memory card or USB key, or touch the printer near the area of the memory card or USB key while actively reading, writing, or printing from these devices. Data corruption can occur. 3. If the memory card or USB key contains documents only, the display automatically changes to OFFICE FILE. Use the left and right Arrow buttons to scroll through the files, and then press the Start button to print. If the memory card or USB key contains both documents and photos, the display asks which files to print. Use the left and right Arrow buttons to scroll to Documents, and then press the Select button . 4. Use the left and right Arrow buttons the Select button . until the heading you want appears on the display, and then press Office File menu item Settings Select File Use the left and right Arrow buttons or memory card. Press the Select button to print. to scroll through the folders and files stored on your USB key to access the contents of the folders or the Start button PictBridge Mode Your printer automatically switches to PictBridge mode when you connect a PictBridge-enabled camera. You can print pictures using the controls of the camera. For more information, see Printing Photos From a PictBridge-Enabled Camera. Main Menu PictBridge Mode Main Menu Paper Setup Photo Size Layout Quality 1. When your printer changes to PictBridge mode, use the left and right Arrow buttons want appears on the display, and then press the Select button . until the heading you 2. Use the left and right Arrow buttons to scroll through the available menu items. 3. When the setting you want appears on the display, press the Select button to save the setting. From this menu item: Paper Setup You can: Specify the size and type of the paper in the paper input tray. Paper Size *8.5x11" 8.5x14" A4 B5
-
 1
1 -
2
-
3
-
4
-
5
-
6
-
7
-
8
-
9
-
10
-
11
-
12
-
13
-
14
-
15
-
16
-
17
-
18
-
19
-
20
-
21
-
22
-
23
-
24
-
25
-
26
-
27
-
28
-
29
-
30
-
31
-
32
-
33
-
34
-
35
-
36
-
37
-
38
-
39
-
40
-
41
-
 42
42 -
 43
43 -
 44
44 -
 45
45 -
 46
46 -
 47
47 -
 48
48 -
 49
49 -
 50
50 -
 51
51 -
 52
52 -
53
-
54
-
55
-
56
-
57
-
58
-
59
-
60
-
61
-
62
-
63
-
64
-
65
-
66
-
67
-
68
-
69
-
70
-
71
-
72
-
73
-
74
-
75
-
76
-
77
-
78
-
79
-
80
-
81
-
82
-
83
-
84
-
85
-
86
-
87
-
88
-
89
-
90
-
91
-
92
-
93
-
94
-
95
-
96
-
97
-
98
-
99
-
100
-
101
-
102
-
103
-
104
-
105
-
106
-
107
-
108
-
109
-
110
-
111
-
112
-
113
-
114
-
115
-
116
-
117
-
118
-
119
-
120
-
121
-
122
-
123
-
124
-
125
-
126
-
127
-
128
-
129
-
130
-
131
-
132
-
133
-
134
-
135
-
136
-
137
-
138
-
139
-
140
-
141
-
142
-
143
-
144
-
145
-
146
-
147
-
148
-
149
-
150
-
151
-
152
-
153
-
154
-
155
-
156
-
157
-
158
-
159
-
160
-
161
-
162
-
163
-
164
-
165
 |
 |