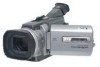
Sony TRV940E Operating Instructions - Page 35
Шaг 4, Иcпользовaниe, ceнcоpной пaнeли
 |
UPC - 072874308940
View all Sony TRV940E manuals
Add to My Manuals
Save this manual to your list of manuals |
Page 35 highlights
Getting Started VCR (COHFGF) CAMERA Step 4 Using the touch panel Шaг 4 Иc aниe ceнcоpной пaнeли Your camcorder has operation buttons on the LCD screen. Touch the LCD screen directly with your finger or the supplied stylus (DCR-TRV950E only) to operate each function. This section describes how to operate the touch panel during recording or playing back images on a tape. (1) Prepare the power supply (p. 24 to 29). (2) Press OPEN to open the LCD panel. (3) Set the POWER switch to CAMERA or VCR while pressing the small green button. (4) Press FN. Operation buttons appear on the LCD screen. (5) Press PAGE2 to go to PAGE2. Operation buttons appear on the LCD screen. (6) Press a desired operation item. Refer to relevant pages of this manual for each function. Ha экpaнe eокaмepы имeютc yпpaвлeния. Пpикоcнитecь к экpaнy ЖКД нeпоcpeдcтвeнно пaльцeм или пpилaгaeмым пep eль DCR-TRV950E) для yпpaвлeния кaждой фyнкциeй. B aвe опиcывaeтcя yпpaвлeниe c ceнcоpной пaнeли во вpeмя зaпиcи изобpaжeний нa кacceтy или иx воcпpоизвeдeния. (1 e иc aния (cтp. 2429). (2) Haжмитe OPEN pыть пaнeль ЖКД. (3) Уcтaновитe пepeключaтeль POWER в положeниe CAMERA или VCR, нaжaв мaлeнькyю зeлeнy y. (4) Haжмитe FN yпpaвлe cя нa экpaнe ЖКД. (5) Haжмитe PAGE2 epeйти к PAGE2. yпpaвлe cя нa экpaнe ЖКД. (6) Haжмитe нy eмeнт yпpaвлeния. Cм. cоотвeтcтвyющиe cтpa pyководcтвa отноcитeльно кaждой фyнкции. 5,6 When the POWER switch is set to CAMERA/ Ecли пepeключaтeль POWER ycтaновлeн в положeниe CAMERA PAGE1 PAGE2 EXIT SPOT DIG FOCUS EFFT END SCH MEM SPOT M I X METER 4 FN 3 POWER MEMORY/ NETWORK PAGE1 PAGE2 EXIT LCD SELF BRT TIMER 2 To return to FN Press EXIT. To execute settings Press OK. The display returns to PAGE1/ PAGE2. To cancel settings Press OFF to return to PAGE1/PAGE2. paтa к FN 1 Haжмитe EXIT. eния ycтaновок Haжмитe OK. Cновa отобpaзитcя PAGE1/ PAGE2. eны ycтaновок Haжмитe OFF paтa к PAGE1/ PAGE2. 35
-
 1
1 -
2
-
3
-
4
-
5
-
6
-
7
-
8
-
9
-
10
-
11
-
12
-
13
-
14
-
15
-
16
-
17
-
18
-
19
-
20
-
21
-
22
-
23
-
24
-
25
-
26
-
27
-
28
-
29
-
 30
30 -
 31
31 -
 32
32 -
 33
33 -
 34
34 -
 35
35 -
 36
36 -
 37
37 -
 38
38 -
 39
39 -
 40
40 -
41
-
42
-
43
-
44
-
45
-
46
-
47
-
48
-
49
-
50
-
51
-
52
-
53
-
54
-
55
-
56
-
57
-
58
-
59
-
60
-
61
-
62
-
63
-
64
-
65
-
66
-
67
-
68
-
69
-
70
-
71
-
72
-
73
-
74
-
75
-
76
-
77
-
78
-
79
-
80
-
81
-
82
-
83
-
84
-
85
-
86
-
87
-
88
-
89
-
90
-
91
-
92
-
93
-
94
-
95
-
96
-
97
-
98
-
99
-
100
-
101
-
102
-
103
-
104
-
105
-
106
-
107
-
108
-
109
-
110
-
111
-
112
-
113
-
114
-
115
-
116
-
117
-
118
-
119
-
120
-
121
-
122
-
123
-
124
-
125
-
126
-
127
-
128
-
129
-
130
-
131
-
132
-
133
-
134
-
135
-
136
-
137
-
138
-
139
-
140
-
141
-
142
-
143
-
144
-
145
-
146
-
147
-
148
-
149
-
150
-
151
-
152
-
153
-
154
-
155
-
156
-
157
-
158
-
159
-
160
-
161
-
162
-
163
-
164
-
165
-
166
-
167
-
168
-
169
-
170
-
171
-
172
-
173
-
174
-
175
-
176
-
177
-
178
-
179
-
180
-
181
-
182
-
183
-
184
-
185
-
186
-
187
-
188
-
189
-
190
-
191
-
192
-
193
-
194
-
195
-
196
-
197
-
198
-
199
-
200
-
201
-
202
-
203
-
204
-
205
-
206
-
207
-
208
-
209
-
210
-
211
-
212
-
213
-
214
-
215
-
216
-
217
-
218
-
219
-
220
-
221
-
222
-
223
-
224
-
225
-
226
-
227
-
228
-
229
-
230
-
231
-
232
-
233
-
234
-
235
-
236
-
237
-
238
-
239
-
240
-
241
-
242
-
243
-
244
-
245
-
246
-
247
-
248
-
249
-
250
-
251
-
252
-
253
-
254
-
255
-
256
-
257
-
258
-
259
-
260
-
261
-
262
-
263
-
264
-
265
-
266
-
267
-
268
-
269
-
270
-
271
-
272
-
273
-
274
-
275
-
276
-
277
-
278
-
279
-
280
-
281
-
282
-
283
-
284
-
285
-
286
-
287
-
288
-
289
-
290
-
291
-
292
-
293
-
294
-
295
-
296
-
297
-
298
-
299
-
300
-
301
-
302
-
303
-
304
-
305
-
306
-
307
-
308
-
309
-
310
-
311
-
312
-
313
-
314
-
315
-
316
-
317
-
318
-
319
-
320
-
321
-
322
-
323
-
324
-
325
-
326
-
327
-
328
-
329
-
330
-
331
-
332
-
333
-
334
-
335
-
336
-
337
-
338
-
339
-
340
-
341
-
342
-
343
-
344
-
345
-
346
-
347
-
348
 |
 |
