Yamaha AW4416 Owner's Manual - Page 132
In/out points, Setting the In point/Out point
 |
View all Yamaha AW4416 manuals
Add to My Manuals
Save this manual to your list of manuals |
Page 132 highlights
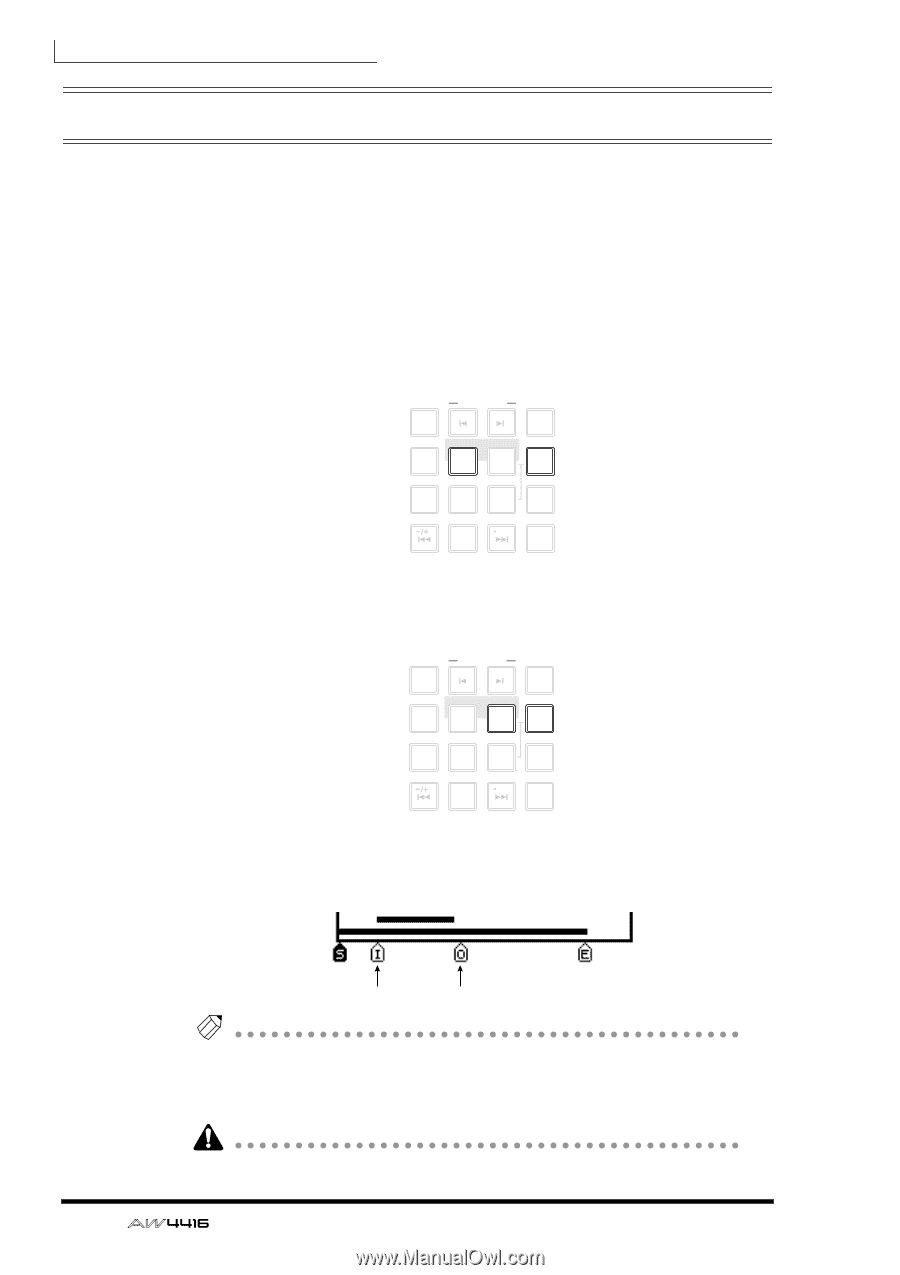
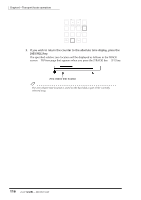
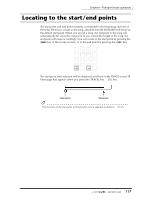
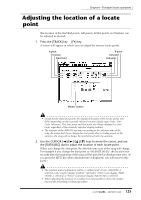
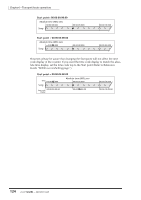
Chapter6-Transport/locate operations In/out points The AW4416 remembers the locations at which recording was last begun and ended as the In point and the Out point. When the In and Out points are memorized, the [IN] and [OUT] keys will light. In this state, you can press the [IN] key or the [OUT] key to locate to the In or Out points. You can also set the In or Out points manually. ❒ Setting the In point/Out point 1. Locate the song to the location where you wish to set the In point. 2. Hold down the Locate section [SET] key and press the [IN] key. NUM LOCATE AUTO PUNCH MARK SEARCH 7 8 LAST REC 4 5 IN OUT 9 MARK 6 SET 1 2 REPEAT A B 0 RTZ 3 ROLL BACK CANCEL NO 3. Locate the song to the location where you wish to set the Out point. 4. Hold down the [SET] key and press the [OUT] key. NUM LOCATE AUTO PUNCH MARK SEARCH 7 8 LAST REC 4 5 IN OUT 9 MARK 6 SET 1 2 REPEAT A B 0 RTZ 3 ROLL BACK CANCEL NO The In point and Out point that you specify will be displayed as follows in the TRACK screen TR View page that appears when you press the [TRACK] key ¡ [F1] key. 120 In point Out point Tip! • The In/Out points are also used as the auto punch-in/out points used by auto punch-in/out (¡ P.130). • The In/Out point settings are saved on the hard disk as part of the currently selected song. You must set the In point ahead of the Out point. - Operation Guide
-
 1
1 -
2
-
3
-
4
-
5
-
6
-
7
-
8
-
9
-
10
-
11
-
12
-
13
-
14
-
15
-
16
-
17
-
18
-
19
-
20
-
21
-
22
-
23
-
24
-
25
-
26
-
27
-
28
-
29
-
30
-
31
-
32
-
33
-
34
-
35
-
36
-
37
-
38
-
39
-
40
-
41
-
42
-
43
-
44
-
45
-
46
-
47
-
48
-
49
-
50
-
51
-
52
-
53
-
54
-
55
-
56
-
57
-
58
-
59
-
60
-
61
-
62
-
63
-
64
-
65
-
66
-
67
-
68
-
69
-
70
-
71
-
72
-
73
-
74
-
75
-
76
-
77
-
78
-
79
-
80
-
81
-
82
-
83
-
84
-
85
-
86
-
87
-
88
-
89
-
90
-
91
-
92
-
93
-
94
-
95
-
96
-
97
-
98
-
99
-
100
-
101
-
102
-
103
-
104
-
105
-
106
-
107
-
108
-
109
-
110
-
111
-
112
-
113
-
114
-
115
-
116
-
117
-
118
-
119
-
120
-
121
-
122
-
123
-
124
-
125
-
126
-
 127
127 -
 128
128 -
 129
129 -
 130
130 -
 131
131 -
 132
132 -
 133
133 -
 134
134 -
 135
135 -
 136
136 -
 137
137 -
138
-
139
-
140
-
141
-
142
-
143
-
144
-
145
-
146
-
147
-
148
-
149
-
150
-
151
-
152
-
153
-
154
-
155
-
156
-
157
-
158
-
159
-
160
-
161
-
162
-
163
-
164
-
165
-
166
-
167
-
168
-
169
-
170
-
171
-
172
-
173
-
174
-
175
-
176
-
177
-
178
-
179
-
180
-
181
-
182
-
183
-
184
-
185
-
186
-
187
-
188
-
189
-
190
-
191
-
192
-
193
-
194
-
195
-
196
-
197
-
198
-
199
-
200
-
201
-
202
-
203
-
204
-
205
-
206
-
207
-
208
-
209
-
210
-
211
-
212
-
213
-
214
-
215
-
216
-
217
-
218
-
219
-
220
-
221
-
222
-
223
-
224
-
225
-
226
-
227
-
228
-
229
-
230
-
231
-
232
-
233
-
234
-
235
-
236
-
237
-
238
-
239
-
240
-
241
-
242
-
243
-
244
-
245
-
246
-
247
-
248
-
249
-
250
-
251
-
252
-
253
-
254
-
255
-
256
-
257
-
258
-
259
-
260
-
261
-
262
-
263
-
264
-
265
-
266
-
267
-
268
-
269
-
270
-
271
-
272
-
273
-
274
-
275
-
276
-
277
-
278
-
279
 |
 |