Yamaha AW4416 Owner's Manual - Page 249
Set your MIDI sequencer so that it will follow MTC messages that
 |
View all Yamaha AW4416 manuals
Add to My Manuals
Save this manual to your list of manuals |
Page 249 highlights
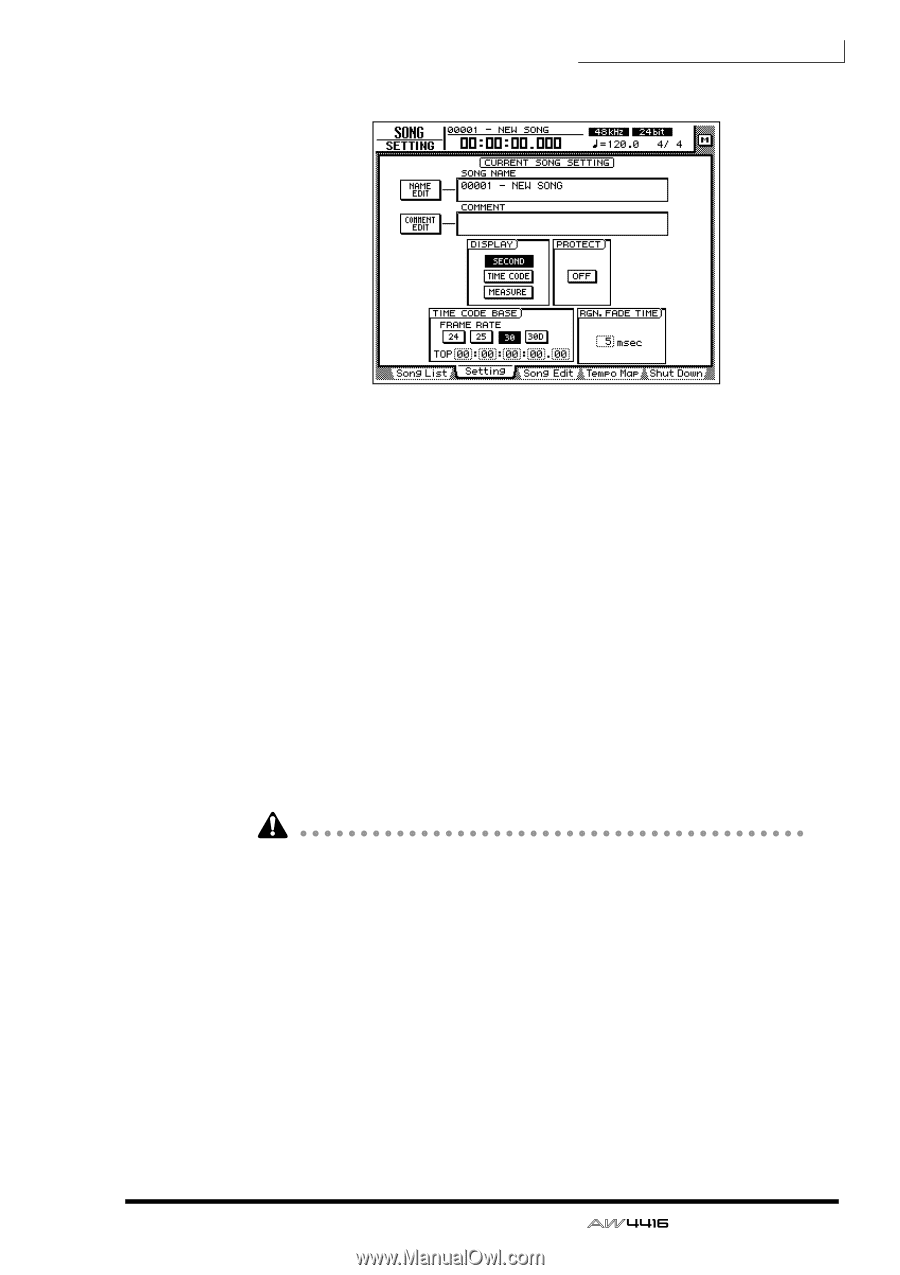
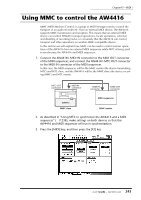
The following screen will appear in the display. Chapter15-MIDI 6. Move the cursor to the TIME CODE area, and turn on one of the 24/25/ 30/30D (drop) buttons to select the frame rate. By default, a frame rate of 30 is selected. The frame rate you select here will also affect the time code that is displayed in the counter. 7. If you wish to display time code in the counter, move the cursor to the TIME CODE button in the DISPLAY area, and press the [ENTER] key. 8. Set your MIDI sequencer so that it will follow MTC messages that it receives, and put it in playback mode. At this time, make sure that the frame rate setting of the sequencer matches the setting that you selected in step 6. With these settings, the MIDI sequencer will be the MTC slave (the device that receives MTC). 9. Record or play back the AW4416 song. When the AW4416 begins running, MTC will be transmitted from the MTC OUT connector to the external MIDI sequencer, causing it to begin synchronized operation from the same location. • It is possible to use the AW4416 as the MTC slave. However in order to ensure that the recorder section operates with maximum stability, we recommend that you use the AW4416 as the MTC master whenever possible. • For the MTC time that is transmitted by the AW4416, you can specify an offset value that will be applied to the internal absolute time (ABS time). For details refer to the Song screen/Setting page in the Reference Guide. 239 - Operation Guide
-
 1
1 -
2
-
3
-
4
-
5
-
6
-
7
-
8
-
9
-
10
-
11
-
12
-
13
-
14
-
15
-
16
-
17
-
18
-
19
-
20
-
21
-
22
-
23
-
24
-
25
-
26
-
27
-
28
-
29
-
30
-
31
-
32
-
33
-
34
-
35
-
36
-
37
-
38
-
39
-
40
-
41
-
42
-
43
-
44
-
45
-
46
-
47
-
48
-
49
-
50
-
51
-
52
-
53
-
54
-
55
-
56
-
57
-
58
-
59
-
60
-
61
-
62
-
63
-
64
-
65
-
66
-
67
-
68
-
69
-
70
-
71
-
72
-
73
-
74
-
75
-
76
-
77
-
78
-
79
-
80
-
81
-
82
-
83
-
84
-
85
-
86
-
87
-
88
-
89
-
90
-
91
-
92
-
93
-
94
-
95
-
96
-
97
-
98
-
99
-
100
-
101
-
102
-
103
-
104
-
105
-
106
-
107
-
108
-
109
-
110
-
111
-
112
-
113
-
114
-
115
-
116
-
117
-
118
-
119
-
120
-
121
-
122
-
123
-
124
-
125
-
126
-
127
-
128
-
129
-
130
-
131
-
132
-
133
-
134
-
135
-
136
-
137
-
138
-
139
-
140
-
141
-
142
-
143
-
144
-
145
-
146
-
147
-
148
-
149
-
150
-
151
-
152
-
153
-
154
-
155
-
156
-
157
-
158
-
159
-
160
-
161
-
162
-
163
-
164
-
165
-
166
-
167
-
168
-
169
-
170
-
171
-
172
-
173
-
174
-
175
-
176
-
177
-
178
-
179
-
180
-
181
-
182
-
183
-
184
-
185
-
186
-
187
-
188
-
189
-
190
-
191
-
192
-
193
-
194
-
195
-
196
-
197
-
198
-
199
-
200
-
201
-
202
-
203
-
204
-
205
-
206
-
207
-
208
-
209
-
210
-
211
-
212
-
213
-
214
-
215
-
216
-
217
-
218
-
219
-
220
-
221
-
222
-
223
-
224
-
225
-
226
-
227
-
228
-
229
-
230
-
231
-
232
-
233
-
234
-
235
-
236
-
237
-
238
-
239
-
240
-
241
-
242
-
243
-
 244
244 -
 245
245 -
 246
246 -
 247
247 -
 248
248 -
 249
249 -
 250
250 -
 251
251 -
 252
252 -
 253
253 -
 254
254 -
255
-
256
-
257
-
258
-
259
-
260
-
261
-
262
-
263
-
264
-
265
-
266
-
267
-
268
-
269
-
270
-
271
-
272
-
273
-
274
-
275
-
276
-
277
-
278
-
279
 |
 |