Yamaha AW4416 Owner's Manual - Page 226
Recording the first
 |
View all Yamaha AW4416 manuals
Add to My Manuals
Save this manual to your list of manuals |
Page 226 highlights
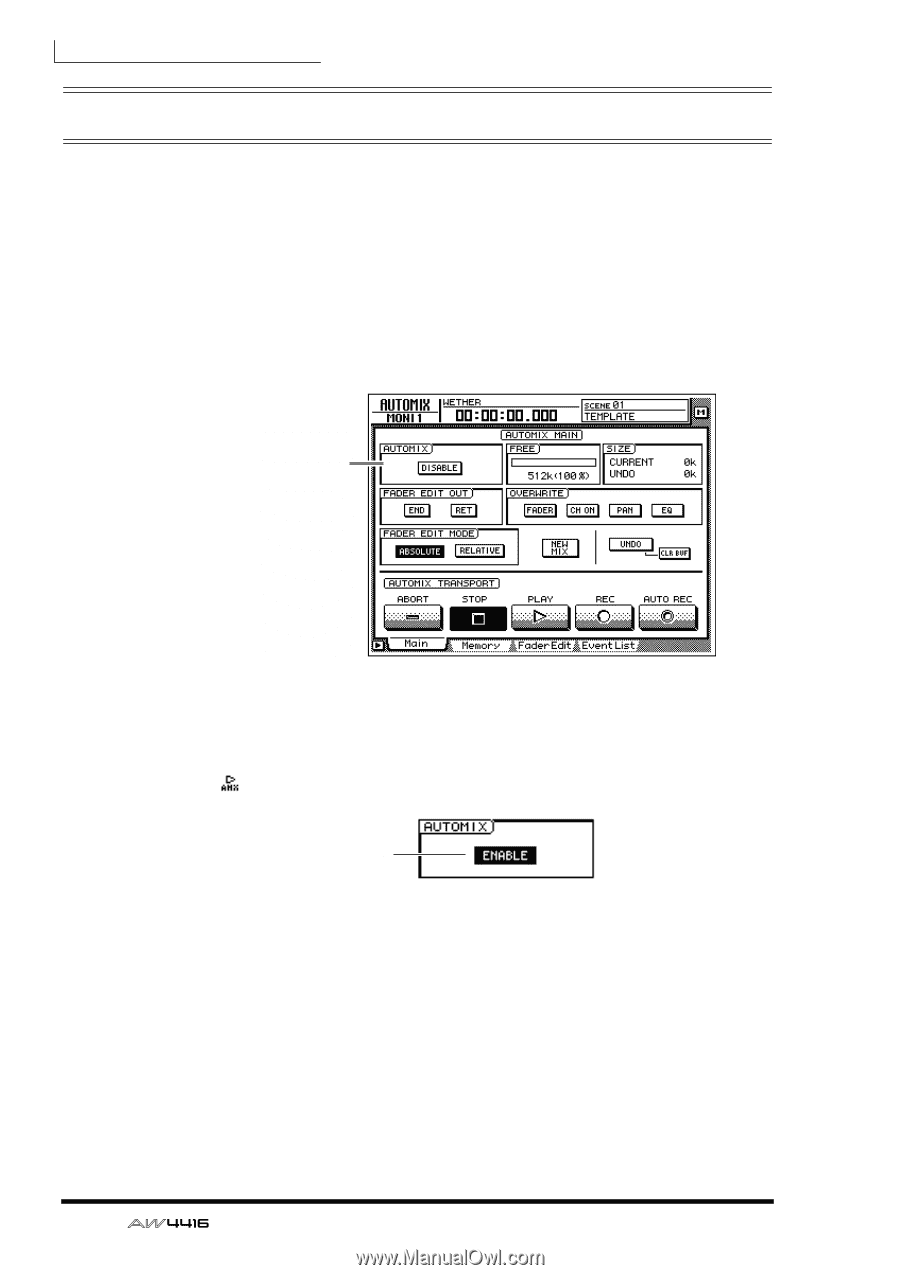
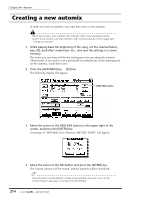
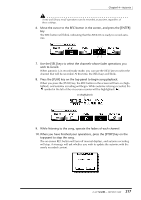
Chapter14-Automix Recording the first section Here we will explain the procedure for recording fader operations of the monitor channels. 1. Press the [HOME] key of the FADER MODE section, and the [MONI] key of the MIXING LAYER section. Faders 1-16 will function as the channel faders for monitor channels 1-16. 2. Locate the song to a point slightly earlier than where you wish to begin recording the automix. 3. Press the [AUTOMIX] key ¡ [F1] key. AUTOMIX field 216 4. Move the cursor to the DISABLE button of the AUTOMIX field, and press the [ENTER] key. The button will be turned on (highlighted), and its title will change to ENABLE. Now automix is on (i.e., can be recorded or played). Whenever automix is on, the icon will always be displayed at the left of the on-screen counter. On 5. Move the cursor to the OVERWRITE field. Turn the FADER button on, and turn off the remaining buttons (CH ON, PAN, EQ). The FADER/CH ON/PAN/EQ buttons in the OVERWRITE field are used to select the events that will be recorded in the automix. If a button is on (highlighted), the corresponding type of event can be recorded in the automix. The following events correspond to each button. • FADER Operations of the faders and AUX send 1-8 faders of each channel • CH ON Operations of the [ON] switches of each channel • PAN Pan operations of each channel • EQ EQ operations of each channel - Operation Guide
-
 1
1 -
2
-
3
-
4
-
5
-
6
-
7
-
8
-
9
-
10
-
11
-
12
-
13
-
14
-
15
-
16
-
17
-
18
-
19
-
20
-
21
-
22
-
23
-
24
-
25
-
26
-
27
-
28
-
29
-
30
-
31
-
32
-
33
-
34
-
35
-
36
-
37
-
38
-
39
-
40
-
41
-
42
-
43
-
44
-
45
-
46
-
47
-
48
-
49
-
50
-
51
-
52
-
53
-
54
-
55
-
56
-
57
-
58
-
59
-
60
-
61
-
62
-
63
-
64
-
65
-
66
-
67
-
68
-
69
-
70
-
71
-
72
-
73
-
74
-
75
-
76
-
77
-
78
-
79
-
80
-
81
-
82
-
83
-
84
-
85
-
86
-
87
-
88
-
89
-
90
-
91
-
92
-
93
-
94
-
95
-
96
-
97
-
98
-
99
-
100
-
101
-
102
-
103
-
104
-
105
-
106
-
107
-
108
-
109
-
110
-
111
-
112
-
113
-
114
-
115
-
116
-
117
-
118
-
119
-
120
-
121
-
122
-
123
-
124
-
125
-
126
-
127
-
128
-
129
-
130
-
131
-
132
-
133
-
134
-
135
-
136
-
137
-
138
-
139
-
140
-
141
-
142
-
143
-
144
-
145
-
146
-
147
-
148
-
149
-
150
-
151
-
152
-
153
-
154
-
155
-
156
-
157
-
158
-
159
-
160
-
161
-
162
-
163
-
164
-
165
-
166
-
167
-
168
-
169
-
170
-
171
-
172
-
173
-
174
-
175
-
176
-
177
-
178
-
179
-
180
-
181
-
182
-
183
-
184
-
185
-
186
-
187
-
188
-
189
-
190
-
191
-
192
-
193
-
194
-
195
-
196
-
197
-
198
-
199
-
200
-
201
-
202
-
203
-
204
-
205
-
206
-
207
-
208
-
209
-
210
-
211
-
212
-
213
-
214
-
215
-
216
-
217
-
218
-
219
-
220
-
 221
221 -
 222
222 -
 223
223 -
 224
224 -
 225
225 -
 226
226 -
 227
227 -
 228
228 -
 229
229 -
 230
230 -
 231
231 -
232
-
233
-
234
-
235
-
236
-
237
-
238
-
239
-
240
-
241
-
242
-
243
-
244
-
245
-
246
-
247
-
248
-
249
-
250
-
251
-
252
-
253
-
254
-
255
-
256
-
257
-
258
-
259
-
260
-
261
-
262
-
263
-
264
-
265
-
266
-
267
-
268
-
269
-
270
-
271
-
272
-
273
-
274
-
275
-
276
-
277
-
278
-
279
 |
 |