Brother International PE-DESIGN Ver.5 Users Manual - English - Page 131
Selecting characters on a text pattern, Editing stitch data of a stitch object
 |
View all Brother International PE-DESIGN Ver.5 manuals
Add to My Manuals
Save this manual to your list of manuals |
Page 131 highlights
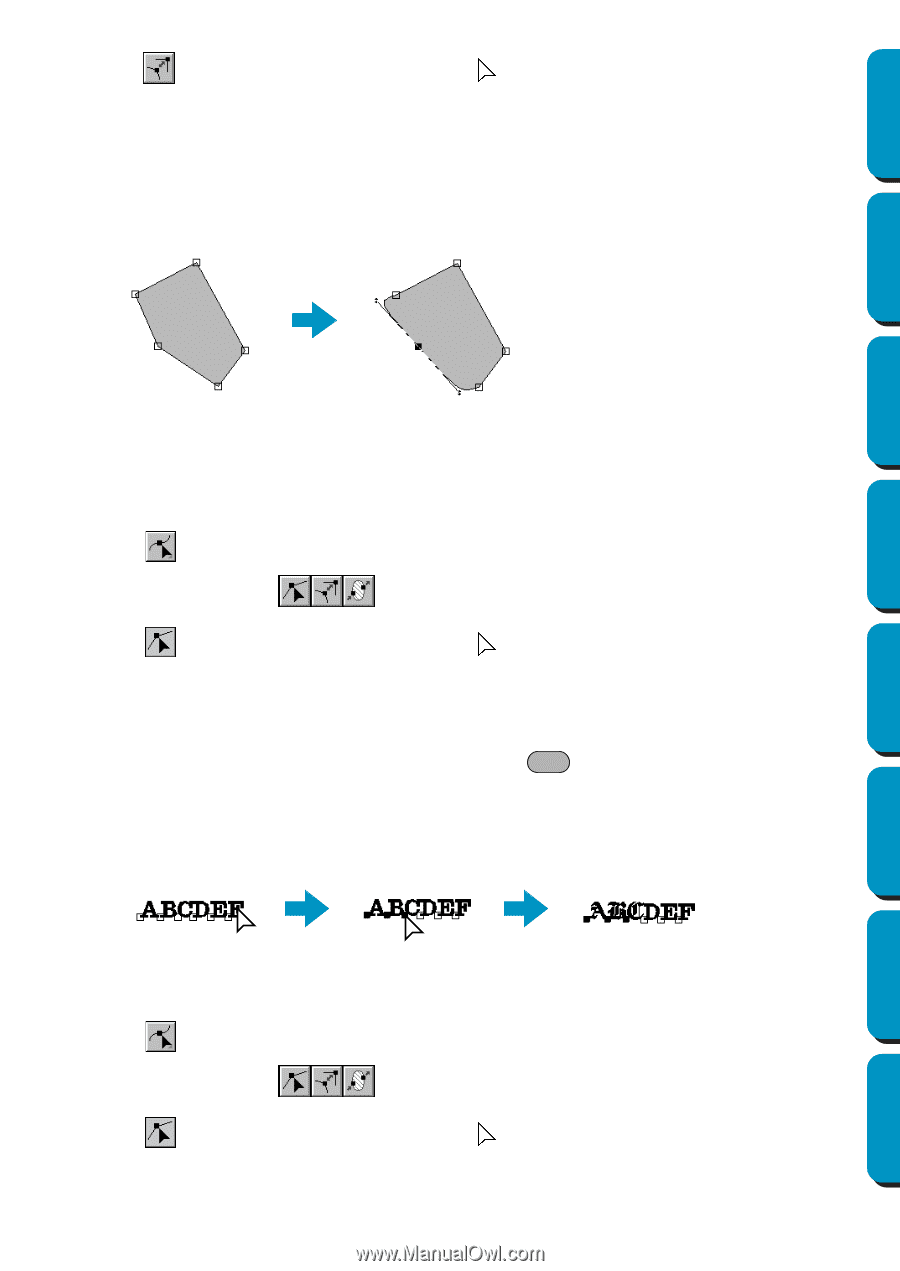
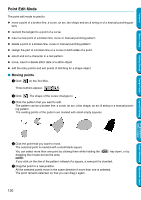
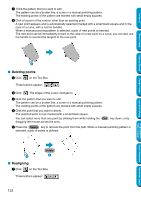
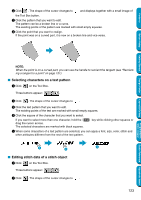
Contents 2 Click . The shape of the cursor changes to and displays together with a small image of the Tool Box button. 3 Click the pattern that you want to edit. The pattern can be a broken line or a curve. The existing points of the pattern are marked with small empty squares. 4 Click the point that you want to realign. If the point was on a curved part, it is now on a broken line and vice versa. Before Using Getting Started Design Center Layout & Editing Programmable Stitch Creator NOTE: When the point is on a curved part, you can use the handle to reorient the tangent (see "Reorienting a tangent to a point" on page 121). I Selecting characters on a text pattern 1 Click on the Tool Box. Three buttons appear: . 2 Click . The shape of the cursor changes to . 3 Click the text pattern that you want to edit. The existing points of the text are marked with small empty squares. 4 Click the square of the character that you want to select. If you want to select more than one character, hold the Ctrl key while clicking other squares or drag the cursor across. The selected characters are marked with black squares. 5 When some characters of a text pattern are selected, you can apply a font, size, color, stitch and other attributes different from the rest of the text pattern. 3 4 5 I Editing stitch data of a stitch object 1 Click on the Tool Box. Three buttons appear: . 2 Click . The shape of the cursor changes to . 123 Quick Reference Alphabetic Index
-
 1
1 -
2
-
3
-
4
-
5
-
6
-
7
-
8
-
9
-
10
-
11
-
12
-
13
-
14
-
15
-
16
-
17
-
18
-
19
-
20
-
21
-
22
-
23
-
24
-
25
-
26
-
27
-
28
-
29
-
30
-
31
-
32
-
33
-
34
-
35
-
36
-
37
-
38
-
39
-
40
-
41
-
42
-
43
-
44
-
45
-
46
-
47
-
48
-
49
-
50
-
51
-
52
-
53
-
54
-
55
-
56
-
57
-
58
-
59
-
60
-
61
-
62
-
63
-
64
-
65
-
66
-
67
-
68
-
69
-
70
-
71
-
72
-
73
-
74
-
75
-
76
-
77
-
78
-
79
-
80
-
81
-
82
-
83
-
84
-
85
-
86
-
87
-
88
-
89
-
90
-
91
-
92
-
93
-
94
-
95
-
96
-
97
-
98
-
99
-
100
-
101
-
102
-
103
-
104
-
105
-
106
-
107
-
108
-
109
-
110
-
111
-
112
-
113
-
114
-
115
-
116
-
117
-
118
-
119
-
120
-
121
-
122
-
123
-
124
-
125
-
 126
126 -
 127
127 -
 128
128 -
 129
129 -
 130
130 -
 131
131 -
 132
132 -
 133
133 -
 134
134 -
 135
135 -
 136
136 -
137
-
138
-
139
-
140
-
141
-
142
-
143
-
144
-
145
-
146
-
147
-
148
-
149
-
150
-
151
-
152
-
153
-
154
-
155
-
156
-
157
-
158
-
159
-
160
-
161
-
162
-
163
-
164
-
165
-
166
-
167
-
168
-
169
-
170
-
171
-
172
-
173
-
174
-
175
-
176
-
177
-
178
-
179
-
180
-
181
-
182
-
183
-
184
-
185
-
186
-
187
-
188
-
189
-
190
-
191
-
192
-
193
-
194
-
195
-
196
-
197
-
198
-
199
-
200
-
201
-
202
-
203
-
204
-
205
-
206
-
207
-
208
-
209
-
210
-
211
-
212
-
213
-
214
-
215
-
216
-
217
-
218
-
219
-
220
-
221
-
222
-
223
-
224
-
225
-
226
-
227
-
228
-
229
-
230
-
231
-
232
-
233
-
234
-
235
-
236
-
237
-
238
-
239
-
240
-
241
-
242
-
243
-
244
-
245
-
246
-
247
-
248
-
249
-
250
-
251
-
252
-
253
-
254
-
255
-
256
-
257
-
258
-
259
-
260
-
261
-
262
-
263
-
264
-
265
-
266
-
267
-
268
-
269
-
270
-
271
-
272
-
273
-
274
 |
 |