Brother International PE-DESIGN Ver.5 Users Manual - English - Page 139
Rectangle Drawing Mode, Drawing a box, Outline Drawing Mode
 |
View all Brother International PE-DESIGN Ver.5 manuals
Add to My Manuals
Save this manual to your list of manuals |
Page 139 highlights
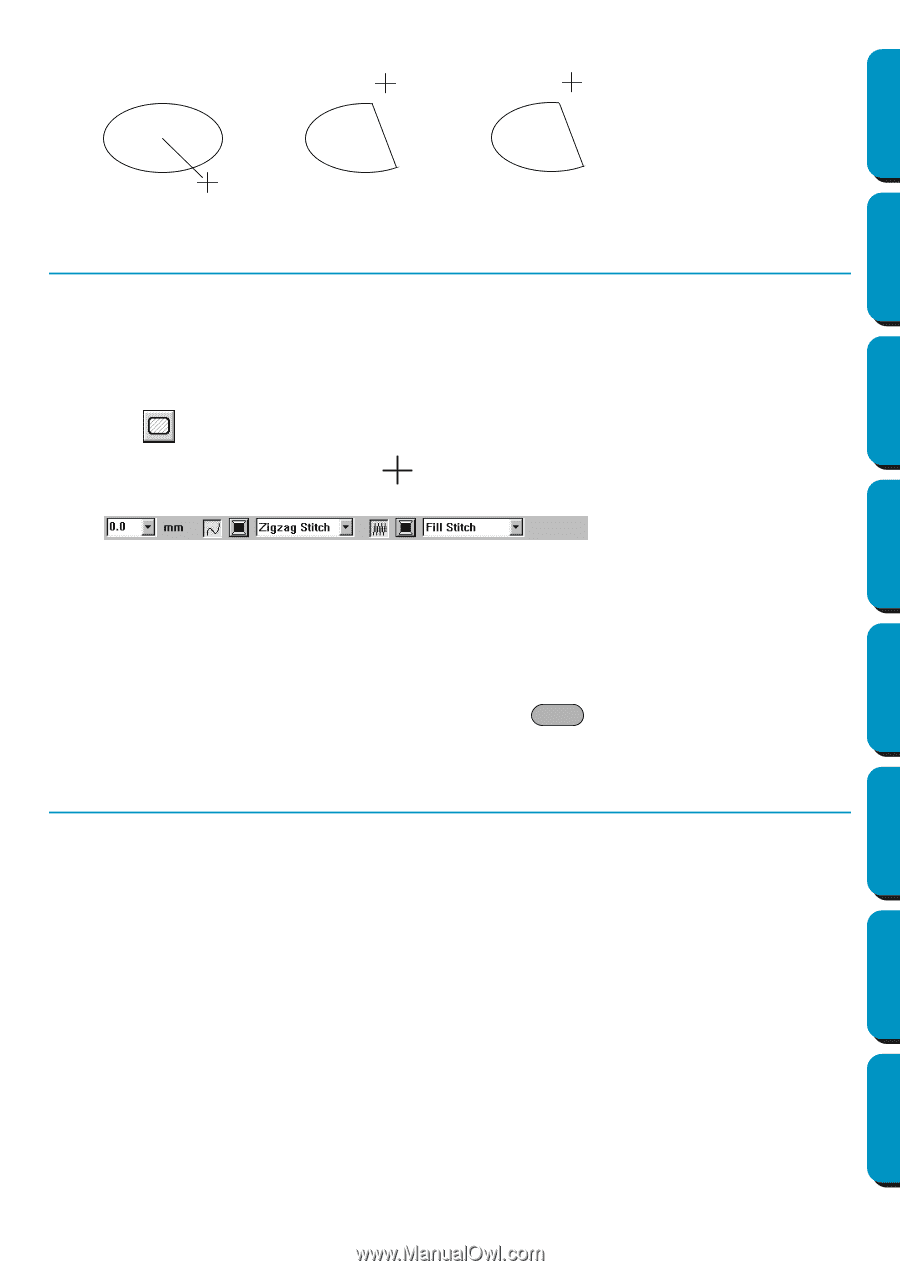
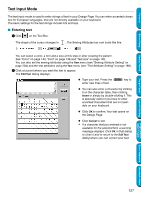
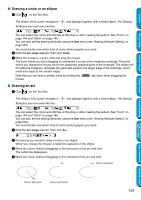
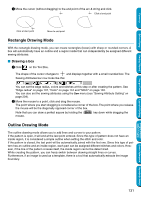
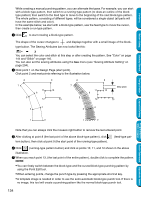
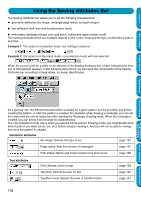
Contents Before Using Getting Started Design Center 5 Move the cursor (without dragging) to the end point of the arc & string and click. Click at end point Click at start point Move to end point Rectangle Drawing Mode With the rectangle drawing mode, you can create rectangles (boxes) with sharp or rounded corners. A box will automatically have an outline and a region inside that can independently be assigned different sewing attributes. I Drawing a box 1 Click on the Tool Box. The shape of the cursor changes to and displays together with a small rounded box. The Sewing Attributes bar now looks like this: You can set the edge radius, colors and stitches at this step or after creating the pattern. See "Edge radius" on page 137, "Color" on page 144 and "Stitch" on page 146. You can also set the sewing attributes using the Sew menu (see "Sewing Attribute Setting" on page 204). 2 Move the mouse to a point, click and drag the mouse. The point where you start dragging is considered a corner of the box. The point where you release the mouse will be the diagonally opposed corner of the box. Note that you can draw a perfect square by holding the Shift key down while dragging the mouse. Outline Drawing Mode The outline drawing mode allows you to add lines and curves to your pattern. If the pattern is open, it will end at the last point entered. Since this type of pattern does not have an inside region, it is considered a simple outline when setting the stitch and color. If the pattern is closed, the last point will be automatically joined with the first one. Since this type of pattern has an outline and an inside region, each part can be assigned different stitches and colors. However, if the line of the pattern crosses itself, the inside region cannot be determined. While creating the pattern, you can freely switch between drawing straight lines or curves. Furthermore, if an image is used as a template, there is a tool that automatically extracts the image boundary. Layout & Editing Programmable Stitch Creator Quick Reference Alphabetic Index 131
-
 1
1 -
2
-
3
-
4
-
5
-
6
-
7
-
8
-
9
-
10
-
11
-
12
-
13
-
14
-
15
-
16
-
17
-
18
-
19
-
20
-
21
-
22
-
23
-
24
-
25
-
26
-
27
-
28
-
29
-
30
-
31
-
32
-
33
-
34
-
35
-
36
-
37
-
38
-
39
-
40
-
41
-
42
-
43
-
44
-
45
-
46
-
47
-
48
-
49
-
50
-
51
-
52
-
53
-
54
-
55
-
56
-
57
-
58
-
59
-
60
-
61
-
62
-
63
-
64
-
65
-
66
-
67
-
68
-
69
-
70
-
71
-
72
-
73
-
74
-
75
-
76
-
77
-
78
-
79
-
80
-
81
-
82
-
83
-
84
-
85
-
86
-
87
-
88
-
89
-
90
-
91
-
92
-
93
-
94
-
95
-
96
-
97
-
98
-
99
-
100
-
101
-
102
-
103
-
104
-
105
-
106
-
107
-
108
-
109
-
110
-
111
-
112
-
113
-
114
-
115
-
116
-
117
-
118
-
119
-
120
-
121
-
122
-
123
-
124
-
125
-
126
-
127
-
128
-
129
-
130
-
131
-
132
-
133
-
 134
134 -
 135
135 -
 136
136 -
 137
137 -
 138
138 -
 139
139 -
 140
140 -
 141
141 -
 142
142 -
 143
143 -
 144
144 -
145
-
146
-
147
-
148
-
149
-
150
-
151
-
152
-
153
-
154
-
155
-
156
-
157
-
158
-
159
-
160
-
161
-
162
-
163
-
164
-
165
-
166
-
167
-
168
-
169
-
170
-
171
-
172
-
173
-
174
-
175
-
176
-
177
-
178
-
179
-
180
-
181
-
182
-
183
-
184
-
185
-
186
-
187
-
188
-
189
-
190
-
191
-
192
-
193
-
194
-
195
-
196
-
197
-
198
-
199
-
200
-
201
-
202
-
203
-
204
-
205
-
206
-
207
-
208
-
209
-
210
-
211
-
212
-
213
-
214
-
215
-
216
-
217
-
218
-
219
-
220
-
221
-
222
-
223
-
224
-
225
-
226
-
227
-
228
-
229
-
230
-
231
-
232
-
233
-
234
-
235
-
236
-
237
-
238
-
239
-
240
-
241
-
242
-
243
-
244
-
245
-
246
-
247
-
248
-
249
-
250
-
251
-
252
-
253
-
254
-
255
-
256
-
257
-
258
-
259
-
260
-
261
-
262
-
263
-
264
-
265
-
266
-
267
-
268
-
269
-
270
-
271
-
272
-
273
-
274
 |
 |