Brother International PE-DESIGN Ver.5 Users Manual - English - Page 61
Step 3 Drawing Lines to Edit the Programmable Stitch
 |
View all Brother International PE-DESIGN Ver.5 manuals
Add to My Manuals
Save this manual to your list of manuals |
Page 61 highlights
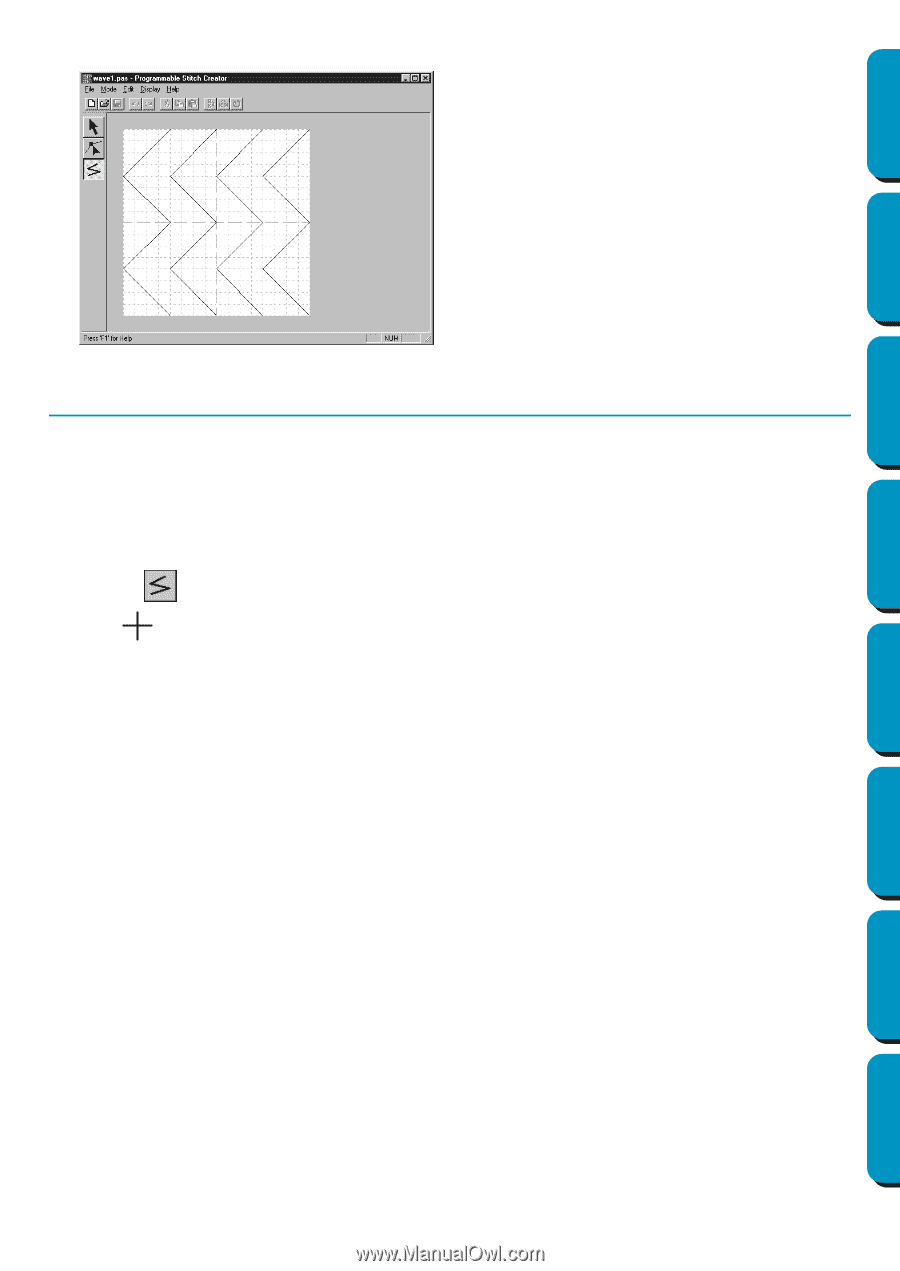
The stitch pattern displays on the work area of the Programmable Stitch Creator application. Contents Before Using Getting Started Design Center Step 3 Drawing Lines to Edit the Programmable Stitch We are going to draw a wave between the displayed ones using the Line drawing tool of the Tool Box. To draw these waves, we will use the grid setting medium with which the pes file stitch pattern was saved. NOTE: Grid types should be selected according to the details you want to draw. Select a narrower grid for more detailed stitches and a wider grid for more simple ones. For more information on the grids and on how to select them, refer to "Grid" on page 248. 1 Click on the Tool Box. Move the cursor over the work area. The shape of the cursor changes to and displays together with a miniature illustration of the tool button. 2 Move the mouse to the second vertical grid line following a wave and click. NOTE: The horizontal and vertical lines that you draw on the work area always follow the grid. The points you create by clicking the mouse are inserted at the intersection of the horizontal and vertical lines of the grid, enabling you to draw diagonal lines as well. So, regardless on where you click, a point will automatically be inserted at the nearest intersection. 3 Move the mouse to the first angle and click again. NOTE: You can always remove the last-entered point by clicking the mouse's right button. 4 Repeat until you reach the end of the line and double-click. Layout & Editing Programmable Stitch Creator Quick Reference Alphabetic Index 53
-
 1
1 -
2
-
3
-
4
-
5
-
6
-
7
-
8
-
9
-
10
-
11
-
12
-
13
-
14
-
15
-
16
-
17
-
18
-
19
-
20
-
21
-
22
-
23
-
24
-
25
-
26
-
27
-
28
-
29
-
30
-
31
-
32
-
33
-
34
-
35
-
36
-
37
-
38
-
39
-
40
-
41
-
42
-
43
-
44
-
45
-
46
-
47
-
48
-
49
-
50
-
51
-
52
-
53
-
54
-
55
-
 56
56 -
 57
57 -
 58
58 -
 59
59 -
 60
60 -
 61
61 -
 62
62 -
 63
63 -
 64
64 -
 65
65 -
 66
66 -
67
-
68
-
69
-
70
-
71
-
72
-
73
-
74
-
75
-
76
-
77
-
78
-
79
-
80
-
81
-
82
-
83
-
84
-
85
-
86
-
87
-
88
-
89
-
90
-
91
-
92
-
93
-
94
-
95
-
96
-
97
-
98
-
99
-
100
-
101
-
102
-
103
-
104
-
105
-
106
-
107
-
108
-
109
-
110
-
111
-
112
-
113
-
114
-
115
-
116
-
117
-
118
-
119
-
120
-
121
-
122
-
123
-
124
-
125
-
126
-
127
-
128
-
129
-
130
-
131
-
132
-
133
-
134
-
135
-
136
-
137
-
138
-
139
-
140
-
141
-
142
-
143
-
144
-
145
-
146
-
147
-
148
-
149
-
150
-
151
-
152
-
153
-
154
-
155
-
156
-
157
-
158
-
159
-
160
-
161
-
162
-
163
-
164
-
165
-
166
-
167
-
168
-
169
-
170
-
171
-
172
-
173
-
174
-
175
-
176
-
177
-
178
-
179
-
180
-
181
-
182
-
183
-
184
-
185
-
186
-
187
-
188
-
189
-
190
-
191
-
192
-
193
-
194
-
195
-
196
-
197
-
198
-
199
-
200
-
201
-
202
-
203
-
204
-
205
-
206
-
207
-
208
-
209
-
210
-
211
-
212
-
213
-
214
-
215
-
216
-
217
-
218
-
219
-
220
-
221
-
222
-
223
-
224
-
225
-
226
-
227
-
228
-
229
-
230
-
231
-
232
-
233
-
234
-
235
-
236
-
237
-
238
-
239
-
240
-
241
-
242
-
243
-
244
-
245
-
246
-
247
-
248
-
249
-
250
-
251
-
252
-
253
-
254
-
255
-
256
-
257
-
258
-
259
-
260
-
261
-
262
-
263
-
264
-
265
-
266
-
267
-
268
-
269
-
270
-
271
-
272
-
273
-
274
 |
 |