Brother International PE-DESIGN Ver.5 Users Manual - English - Page 47
Set the text stitch, Enter the text, Delete, Text sew type, Satin stitch, Edit Text, Text Letters
 |
View all Brother International PE-DESIGN Ver.5 manuals
Add to My Manuals
Save this manual to your list of manuals |
Page 47 highlights
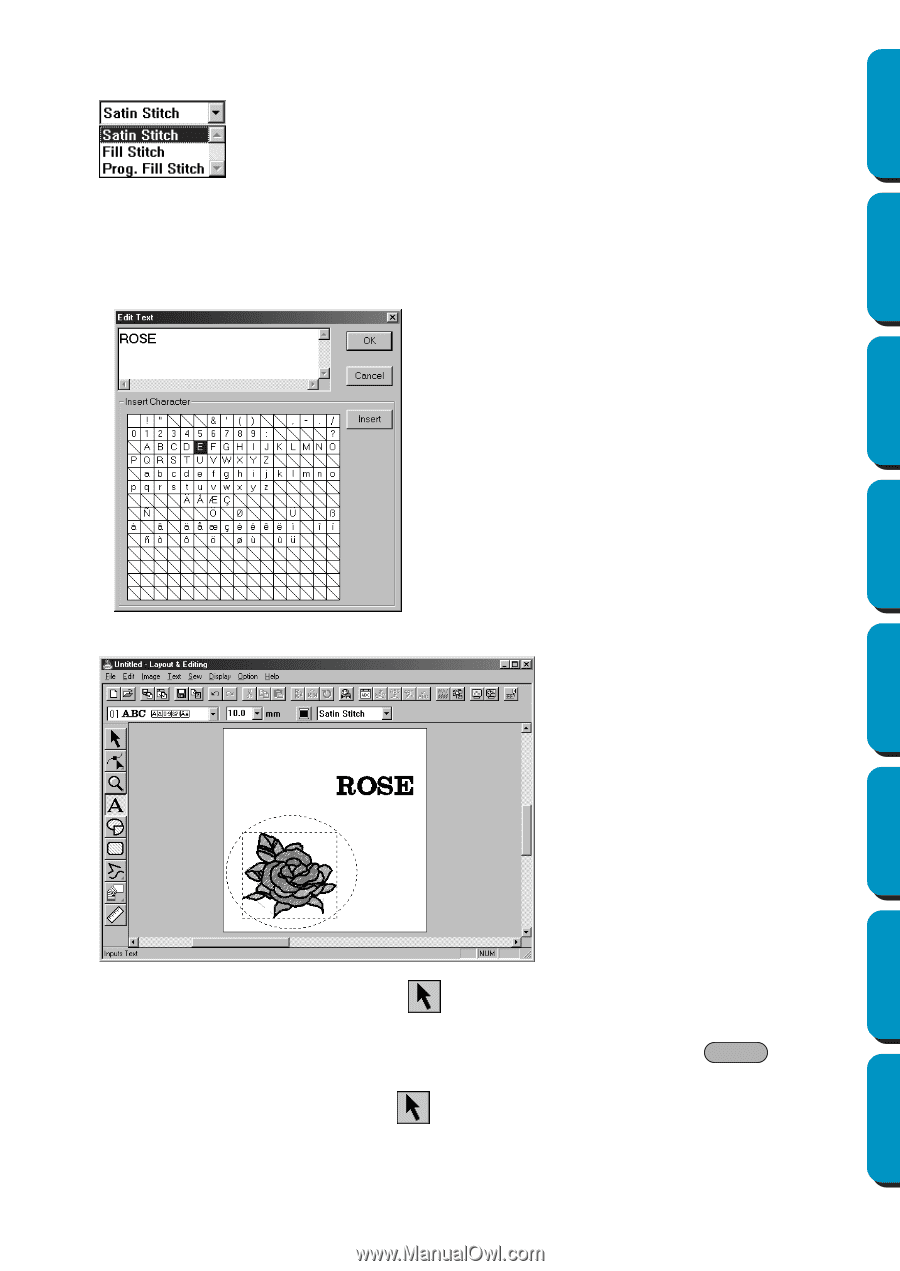
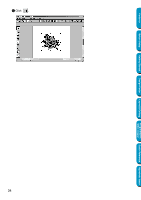
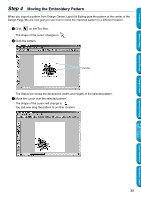
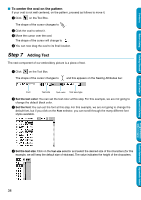
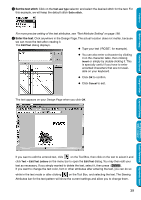
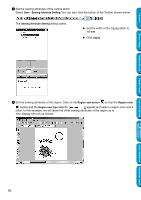
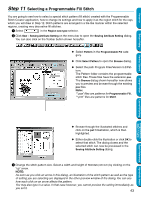
Contents Before Using 5 Set the text stitch: Click on the Text sew type selector and select the desired stitch for the text. For this example, we will keep the default stitch Satin stitch. For more precise setting of the text attributes, see "Text Attribute Setting" on page 198. 6 Enter the text: Click anywhere in the Design Page. The actual location does not matter, because we can move the text after creating it. The Edit Text dialog displays. N Type your text ("ROSE", for example). N You can also enter a character by clicking it on the character table, then clicking Insert or simply by double-clicking it. This is specially useful if you have to enter accented characters that are not available on your keyboard. N Click OK to confirm. N Click Cancel to exit. The text appears on your Design Page when you click OK. Getting Started Design Center Layout & Editing Programmable Stitch Creator Quick Reference Alphabetic Index If you want to edit the entered text, click on the Tool Box, then click on the text to select it and click Text - Edit Text Letters on the menu bar to open the Edit Text dialog. You may then edit your text as necessary. If you simply wanted to delete the text, select it, then press Delete . If you want to change the text color, font or other attributes after entering the text, you can do so while in the text mode or after clicking on the Tool Box, and selecting the text. The Sewing Attributes bar for the text pattern will show the current settings and allow you to change them. 39
-
 1
1 -
2
-
3
-
4
-
5
-
6
-
7
-
8
-
9
-
10
-
11
-
12
-
13
-
14
-
15
-
16
-
17
-
18
-
19
-
20
-
21
-
22
-
23
-
24
-
25
-
26
-
27
-
28
-
29
-
30
-
31
-
32
-
33
-
34
-
35
-
36
-
37
-
38
-
39
-
40
-
41
-
 42
42 -
 43
43 -
 44
44 -
 45
45 -
 46
46 -
 47
47 -
 48
48 -
 49
49 -
 50
50 -
 51
51 -
 52
52 -
53
-
54
-
55
-
56
-
57
-
58
-
59
-
60
-
61
-
62
-
63
-
64
-
65
-
66
-
67
-
68
-
69
-
70
-
71
-
72
-
73
-
74
-
75
-
76
-
77
-
78
-
79
-
80
-
81
-
82
-
83
-
84
-
85
-
86
-
87
-
88
-
89
-
90
-
91
-
92
-
93
-
94
-
95
-
96
-
97
-
98
-
99
-
100
-
101
-
102
-
103
-
104
-
105
-
106
-
107
-
108
-
109
-
110
-
111
-
112
-
113
-
114
-
115
-
116
-
117
-
118
-
119
-
120
-
121
-
122
-
123
-
124
-
125
-
126
-
127
-
128
-
129
-
130
-
131
-
132
-
133
-
134
-
135
-
136
-
137
-
138
-
139
-
140
-
141
-
142
-
143
-
144
-
145
-
146
-
147
-
148
-
149
-
150
-
151
-
152
-
153
-
154
-
155
-
156
-
157
-
158
-
159
-
160
-
161
-
162
-
163
-
164
-
165
-
166
-
167
-
168
-
169
-
170
-
171
-
172
-
173
-
174
-
175
-
176
-
177
-
178
-
179
-
180
-
181
-
182
-
183
-
184
-
185
-
186
-
187
-
188
-
189
-
190
-
191
-
192
-
193
-
194
-
195
-
196
-
197
-
198
-
199
-
200
-
201
-
202
-
203
-
204
-
205
-
206
-
207
-
208
-
209
-
210
-
211
-
212
-
213
-
214
-
215
-
216
-
217
-
218
-
219
-
220
-
221
-
222
-
223
-
224
-
225
-
226
-
227
-
228
-
229
-
230
-
231
-
232
-
233
-
234
-
235
-
236
-
237
-
238
-
239
-
240
-
241
-
242
-
243
-
244
-
245
-
246
-
247
-
248
-
249
-
250
-
251
-
252
-
253
-
254
-
255
-
256
-
257
-
258
-
259
-
260
-
261
-
262
-
263
-
264
-
265
-
266
-
267
-
268
-
269
-
270
-
271
-
272
-
273
-
274
 |
 |