Brother International PE-DESIGN Ver.5 Users Manual - English - Page 186
Input – from Clipboard
 |
View all Brother International PE-DESIGN Ver.5 manuals
Add to My Manuals
Save this manual to your list of manuals |
Page 186 highlights
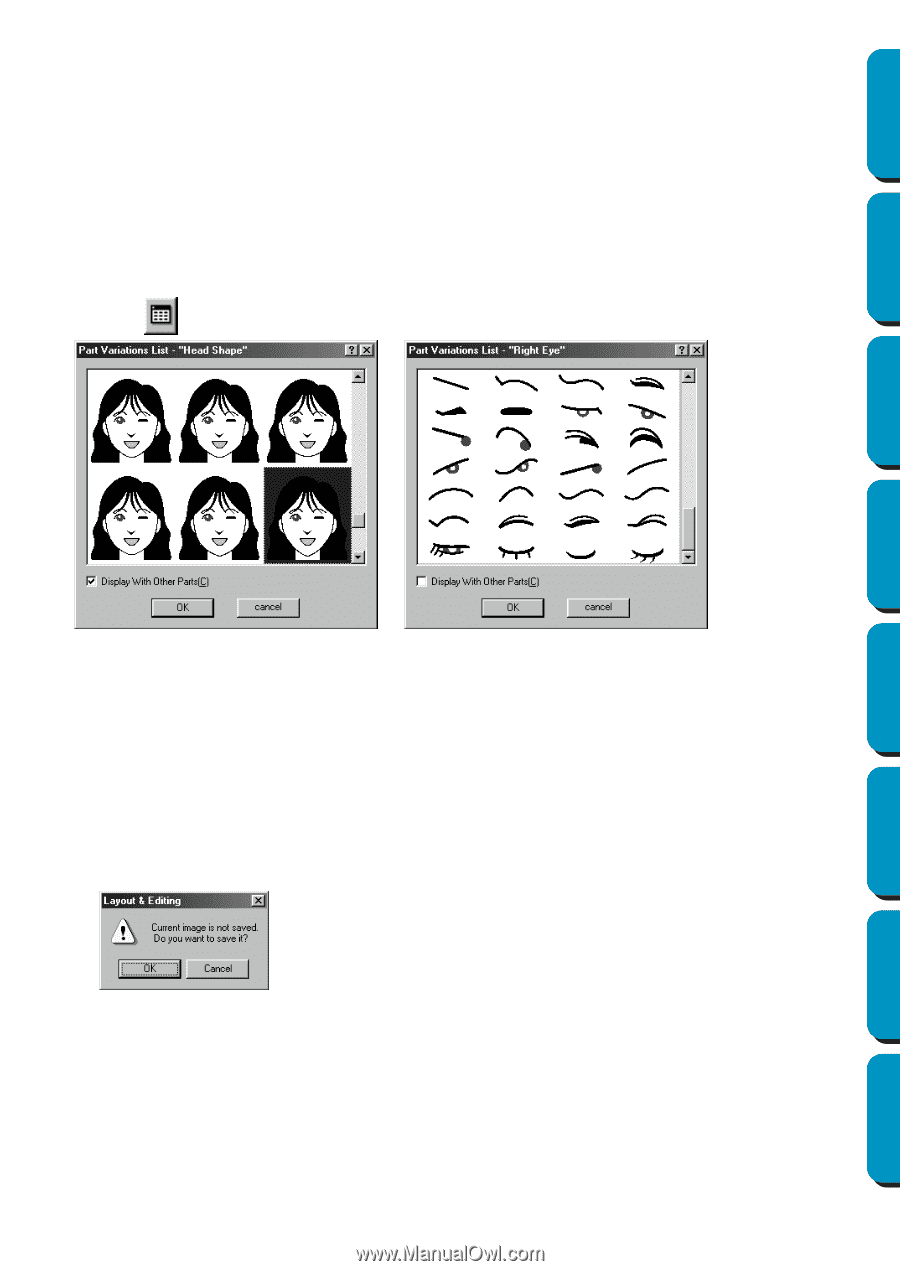
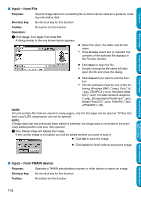
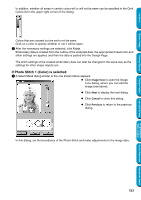
Contents 2 While checking the sample image on the right side of the dialog, select the various facial features. N Select the overall contour (appearance) of the portrait from the Facial Feature list. Select from narrow, wide, child-like, etc. N Select a part of the portrait from the Part list. The part of the portrait to be changed can also be selected by clicking it in the sample image. N Drag the Part Variation slider to select the part variation. The selected part variation is shown in the sample image. Select the Change Both Left and Right check box to change both sides of a part, such as the eyes or ears. N Click to display all variations of the selected part. Before Using Getting Started Design Center Layout & Editing Programmable Stitch Creator Quick Reference Alphabetic Index If the Display With Other Parts check box is selected, images of all parts combined are displayed. If the check box is not selected, only the variations of the selected part are displayed. Select a part from the list, and then click OK. N Drag the Part Feature slider to change the part feature. Select from making the part standard size, slightly larger, slightly smaller, wider or taller. N Click the Color tab to change the color of the part. 3 After the portrait is created, click OK. The portrait image appears in Design Page. If the current image is not saved, you will be asked whether you want to save it. N Click OK to save the image. N Click Cancel to finish without saving the image. I Input - from Clipboard Purpose: Import image data from the clipboard. Shortcut key: No shortcut key for this function Toolbar: No button for this function Operation: 178
-
 1
1 -
2
-
3
-
4
-
5
-
6
-
7
-
8
-
9
-
10
-
11
-
12
-
13
-
14
-
15
-
16
-
17
-
18
-
19
-
20
-
21
-
22
-
23
-
24
-
25
-
26
-
27
-
28
-
29
-
30
-
31
-
32
-
33
-
34
-
35
-
36
-
37
-
38
-
39
-
40
-
41
-
42
-
43
-
44
-
45
-
46
-
47
-
48
-
49
-
50
-
51
-
52
-
53
-
54
-
55
-
56
-
57
-
58
-
59
-
60
-
61
-
62
-
63
-
64
-
65
-
66
-
67
-
68
-
69
-
70
-
71
-
72
-
73
-
74
-
75
-
76
-
77
-
78
-
79
-
80
-
81
-
82
-
83
-
84
-
85
-
86
-
87
-
88
-
89
-
90
-
91
-
92
-
93
-
94
-
95
-
96
-
97
-
98
-
99
-
100
-
101
-
102
-
103
-
104
-
105
-
106
-
107
-
108
-
109
-
110
-
111
-
112
-
113
-
114
-
115
-
116
-
117
-
118
-
119
-
120
-
121
-
122
-
123
-
124
-
125
-
126
-
127
-
128
-
129
-
130
-
131
-
132
-
133
-
134
-
135
-
136
-
137
-
138
-
139
-
140
-
141
-
142
-
143
-
144
-
145
-
146
-
147
-
148
-
149
-
150
-
151
-
152
-
153
-
154
-
155
-
156
-
157
-
158
-
159
-
160
-
161
-
162
-
163
-
164
-
165
-
166
-
167
-
168
-
169
-
170
-
171
-
172
-
173
-
174
-
175
-
176
-
177
-
178
-
179
-
180
-
 181
181 -
 182
182 -
 183
183 -
 184
184 -
 185
185 -
 186
186 -
 187
187 -
 188
188 -
 189
189 -
 190
190 -
 191
191 -
192
-
193
-
194
-
195
-
196
-
197
-
198
-
199
-
200
-
201
-
202
-
203
-
204
-
205
-
206
-
207
-
208
-
209
-
210
-
211
-
212
-
213
-
214
-
215
-
216
-
217
-
218
-
219
-
220
-
221
-
222
-
223
-
224
-
225
-
226
-
227
-
228
-
229
-
230
-
231
-
232
-
233
-
234
-
235
-
236
-
237
-
238
-
239
-
240
-
241
-
242
-
243
-
244
-
245
-
246
-
247
-
248
-
249
-
250
-
251
-
252
-
253
-
254
-
255
-
256
-
257
-
258
-
259
-
260
-
261
-
262
-
263
-
264
-
265
-
266
-
267
-
268
-
269
-
270
-
271
-
272
-
273
-
274
 |
 |