Brother International PE-DESIGN Ver.5 Users Manual - English - Page 28
Step 4 Editing Lines, Editing Lines
 |
View all Brother International PE-DESIGN Ver.5 manuals
Add to My Manuals
Save this manual to your list of manuals |
Page 28 highlights
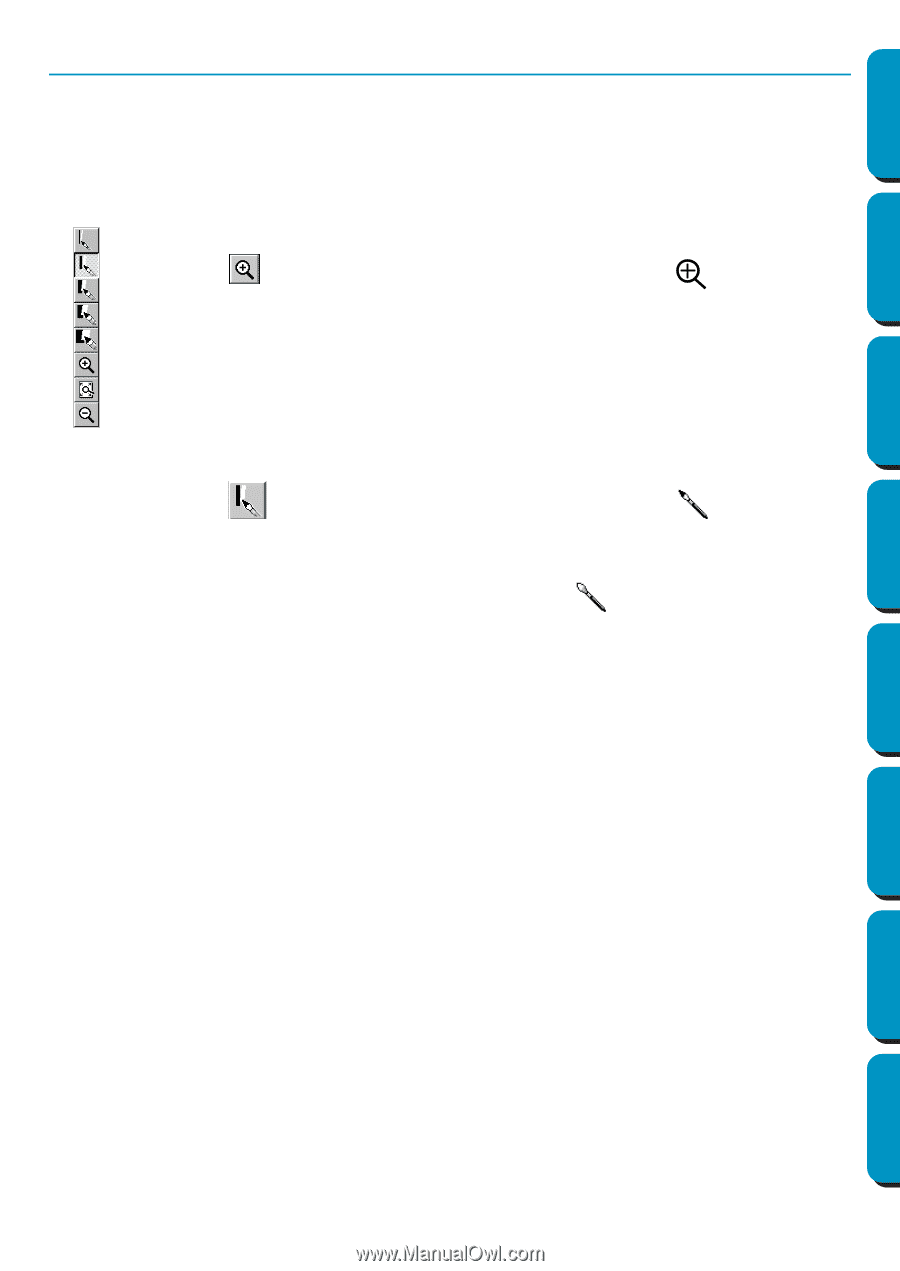
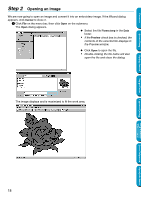
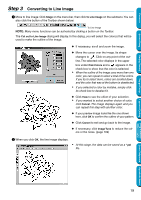
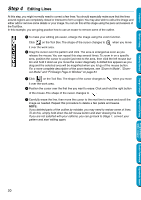
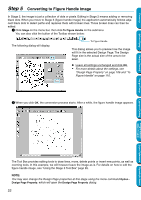
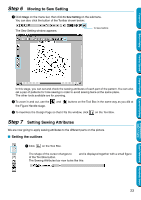
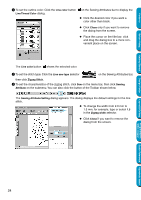
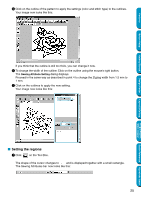
Contents Before Using Getting Started Step 4 Editing Lines At this step, you might normally need to correct a few lines. You should especially make sure that the lines around regions are completely closed or intersect to form a region.You may also wish to edit a line image and either add or remove some details or your image. You can do this at this stage using the pens and erasers of the Tool Box. In this example, you are going practice how to use an eraser to remove some of the outline. 1 To make your editing job easier, enlarge the image using the zoom function. Click on the Tool Box. The shape of the cursor changes to when you move it over the work area. 2 Drag the cursor over the pattern and click. The area is enlarged as soon as you release the mouse. You can repeat this step several times. To zoom in on a specific area, position the cursor to a point just next to the area, then click the left mouse button and hold it down as you move the cursor diagonally. A dotted box appears as you drag and the selected area will be magnified when you let go of the mouse button. For a more complete description of the zoom features, see "Zoom-in Mode", "Zoomout Mode" and "Fit Design Page to Window" on page 64. 3 Click on the Tool Box. The shape of the cursor changes to when you move it over the work area. 4 Position the cursor over the first line you want to erase. Click and hold the right button of the mouse. The shape of the cursor changes to . 5 Carefully erase the line, then move the cursor to the next line to erase and scroll the image as needed. Repeat this procedure to delete a few petals and leaves. NOTE: If you deleted parts of the outline by mistake, you may need to redraw some of lines. To do this, simply hold down the left mouse button and start drawing the line. If you are not satisfied with your editions, you can go back to Stage 1, convert your pattern and start editing again. Design Center Layout & Editing Programmable Stitch Creator Quick Reference Alphabetic Index 20
-
 1
1 -
2
-
3
-
4
-
5
-
6
-
7
-
8
-
9
-
10
-
11
-
12
-
13
-
14
-
15
-
16
-
17
-
18
-
19
-
20
-
21
-
22
-
 23
23 -
 24
24 -
 25
25 -
 26
26 -
 27
27 -
 28
28 -
 29
29 -
 30
30 -
 31
31 -
 32
32 -
 33
33 -
34
-
35
-
36
-
37
-
38
-
39
-
40
-
41
-
42
-
43
-
44
-
45
-
46
-
47
-
48
-
49
-
50
-
51
-
52
-
53
-
54
-
55
-
56
-
57
-
58
-
59
-
60
-
61
-
62
-
63
-
64
-
65
-
66
-
67
-
68
-
69
-
70
-
71
-
72
-
73
-
74
-
75
-
76
-
77
-
78
-
79
-
80
-
81
-
82
-
83
-
84
-
85
-
86
-
87
-
88
-
89
-
90
-
91
-
92
-
93
-
94
-
95
-
96
-
97
-
98
-
99
-
100
-
101
-
102
-
103
-
104
-
105
-
106
-
107
-
108
-
109
-
110
-
111
-
112
-
113
-
114
-
115
-
116
-
117
-
118
-
119
-
120
-
121
-
122
-
123
-
124
-
125
-
126
-
127
-
128
-
129
-
130
-
131
-
132
-
133
-
134
-
135
-
136
-
137
-
138
-
139
-
140
-
141
-
142
-
143
-
144
-
145
-
146
-
147
-
148
-
149
-
150
-
151
-
152
-
153
-
154
-
155
-
156
-
157
-
158
-
159
-
160
-
161
-
162
-
163
-
164
-
165
-
166
-
167
-
168
-
169
-
170
-
171
-
172
-
173
-
174
-
175
-
176
-
177
-
178
-
179
-
180
-
181
-
182
-
183
-
184
-
185
-
186
-
187
-
188
-
189
-
190
-
191
-
192
-
193
-
194
-
195
-
196
-
197
-
198
-
199
-
200
-
201
-
202
-
203
-
204
-
205
-
206
-
207
-
208
-
209
-
210
-
211
-
212
-
213
-
214
-
215
-
216
-
217
-
218
-
219
-
220
-
221
-
222
-
223
-
224
-
225
-
226
-
227
-
228
-
229
-
230
-
231
-
232
-
233
-
234
-
235
-
236
-
237
-
238
-
239
-
240
-
241
-
242
-
243
-
244
-
245
-
246
-
247
-
248
-
249
-
250
-
251
-
252
-
253
-
254
-
255
-
256
-
257
-
258
-
259
-
260
-
261
-
262
-
263
-
264
-
265
-
266
-
267
-
268
-
269
-
270
-
271
-
272
-
273
-
274
 |
 |