Brother International PE-DESIGN Ver.5 Users Manual - English - Page 37
Using Layout & Editing
 |
View all Brother International PE-DESIGN Ver.5 manuals
Add to My Manuals
Save this manual to your list of manuals |
Page 37 highlights
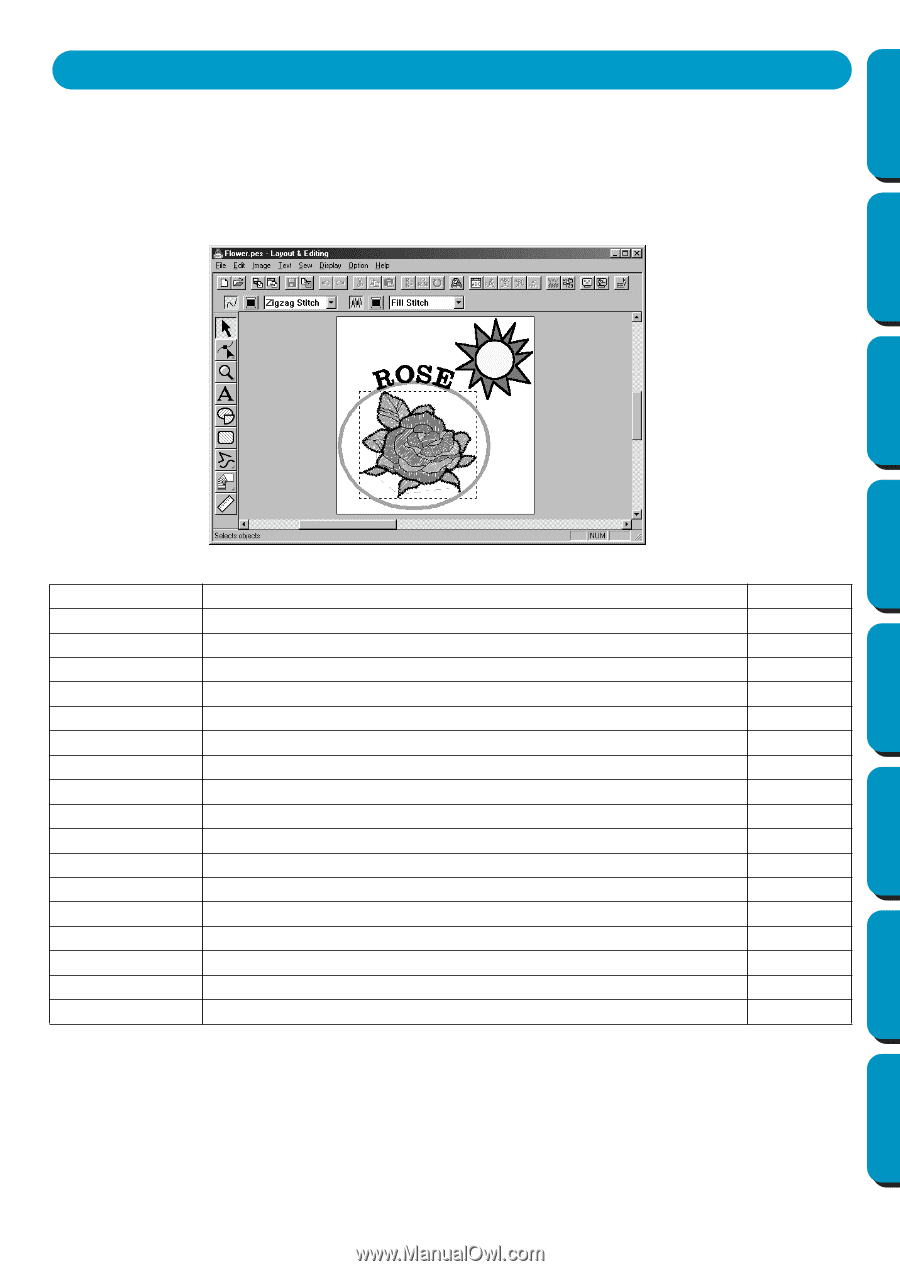
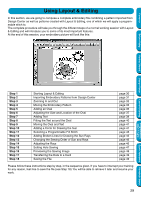
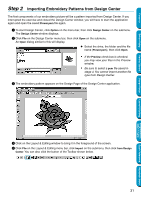
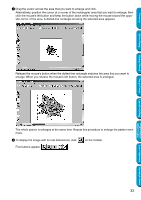
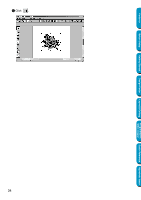
Contents Using Layout & Editing In this section, we are going to compose a complete embroidery file combining a pattern imported from Design Center as well as patterns created with Layout & Editing, one of which we will apply a programmable stitch to. The complete procedure will take you through the different steps of a normal working session with Layout & Editing and will introduce you to some of its most important features. At the end of this session, your embroidery picture will look like this: Before Using Getting Started Design Center Layout & Editing Programmable Stitch Creator Step 1 Step 2 Step 3 Step 4 Step 5 Step 6 Step 7 Step 8 Step 9 Step 10 Step 11 Step 12 Step 13 Step 14 Step 15 Step 16 Step 17 Step 18 Starting Layout & Editing Importing Embroidery Patterns from Design Center Zooming In and Out Moving the Embroidery Pattern Adding an Oval Adjusting the Size and Location of the Oval Adding Text Fitting the Text around the Oval Moving the Oval and Text Adding a Circle for Drawing the Sun Selecting a Programmable Fill Stitch Adding Broken Lines for Drawing the Sun Rays Changing the Sewing Order of Sun and Rays Adjusting the Rays Setting Hole Sewing Previewing the Sewing Image Transferring the Data to a Card Saving the File page 30 page 31 page 32 page 35 page 36 page 37 page 38 page 40 page 41 page 41 page 43 page 45 page 46 page 46 page 47 page 48 page 49 page 49 Please follow these instructions step by step, in the sequence given. If you have to interrupt your training for any reason, feel free to save the file (see Step 18). You will be able to retrieve it later and resume your work. 29 Quick Reference Alphabetic Index
-
 1
1 -
2
-
3
-
4
-
5
-
6
-
7
-
8
-
9
-
10
-
11
-
12
-
13
-
14
-
15
-
16
-
17
-
18
-
19
-
20
-
21
-
22
-
23
-
24
-
25
-
26
-
27
-
28
-
29
-
30
-
31
-
 32
32 -
 33
33 -
 34
34 -
 35
35 -
 36
36 -
 37
37 -
 38
38 -
 39
39 -
 40
40 -
 41
41 -
 42
42 -
43
-
44
-
45
-
46
-
47
-
48
-
49
-
50
-
51
-
52
-
53
-
54
-
55
-
56
-
57
-
58
-
59
-
60
-
61
-
62
-
63
-
64
-
65
-
66
-
67
-
68
-
69
-
70
-
71
-
72
-
73
-
74
-
75
-
76
-
77
-
78
-
79
-
80
-
81
-
82
-
83
-
84
-
85
-
86
-
87
-
88
-
89
-
90
-
91
-
92
-
93
-
94
-
95
-
96
-
97
-
98
-
99
-
100
-
101
-
102
-
103
-
104
-
105
-
106
-
107
-
108
-
109
-
110
-
111
-
112
-
113
-
114
-
115
-
116
-
117
-
118
-
119
-
120
-
121
-
122
-
123
-
124
-
125
-
126
-
127
-
128
-
129
-
130
-
131
-
132
-
133
-
134
-
135
-
136
-
137
-
138
-
139
-
140
-
141
-
142
-
143
-
144
-
145
-
146
-
147
-
148
-
149
-
150
-
151
-
152
-
153
-
154
-
155
-
156
-
157
-
158
-
159
-
160
-
161
-
162
-
163
-
164
-
165
-
166
-
167
-
168
-
169
-
170
-
171
-
172
-
173
-
174
-
175
-
176
-
177
-
178
-
179
-
180
-
181
-
182
-
183
-
184
-
185
-
186
-
187
-
188
-
189
-
190
-
191
-
192
-
193
-
194
-
195
-
196
-
197
-
198
-
199
-
200
-
201
-
202
-
203
-
204
-
205
-
206
-
207
-
208
-
209
-
210
-
211
-
212
-
213
-
214
-
215
-
216
-
217
-
218
-
219
-
220
-
221
-
222
-
223
-
224
-
225
-
226
-
227
-
228
-
229
-
230
-
231
-
232
-
233
-
234
-
235
-
236
-
237
-
238
-
239
-
240
-
241
-
242
-
243
-
244
-
245
-
246
-
247
-
248
-
249
-
250
-
251
-
252
-
253
-
254
-
255
-
256
-
257
-
258
-
259
-
260
-
261
-
262
-
263
-
264
-
265
-
266
-
267
-
268
-
269
-
270
-
271
-
272
-
273
-
274
 |
 |