Epson 2200 Service Manual - Page 7

Adjustment, Maintenance, APPENDIX - stylus photo print head

Page 7 highlights

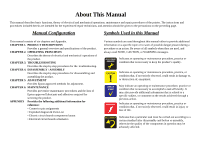
4.2.6 Removing the Paper Eject Roller B 144 4.2.7 Removing the Printhead 146 4.2.8 Removing the Carriage Guide Shaft B 149 4.2.9 Removing the Carriage Guide Shaft A and Carriage Unit 152 4.2.10 Removing the Ink System Unit 158 4.2.11 Removing the Release Lever Shaft 159 4.2.12 Removing the Sensors 161 4.2.13 Removing the Motors 168 4.2.14 Removing the DE Unit and ASF/Pump Motor 171 4.2.15 Removing the PF Roller 175 4.2.16 Removing the Paper Eject Roller Shaft A 179 4.2.17 Removing the PF Roller Support 181 4.2.18 Disassembling the Cutter Unit 182 4.2.19 Fitting the Protective Materials 186 Chapter 5 Adjustment 5.1 Adjustment Items and Overview 188 5.1.1 Servicing Adjustment Item List 188 5.1.2 Priority of Adjustment Items 193 5.1.3 Replacement Part-Based Adjustment Priorities 194 5.1.4 Required Jigs, Tools and Like 196 5.2 Adjustments 197 5.2.1 Servicing Program Usage Outline 197 5.2.2 Head ID Input Function 199 5.2.3 CR motor drive torque dispersion measurement 199 5.2.4 PG Adjustment 200 5.2.5 Head Angular Adjustment 204 5.2.6 CR Tooth Skip Prevention Mechanism Adjustment 206 5.2.7 PF Adjustment 206 5.2.8 PW Sensor Adjustment 207 5.2.9 Bi-D Adjustment 208 5.2.10 Pixel Shift Adjustment 209 5.2.11 Cut Position Adjustment 210 5.2.12 USB ID Input 210 5.2.13 IEEE-1394 ID Input 211 5.2.14 First dot position adjsutment (Left/Right Margin Adjustment 211 5.2.15 ..... A3+ Photo Quality Ink Jet Paper 2 Print Pattern Printing Function 212 5.2.16 A4 Plain Paper print check pattern 213 Chapter 6 Maintenance 6.1 Overview 215 6.1.1 ROM Replacement 215 6.1.2 Cleaning 215 6.1.3 Service Maintenance 216 6.1.4 Lubrication 217 Chapter 7 APPENDIX 7.1 Connector Summary 227 7.1.1 Connectors and Pin Layouts 227 7.1.2 EEPROM Address Map 231 7.2 Exploded Diagram 236 7.3 Parts List for EPSON Stylus Photo 2100 248 7.4 Circuit Diagram 253

  • 1
  • 2
  • 3
  • 4
  • 5
  • 6
  • 7
  • 8
  • 9
  • 10
  • 11
  • 12
  • 13
  • 14
  • 15
  • 16
  • 17
  • 18
  • 19
  • 20
  • 21
  • 22
  • 23
  • 24
  • 25
  • 26
  • 27
  • 28
  • 29
  • 30
  • 31
  • 32
  • 33
  • 34
  • 35
  • 36
  • 37
  • 38
  • 39
  • 40
  • 41
  • 42
  • 43
  • 44
  • 45
  • 46
  • 47
  • 48
  • 49
  • 50
  • 51
  • 52
  • 53
  • 54
  • 55
  • 56
  • 57
  • 58
  • 59
  • 60
  • 61
  • 62
  • 63
  • 64
  • 65
  • 66
  • 67
  • 68
  • 69
  • 70
  • 71
  • 72
  • 73
  • 74
  • 75
  • 76
  • 77
  • 78
  • 79
  • 80
  • 81
  • 82
  • 83
  • 84
  • 85
  • 86
  • 87
  • 88
  • 89
  • 90
  • 91
  • 92
  • 93
  • 94
  • 95
  • 96
  • 97
  • 98
  • 99
  • 100
  • 101
  • 102
  • 103
  • 104
  • 105
  • 106
  • 107
  • 108
  • 109
  • 110
  • 111
  • 112
  • 113
  • 114
  • 115
  • 116
  • 117
  • 118
  • 119
  • 120
  • 121
  • 122
  • 123
  • 124
  • 125
  • 126
  • 127
  • 128
  • 129
  • 130
  • 131
  • 132
  • 133
  • 134
  • 135
  • 136
  • 137
  • 138
  • 139
  • 140
  • 141
  • 142
  • 143
  • 144
  • 145
  • 146
  • 147
  • 148
  • 149
  • 150
  • 151
  • 152
  • 153
  • 154
  • 155
  • 156
  • 157
  • 158
  • 159
  • 160
  • 161
  • 162
  • 163
  • 164
  • 165
  • 166
  • 167
  • 168
  • 169
  • 170
  • 171
  • 172
  • 173
  • 174
  • 175
  • 176
  • 177
  • 178
  • 179
  • 180
  • 181
  • 182
  • 183
  • 184
  • 185
  • 186
  • 187
  • 188
  • 189
  • 190
  • 191
  • 192
  • 193
  • 194
  • 195
  • 196
  • 197
  • 198
  • 199
  • 200
  • 201
  • 202
  • 203
  • 204
  • 205
  • 206
  • 207
  • 208
  • 209
  • 210
  • 211
  • 212
  • 213
  • 214
  • 215
  • 216
  • 217
  • 218
  • 219
  • 220
  • 221
  • 222
  • 223
  • 224
  • 225
  • 226
  • 227
  • 228
  • 229
  • 230
  • 231
  • 232
  • 233
  • 234
  • 235
  • 236
  • 237
  • 238
  • 239
  • 240
  • 241
  • 242
  • 243
  • 244
  • 245
  • 246
  • 247
  • 248
  • 249
  • 250
  • 251
  • 252
  • 253
  • 254
  • 255
  • 256
  • 257
  • 258

4.2.6 Removing the Paper Eject Roller B
.........................................................
144
4.2.7 Removing the Printhead
..........................................................................
146
4.2.8 Removing the Carriage Guide Shaft B
....................................................
149
4.2.9 Removing the Carriage Guide Shaft A and Carriage Unit
......................
152
4.2.10 Removing the Ink System Unit
.............................................................
158
4.2.11 Removing the Release Lever Shaft
.......................................................
159
4.2.12 Removing the Sensors
...........................................................................
161
4.2.13 Removing the Motors
............................................................................
168
4.2.14 Removing the DE Unit and ASF/Pump Motor
......................................
171
4.2.15 Removing the PF Roller
........................................................................
175
4.2.16 Removing the Paper Eject Roller Shaft A
.............................................
179
4.2.17 Removing the PF Roller Support
..........................................................
181
4.2.18 Disassembling the Cutter Unit
...............................................................
182
4.2.19 Fitting the Protective Materials
.............................................................
186
Chapter 5 Adjustment
5.1 Adjustment Items and Overview
188
5.1.1 Servicing Adjustment Item List
...............................................................
188
5.1.2 Priority of Adjustment Items
...................................................................
193
5.1.3 Replacement Part-Based Adjustment Priorities
......................................
194
5.1.4 Required Jigs, Tools and Like
.................................................................
196
5.2 Adjustments
197
5.2.1 Servicing Program Usage Outline
...........................................................
197
5.2.2 Head ID Input Function
...........................................................................
199
5.2.3 CR motor drive torque dispersion measurement
.....................................
199
5.2.4 PG Adjustment
........................................................................................
200
5.2.5 Head Angular Adjustment
.......................................................................
204
5.2.6 CR Tooth Skip Prevention Mechanism Adjustment
...............................
206
5.2.7 PF Adjustment
.........................................................................................
206
5.2.8 PW Sensor Adjustment
............................................................................
207
5.2.9 Bi-D Adjustment
.....................................................................................
208
5.2.10 Pixel Shift Adjustment
..........................................................................
209
5.2.11 Cut Position Adjustment
........................................................................
210
5.2.12 USB ID Input
.........................................................................................
210
5.2.13 IEEE-1394 ID Input
..............................................................................
211
5.2.14 First dot position adjsutment (Left/Right Margin Adjustment)
............
211
5.2.15
.....
A3+ Photo Quality Ink Jet Paper 2 Print Pattern Printing Function
212
5.2.16 A4 Plain Paper print check pattern
........................................................
213
Chapter 6 Maintenance
6.1 Overview
215
6.1.1 ROM Replacement
..................................................................................
215
6.1.2 Cleaning
...................................................................................................
215
6.1.3 Service Maintenance
...............................................................................
216
6.1.4 Lubrication
..............................................................................................
217
Chapter 7 APPENDIX
7.1 Connector Summary
227
7.1.1 Connectors and Pin Layouts
....................................................................
227
7.1.2 EEPROM Address Map
..........................................................................
231
7.2 Exploded Diagram
236
7.3 Parts List for EPSON Stylus Photo 2100
248
7.4 Circuit Diagram
253