HP Xw460c HP Insight Control Environment User Guide - Page 39
Creating a rack, All e-Class Enclosures
 |
View all HP Xw460c manuals
Add to My Manuals
Save this manual to your list of manuals |
Page 39 highlights
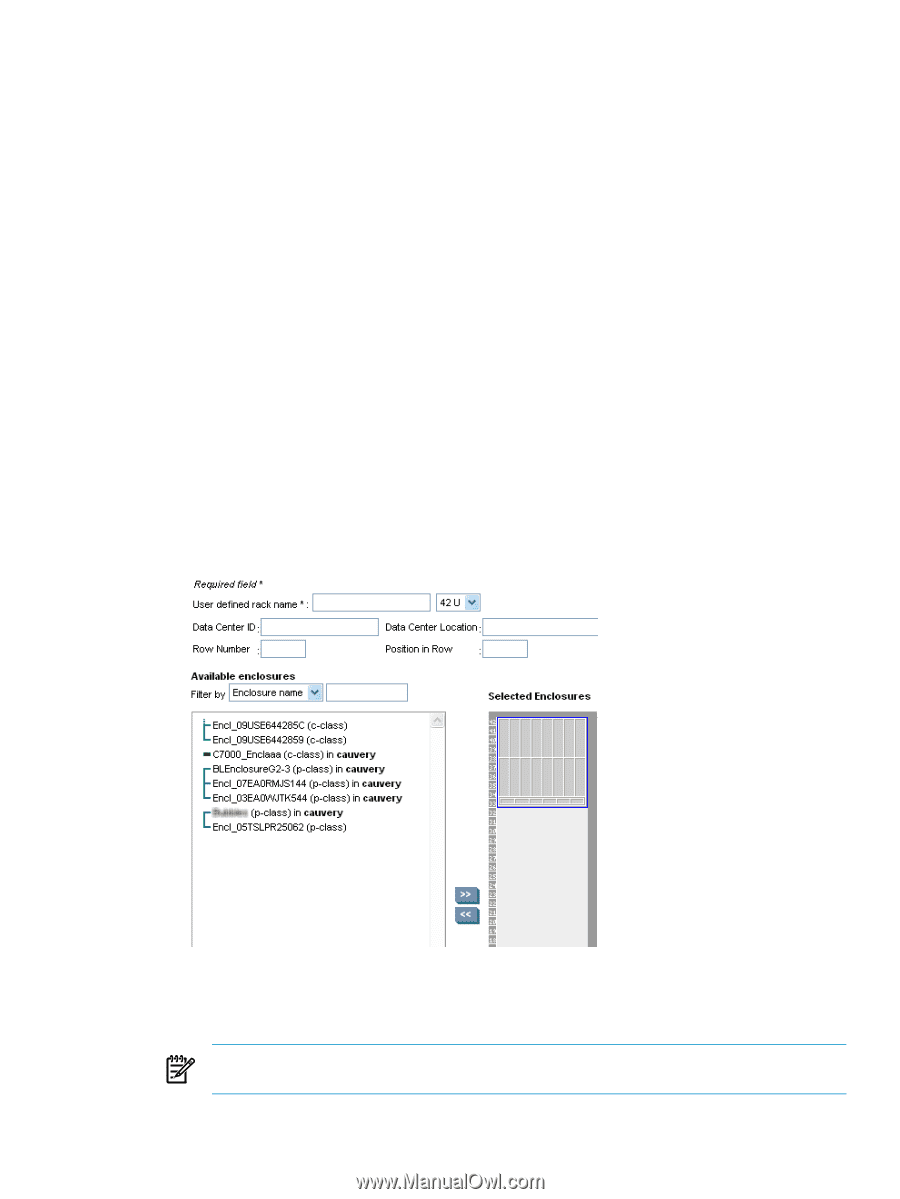
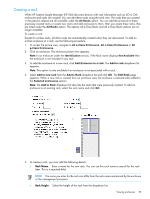
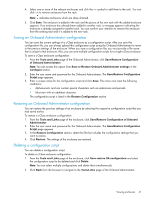
Creating a rack When HP Systems Insight Manager (HP SIM) discovers devices with rack information such as iLO or OA, enclosures and racks are created. You can edit these racks using the rack view. The racks that you created in the previous release are all available under the All Racks option. You can add the enclosure to these previously created racks or create new racks and add enclosures to them. After you create these racks, they are listed under the All Racks option. The options All p-Class Racks and All e-Class Racks options are no longer available. To create a rack: Except for e-Class racks, all other racks are automatically created when they are discovered. To add an e-Class enclosure to a rack, use the following procedure. 1. To access the picture view, navigate to All e-Class Enclosures, All c-Class Enclosures or All p-Class Enclosures. 2. Click an enclosure. The enclosure picture view appears. Note: In an enclosure under the Identification section, if the Rack name displays Not Available then the enclosure is not included in any rack. 3. To add the enclosure to a new rack, click Add Enclosure to a rack. The Add to rack dropdown list appears. Note: This option is only available if an enclosure is not associated with a rack. 4. Select Add to new rack from the Add to Rack dropdown list and click GO. The Edit Rack page appears. When a new rack is created from an enclosure view, the enclosure is automatically added to the Selected enclosures section. Note: The Add to Rack dropdown list also lists the racks that were previously created. To add an enclosure to an existing rack, select the rack name and click GO. 5. To create a rack, you must add the following details: • Rack Name. Enter a name for the new rack. You can use this rack name to search for the rack later. This is a required field. NOTE: The name you enter for the rack can differ from the rack name maintained by the enclosure or the management processor. • Rack Height. Select the height of the rack from the dropdown list. Viewing enclosures 39
-
 1
1 -
2
-
3
-
4
-
5
-
6
-
7
-
8
-
9
-
10
-
11
-
12
-
13
-
14
-
15
-
16
-
17
-
18
-
19
-
20
-
21
-
22
-
23
-
24
-
25
-
26
-
27
-
28
-
29
-
30
-
31
-
32
-
33
-
 34
34 -
 35
35 -
 36
36 -
 37
37 -
 38
38 -
 39
39 -
 40
40 -
 41
41 -
 42
42 -
 43
43 -
 44
44 -
45
-
46
-
47
-
48
-
49
-
50
-
51
-
52
-
53
-
54
-
55
-
56
-
57
-
58
-
59
-
60
-
61
-
62
-
63
-
64
-
65
-
66
-
67
-
68
-
69
-
70
-
71
-
72
-
73
-
74
-
75
-
76
-
77
-
78
-
79
-
80
-
81
-
82
-
83
-
84
-
85
-
86
-
87
-
88
-
89
-
90
-
91
-
92
-
93
-
94
-
95
-
96
-
97
-
98
-
99
-
100
-
101
-
102
-
103
-
104
-
105
-
106
-
107
-
108
-
109
-
110
-
111
-
112
-
113
-
114
-
115
-
116
-
117
-
118
-
119
-
120
-
121
-
122
-
123
-
124
-
125
-
126
-
127
-
128
-
129
-
130
-
131
-
132
-
133
-
134
-
135
-
136
-
137
-
138
-
139
-
140
-
141
-
142
-
143
-
144
-
145
-
146
-
147
-
148
-
149
-
150
-
151
-
152
-
153
-
154
-
155
-
156
-
157
-
158
-
159
-
160
-
161
-
162
-
163
-
164
-
165
-
166
-
167
-
168
-
169
-
170
-
171
-
172
-
173
-
174
-
175
-
176
-
177
-
178
-
179
-
180
-
181
 |
 |