HP Xw460c HP Insight Control Environment User Guide - Page 75
Deploying and securing servers
 |
View all HP Xw460c manuals
Add to My Manuals
Save this manual to your list of manuals |
Page 75 highlights
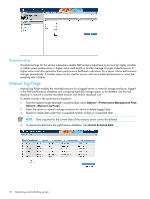
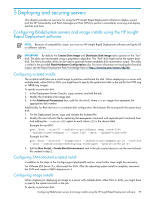
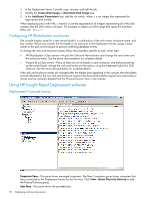
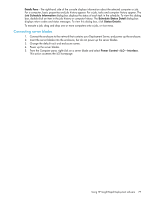
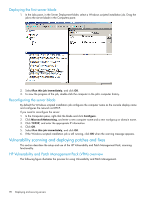
5 Deploying and securing servers This chapter provides an overview for using the HP Insight Rapid Deployment software to deploy servers and the HP Vulnerability and Patch Management Pack (VPM) to perform vulnerability scanning and deploy patches and fixes. Configuring BladeSystem servers and image installs using the HP Insight Rapid Deployment software NOTE: Because of compatibility issues, you must run HP Insight Rapid Deployment software and Ignite-UX on different subnets. IMPORTANT: By default, the Create Disk Image and Distribute Disk Image tasks operate on the "first" disk. The disks are enumerated using a proprietary algorithm. The "first" disk might not be the system boot disk. The Altiris showdisk utility can be used to generate human-readable disk enumeration output. This utility is called in the provided Read Hardware Configuration jobs. For more information on reading the showdisk output, see the Rapid Deployment Pack Knowledge Base at http://www.hp.com/servers/rdp/kb. Configuring scripted installs The scripted install jobs use a small image to partition and format the disk. When deploying to a server with multiple disks, either DAS or SAN, you might have to specify the system boot disk in the job for the NTFS.img or GRUB.img images. To specify a particular disk: 1. In the Deployment Server Console, copy, rename, and edit the job. 2. Modify the Distribute Disk Image task. 3. In the Additional Parameters box, add the -dx switch, where x is an integer that represents the appropriate disk number. Additionally, for Red Hat Linux in a multiple disk configuration, the kickstart file must specify the system boot disk. 1. On the Deployment Server, copy and rename the kickstart file. 2. Modify the new kickstart file by replacing the autopart command with separate part command lines and adding the --ondisk=XXX option to each where XXX is the device label. Example for non-LVM: part /boot --size=75 --ondisk=cciss/c0d0part swap -size=1000 --ondisk=cciss/c0d0part / --size 5120 --grow --ondisk=cciss/c0d0 Example for LVM: part /boot --size=100 --fstype=ext3 --ondisk=cciss/c0d0part pv.01 --size=100 --grow --ondisk=cciss/c0d0volgroup VolGroup00 --pesize=32768 pv.01 3. Edit the Run Script - Create Boot Environment task in the job created above to use the new kickstart file created in step 2. Configuring SAN-attached scripted install In addition to the steps in the Configuring-scripted-installs section, some further steps might be necessary. For VMware ESX Server 3.x, disconnect the SAN. After the operating system install is complete, reconnect the SAN and create a VMFS datastore on it. Configuring image installs When capturing or deploying an image to a server with multiple disks, either DAS or SAN, you might have to specify the system boot disk in the job. To specify a particular disk: Configuring BladeSystem servers and image installs using the HP Insight Rapid Deployment software 75
-
 1
1 -
2
-
3
-
4
-
5
-
6
-
7
-
8
-
9
-
10
-
11
-
12
-
13
-
14
-
15
-
16
-
17
-
18
-
19
-
20
-
21
-
22
-
23
-
24
-
25
-
26
-
27
-
28
-
29
-
30
-
31
-
32
-
33
-
34
-
35
-
36
-
37
-
38
-
39
-
40
-
41
-
42
-
43
-
44
-
45
-
46
-
47
-
48
-
49
-
50
-
51
-
52
-
53
-
54
-
55
-
56
-
57
-
58
-
59
-
60
-
61
-
62
-
63
-
64
-
65
-
66
-
67
-
68
-
69
-
 70
70 -
 71
71 -
 72
72 -
 73
73 -
 74
74 -
 75
75 -
 76
76 -
 77
77 -
 78
78 -
 79
79 -
 80
80 -
81
-
82
-
83
-
84
-
85
-
86
-
87
-
88
-
89
-
90
-
91
-
92
-
93
-
94
-
95
-
96
-
97
-
98
-
99
-
100
-
101
-
102
-
103
-
104
-
105
-
106
-
107
-
108
-
109
-
110
-
111
-
112
-
113
-
114
-
115
-
116
-
117
-
118
-
119
-
120
-
121
-
122
-
123
-
124
-
125
-
126
-
127
-
128
-
129
-
130
-
131
-
132
-
133
-
134
-
135
-
136
-
137
-
138
-
139
-
140
-
141
-
142
-
143
-
144
-
145
-
146
-
147
-
148
-
149
-
150
-
151
-
152
-
153
-
154
-
155
-
156
-
157
-
158
-
159
-
160
-
161
-
162
-
163
-
164
-
165
-
166
-
167
-
168
-
169
-
170
-
171
-
172
-
173
-
174
-
175
-
176
-
177
-
178
-
179
-
180
-
181
 |
 |