Pioneer AVIC-5100NEX Owner's Manual - Page 184
Setting the second camera, input, System settings
 |
View all Pioneer AVIC-5100NEX manuals
Add to My Manuals
Save this manual to your list of manuals |
Page 184 highlights
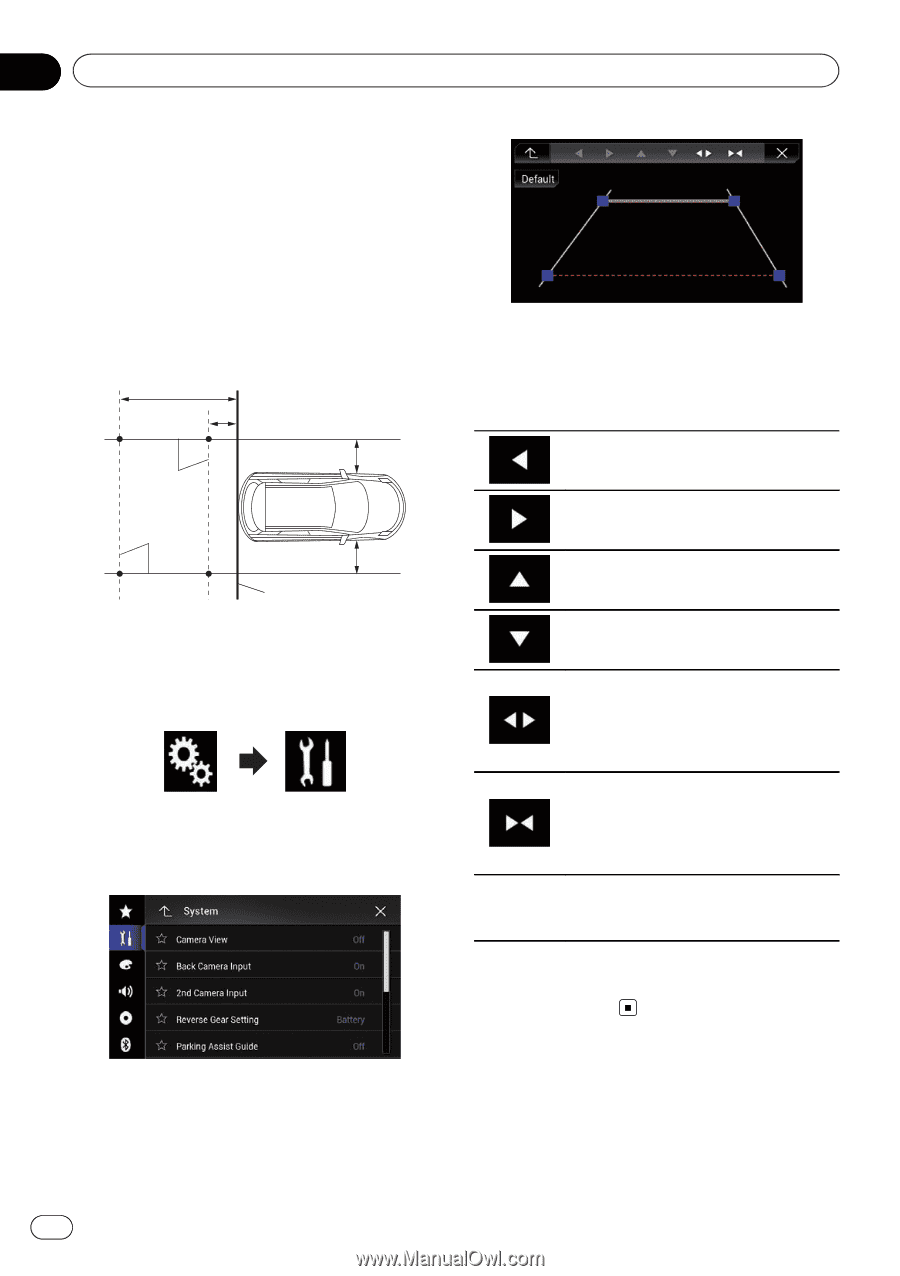
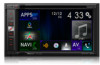
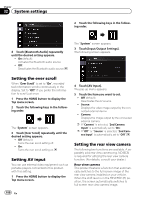
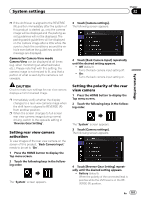
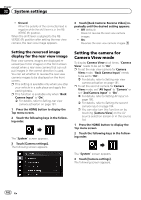
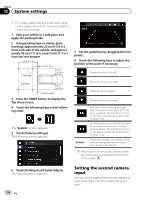
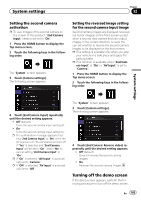
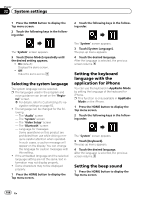
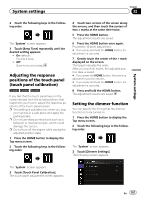
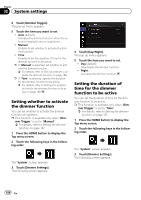
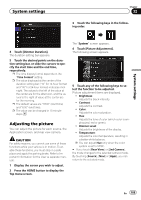
Chapter 32 System settings ! The image quality may deteriorate depending on the usage environment, such as at night or in dark surroundings. 1 Park your vehicle in a safe place and apply the parking brake. 2 Using packing tape or similar, place markings approximately 25 cm (9-7/8 in.) from each side of the vehicle, and approximately 50 cm (1 ft. 8 in.) and 2 m (6 ft. 7 in.) from the rear bumper. 2 m (6 ft. 7 in.) Markings 50 cm (1 ft. 8 in.) 25 cm (9-7/8 in.) Markings 25 cm (9-7/8 in.) Rear bumper 3 Press the HOME button to display the Top menu screen. 4 Touch the following keys in the following order. The "System" screen appears. 5 Touch [Camera settings]. The following screen appears. 7 Set the guidelines by dragging the four points. 8 Touch the following keys to adjust the position of the point if necessary. Moves the point to the left. Moves the point to the right. Moves the point upward. Moves the point downward. Default Extends the line to the left and right from the current center point of the distance guideline. The adjustment points on the lateral coordinates at both ends will also move. Shortens the line from the left and right to the current center point of the distance guideline. The adjustment points on the lateral coordinates at both ends will also move. Resets the settings of the distance and vehicle width guidelines and adjustment points to the default. p When a point is moved, the distance from the initial value is displayed at the bottom of the screen. 6 Touch [Parking Assist Guide Adjust]. The following screen appears. 184 En Setting the second camera input You can view images of the second camera (a front camera etc.) on the screen of this product.
-
 1
1 -
2
-
3
-
4
-
5
-
6
-
7
-
8
-
9
-
10
-
11
-
12
-
13
-
14
-
15
-
16
-
17
-
18
-
19
-
20
-
21
-
22
-
23
-
24
-
25
-
26
-
27
-
28
-
29
-
30
-
31
-
32
-
33
-
34
-
35
-
36
-
37
-
38
-
39
-
40
-
41
-
42
-
43
-
44
-
45
-
46
-
47
-
48
-
49
-
50
-
51
-
52
-
53
-
54
-
55
-
56
-
57
-
58
-
59
-
60
-
61
-
62
-
63
-
64
-
65
-
66
-
67
-
68
-
69
-
70
-
71
-
72
-
73
-
74
-
75
-
76
-
77
-
78
-
79
-
80
-
81
-
82
-
83
-
84
-
85
-
86
-
87
-
88
-
89
-
90
-
91
-
92
-
93
-
94
-
95
-
96
-
97
-
98
-
99
-
100
-
101
-
102
-
103
-
104
-
105
-
106
-
107
-
108
-
109
-
110
-
111
-
112
-
113
-
114
-
115
-
116
-
117
-
118
-
119
-
120
-
121
-
122
-
123
-
124
-
125
-
126
-
127
-
128
-
129
-
130
-
131
-
132
-
133
-
134
-
135
-
136
-
137
-
138
-
139
-
140
-
141
-
142
-
143
-
144
-
145
-
146
-
147
-
148
-
149
-
150
-
151
-
152
-
153
-
154
-
155
-
156
-
157
-
158
-
159
-
160
-
161
-
162
-
163
-
164
-
165
-
166
-
167
-
168
-
169
-
170
-
171
-
172
-
173
-
174
-
175
-
176
-
177
-
178
-
 179
179 -
 180
180 -
 181
181 -
 182
182 -
 183
183 -
 184
184 -
 185
185 -
 186
186 -
 187
187 -
 188
188 -
 189
189 -
190
-
191
-
192
-
193
-
194
-
195
-
196
-
197
-
198
-
199
-
200
-
201
-
202
-
203
-
204
-
205
-
206
-
207
-
208
-
209
-
210
-
211
-
212
-
213
-
214
-
215
-
216
-
217
-
218
-
219
-
220
-
221
-
222
-
223
-
224
-
225
-
226
-
227
-
228
-
229
-
230
-
231
-
232
-
233
-
234
-
235
-
236
-
237
-
238
-
239
-
240
-
241
-
242
-
243
-
244
-
245
-
246
-
247
-
248
-
249
-
250
-
251
-
252
-
253
-
254
-
255
-
256
-
257
-
258
-
259
-
260
-
261
-
262
-
263
-
264
 |
 |