Pioneer AVIC-5100NEX Owner's Manual - Page 205
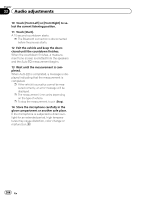
Touch [A-EQ&TA Measurement].
 |
View all Pioneer AVIC-5100NEX manuals
Add to My Manuals
Save this manual to your list of manuals |
Page 205 highlights
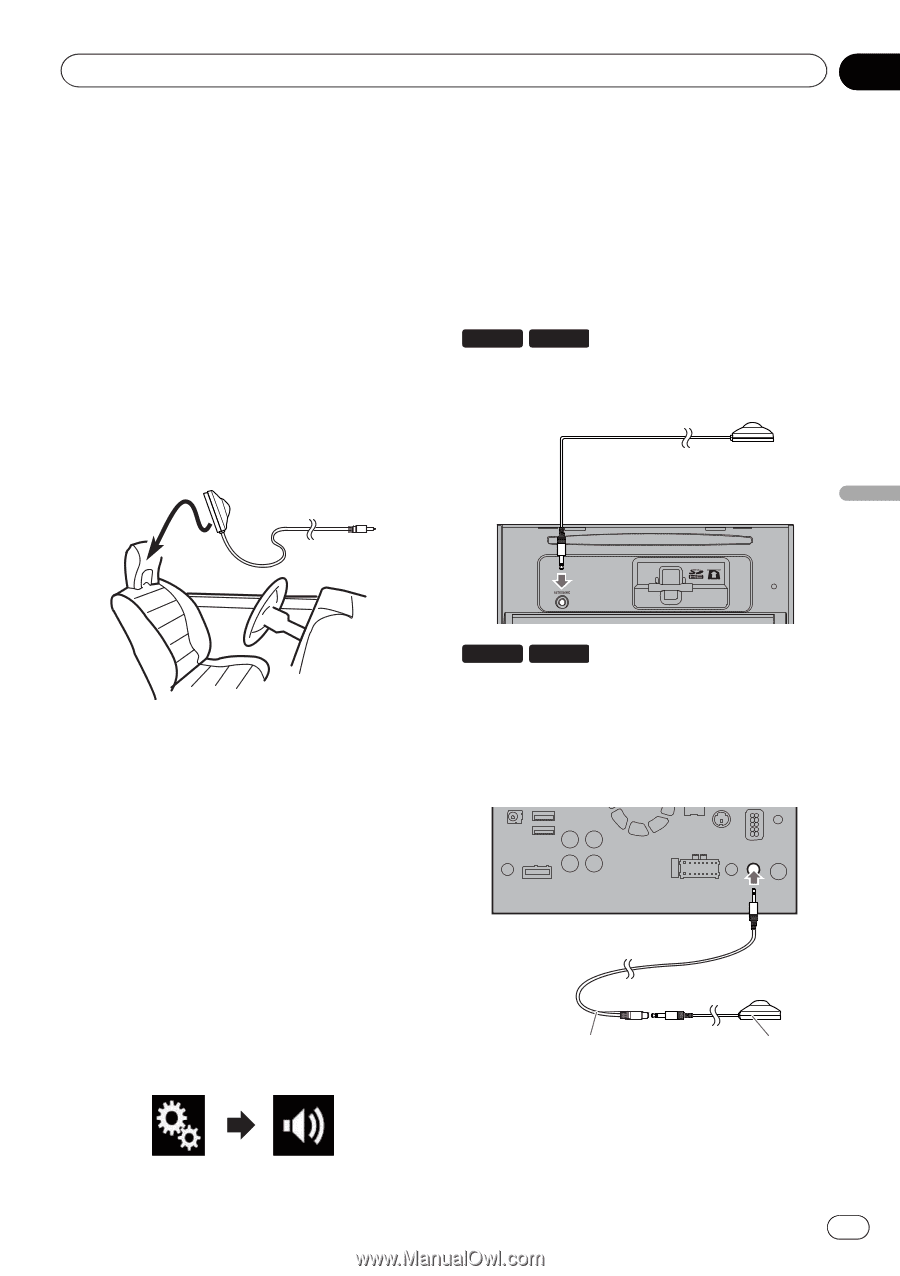
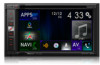
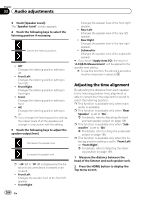
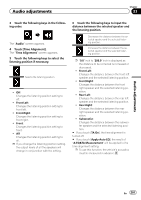
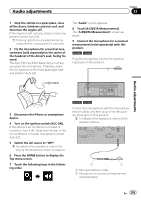
Audio adjustments Chapter 33 1 Stop the vehicle in a quiet place, close all the doors, windows and sun roof, and then turn the engine off. If the engine is left running, engine noise may prevent correct Auto EQ. p If driving restrictions are detected during measurement, measurement is canceled. 2 Fix the microphone for acoustical measurement (sold separately) in the center of the headrest of the driver's seat, facing forward. The Auto EQ may differ depending on where you place the microphone. If desired, place the microphone on the front passenger seat and perform Auto EQ. The "Audio" screen appears. 8 Touch [A-EQ&TA Measurement]. The "A-EQ&TA Measurement" screen appears. 9 Connect the microphone for acoustical measurement (sold separately) with this product. 8100NEX 7100NEX Plug the microphone into the microphone input jack on this product. Audio adjustments 3 Disconnect the iPhone or smartphone device. 4 Turn on the ignition switch (ACC ON). If the vehicle's air conditioner or heater is turned on, turn it off. Noise from the fan in the air conditioner or heater may prevent correct Auto EQ. 5 Switch the AV source to "OFF". = For details of the operations, refer to Displaying the AV operation screen on page 24. 6 Press the HOME button to display the Top menu screen. 7 Touch the following keys in the following order. 6100NEX 5100NEX Connect the microphone with the mini-jack extension cable, and then plug it into the auxiliary input jack on this product. = For details of the operations, refer to the Installation Manual. 1 2 1 Mini-jack extension cable 2 Microphone for acoustical measurement (sold separately) En 205
-
 1
1 -
2
-
3
-
4
-
5
-
6
-
7
-
8
-
9
-
10
-
11
-
12
-
13
-
14
-
15
-
16
-
17
-
18
-
19
-
20
-
21
-
22
-
23
-
24
-
25
-
26
-
27
-
28
-
29
-
30
-
31
-
32
-
33
-
34
-
35
-
36
-
37
-
38
-
39
-
40
-
41
-
42
-
43
-
44
-
45
-
46
-
47
-
48
-
49
-
50
-
51
-
52
-
53
-
54
-
55
-
56
-
57
-
58
-
59
-
60
-
61
-
62
-
63
-
64
-
65
-
66
-
67
-
68
-
69
-
70
-
71
-
72
-
73
-
74
-
75
-
76
-
77
-
78
-
79
-
80
-
81
-
82
-
83
-
84
-
85
-
86
-
87
-
88
-
89
-
90
-
91
-
92
-
93
-
94
-
95
-
96
-
97
-
98
-
99
-
100
-
101
-
102
-
103
-
104
-
105
-
106
-
107
-
108
-
109
-
110
-
111
-
112
-
113
-
114
-
115
-
116
-
117
-
118
-
119
-
120
-
121
-
122
-
123
-
124
-
125
-
126
-
127
-
128
-
129
-
130
-
131
-
132
-
133
-
134
-
135
-
136
-
137
-
138
-
139
-
140
-
141
-
142
-
143
-
144
-
145
-
146
-
147
-
148
-
149
-
150
-
151
-
152
-
153
-
154
-
155
-
156
-
157
-
158
-
159
-
160
-
161
-
162
-
163
-
164
-
165
-
166
-
167
-
168
-
169
-
170
-
171
-
172
-
173
-
174
-
175
-
176
-
177
-
178
-
179
-
180
-
181
-
182
-
183
-
184
-
185
-
186
-
187
-
188
-
189
-
190
-
191
-
192
-
193
-
194
-
195
-
196
-
197
-
198
-
199
-
 200
200 -
 201
201 -
 202
202 -
 203
203 -
 204
204 -
 205
205 -
 206
206 -
 207
207 -
 208
208 -
 209
209 -
 210
210 -
211
-
212
-
213
-
214
-
215
-
216
-
217
-
218
-
219
-
220
-
221
-
222
-
223
-
224
-
225
-
226
-
227
-
228
-
229
-
230
-
231
-
232
-
233
-
234
-
235
-
236
-
237
-
238
-
239
-
240
-
241
-
242
-
243
-
244
-
245
-
246
-
247
-
248
-
249
-
250
-
251
-
252
-
253
-
254
-
255
-
256
-
257
-
258
-
259
-
260
-
261
-
262
-
263
-
264
 |
 |