Pioneer AVIC-5100NEX Owner's Manual - Page 54
Editing the stored alert points, Registering and editing locations and routes
 |
View all Pioneer AVIC-5100NEX manuals
Add to My Manuals
Save this manual to your list of manuals |
Page 54 highlights
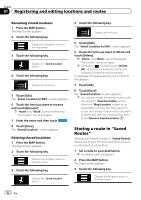
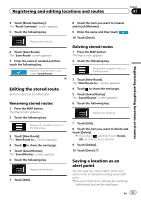
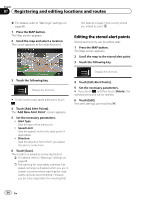
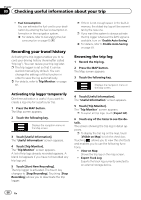
Chapter 07 Registering and editing locations and routes = For details, refer to "Warnings" settings on page 66. 1 Press the MAP button. The Map screen appears. 2 Scroll the map and select a location. The cursor appears at the selected point. this feature is legal in the country where you intend to use it. Editing the stored alert points Stored alert points can be edited later. 1 Press the MAP button. The Map screen appears. 2 Scroll the map to the stored alert point. 3 Touch the following key. Displays the shortcuts. 3 Touch the following key. Displays the shortcuts. # To edit a previously saved alert point, touch . 4 Touch [Add Alert Points]. The "Add New Alert Point" screen appears. 5 Set the necessary parameters. ! Alert Type: Sets the type of the alert point. ! Speed Limit: Sets the speed limit for this alert point (if applicable). ! Direction: Sets the direction from which you expect the alert to come from. 6 Touch [Save]. The location is saved as a new alert point. = For details, refer to "Warnings" settings on page 66. p The warning for road safety cameras (like speed cameras) is disabled when you are in certain countries where warnings for road safety cameras are prohibited. However, you are fully responsible for ensuring that 4 Touch [Edit Alert Points]. 5 Set the necessary parameters. # If you touch and then touch [Delete], the selected alert point will be deleted. 6 Touch [Edit]. The alert settings are modified. 54 En
-
 1
1 -
2
-
3
-
4
-
5
-
6
-
7
-
8
-
9
-
10
-
11
-
12
-
13
-
14
-
15
-
16
-
17
-
18
-
19
-
20
-
21
-
22
-
23
-
24
-
25
-
26
-
27
-
28
-
29
-
30
-
31
-
32
-
33
-
34
-
35
-
36
-
37
-
38
-
39
-
40
-
41
-
42
-
43
-
44
-
45
-
46
-
47
-
48
-
 49
49 -
 50
50 -
 51
51 -
 52
52 -
 53
53 -
 54
54 -
 55
55 -
 56
56 -
 57
57 -
 58
58 -
 59
59 -
60
-
61
-
62
-
63
-
64
-
65
-
66
-
67
-
68
-
69
-
70
-
71
-
72
-
73
-
74
-
75
-
76
-
77
-
78
-
79
-
80
-
81
-
82
-
83
-
84
-
85
-
86
-
87
-
88
-
89
-
90
-
91
-
92
-
93
-
94
-
95
-
96
-
97
-
98
-
99
-
100
-
101
-
102
-
103
-
104
-
105
-
106
-
107
-
108
-
109
-
110
-
111
-
112
-
113
-
114
-
115
-
116
-
117
-
118
-
119
-
120
-
121
-
122
-
123
-
124
-
125
-
126
-
127
-
128
-
129
-
130
-
131
-
132
-
133
-
134
-
135
-
136
-
137
-
138
-
139
-
140
-
141
-
142
-
143
-
144
-
145
-
146
-
147
-
148
-
149
-
150
-
151
-
152
-
153
-
154
-
155
-
156
-
157
-
158
-
159
-
160
-
161
-
162
-
163
-
164
-
165
-
166
-
167
-
168
-
169
-
170
-
171
-
172
-
173
-
174
-
175
-
176
-
177
-
178
-
179
-
180
-
181
-
182
-
183
-
184
-
185
-
186
-
187
-
188
-
189
-
190
-
191
-
192
-
193
-
194
-
195
-
196
-
197
-
198
-
199
-
200
-
201
-
202
-
203
-
204
-
205
-
206
-
207
-
208
-
209
-
210
-
211
-
212
-
213
-
214
-
215
-
216
-
217
-
218
-
219
-
220
-
221
-
222
-
223
-
224
-
225
-
226
-
227
-
228
-
229
-
230
-
231
-
232
-
233
-
234
-
235
-
236
-
237
-
238
-
239
-
240
-
241
-
242
-
243
-
244
-
245
-
246
-
247
-
248
-
249
-
250
-
251
-
252
-
253
-
254
-
255
-
256
-
257
-
258
-
259
-
260
-
261
-
262
-
263
-
264
 |
 |