Pioneer AVIC-5100NEX Owner's Manual - Page 2
for buying this Pioneer product. - touch screen navigation
 |
View all Pioneer AVIC-5100NEX manuals
Add to My Manuals
Save this manual to your list of manuals |
Page 2 highlights
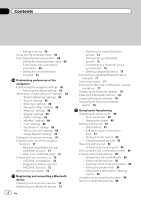
Contents Thank you for buying this Pioneer product. Please read through these instructions so you will know how to operate your model properly. After you have finished reading the instructions, keep this document in a safe place for future reference. Important The screens shown in the examples may differ from actual screens, which may be changed without notice for performance and function improvements. Introduction Manual overview 11 - How to use this manual 11 - Conventions used in this manual 11 - Terms used in this manual 11 Notes on internal memory 12 - Before removing the vehicle battery 12 - Data subject to erasure 12 - Resetting the microprocessor 12 Basic operation Checking part names and functions 13 Remote control 14 Use and care of the remote control 15 - Installing the battery 15 - Using the remote control 15 Protecting your product against theft 16 - Removing the detachable faceplate 16 - Attaching the detachable faceplate 16 Notes on using the LCD panel 16 Adjusting the LCD panel angle 17 Inserting/ejecting/connecting media 17 - Inserting and ejecting a disc 17 - Inserting and ejecting an SD memory card 18 - Connecting and disconnecting an iPod 19 - Plugging and unplugging a USB storage device 19 Startup and termination 19 On first-time startup 19 2 En Regular startup 20 - A message about the map database 20 Turning off the display 20 - When the Application screen is available 20 - When the Application screen is not available 20 How to use the screens 22 - Switching screens using the touch panel keys 22 - Switching screens using the hardware buttons 23 Supported AV source 24 Displaying the AV operation screen 24 - Selecting a front source on the AV source selection screen 25 - Selecting a front source on the source list 25 - Selecting a rear source 25 Turning off the AV source 25 Changing the display order of source icons 25 Changing the display order of source keys 26 Using the touch panel 26 - Using the common touch panel keys 26 - Operating list screens 27 - Operating the time bar 27 - Operating the on-screen keyboard 27 On first-time startup of the navigation system 28 How to use the Navigation menu screen Operating the Navigation menu screen 29 How to use the map How to read the Map screen 31 AV information bar 31 Operating the Map screen 32 - Changing the scale of the map 32
-
 1
1 -
 2
2 -
 3
3 -
 4
4 -
 5
5 -
 6
6 -
 7
7 -
 8
8 -
9
-
10
-
11
-
12
-
13
-
14
-
15
-
16
-
17
-
18
-
19
-
20
-
21
-
22
-
23
-
24
-
25
-
26
-
27
-
28
-
29
-
30
-
31
-
32
-
33
-
34
-
35
-
36
-
37
-
38
-
39
-
40
-
41
-
42
-
43
-
44
-
45
-
46
-
47
-
48
-
49
-
50
-
51
-
52
-
53
-
54
-
55
-
56
-
57
-
58
-
59
-
60
-
61
-
62
-
63
-
64
-
65
-
66
-
67
-
68
-
69
-
70
-
71
-
72
-
73
-
74
-
75
-
76
-
77
-
78
-
79
-
80
-
81
-
82
-
83
-
84
-
85
-
86
-
87
-
88
-
89
-
90
-
91
-
92
-
93
-
94
-
95
-
96
-
97
-
98
-
99
-
100
-
101
-
102
-
103
-
104
-
105
-
106
-
107
-
108
-
109
-
110
-
111
-
112
-
113
-
114
-
115
-
116
-
117
-
118
-
119
-
120
-
121
-
122
-
123
-
124
-
125
-
126
-
127
-
128
-
129
-
130
-
131
-
132
-
133
-
134
-
135
-
136
-
137
-
138
-
139
-
140
-
141
-
142
-
143
-
144
-
145
-
146
-
147
-
148
-
149
-
150
-
151
-
152
-
153
-
154
-
155
-
156
-
157
-
158
-
159
-
160
-
161
-
162
-
163
-
164
-
165
-
166
-
167
-
168
-
169
-
170
-
171
-
172
-
173
-
174
-
175
-
176
-
177
-
178
-
179
-
180
-
181
-
182
-
183
-
184
-
185
-
186
-
187
-
188
-
189
-
190
-
191
-
192
-
193
-
194
-
195
-
196
-
197
-
198
-
199
-
200
-
201
-
202
-
203
-
204
-
205
-
206
-
207
-
208
-
209
-
210
-
211
-
212
-
213
-
214
-
215
-
216
-
217
-
218
-
219
-
220
-
221
-
222
-
223
-
224
-
225
-
226
-
227
-
228
-
229
-
230
-
231
-
232
-
233
-
234
-
235
-
236
-
237
-
238
-
239
-
240
-
241
-
242
-
243
-
244
-
245
-
246
-
247
-
248
-
249
-
250
-
251
-
252
-
253
-
254
-
255
-
256
-
257
-
258
-
259
-
260
-
261
-
262
-
263
-
264
 |
 |