HTC Tilt User Manual - Page 89
Calendar, Create appointments
 |
View all HTC Tilt manuals
Add to My Manuals
Save this manual to your list of manuals |
Page 89 highlights
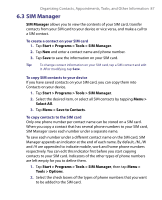
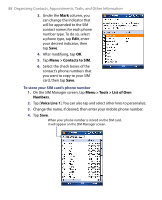
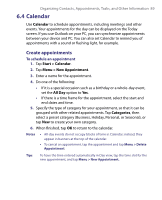
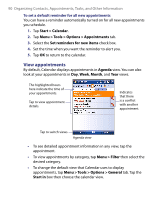
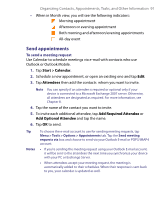
Organizing Contacts, Appointments, Tasks, and Other Information 89 6.4 Calendar Use Calendar to schedule appointments, including meetings and other events. Your appointments for the day can be displayed on the Today screen. If you use Outlook on your PC, you can synchronize appointments between your device and PC. You can also set Calendar to remind you of appointments with a sound or flashing light, for example. Create appointments To schedule an appointment 1. Tap Start > Calendar. 2. Tap Menu > New Appointment. 3. Enter a name for the appointment. 4. Do one of the following: • If it is a special occasion such as a birthday or a whole-day event, set the All Day option to Yes. • If there is a time frame for the appointment, select the start and end dates and time. 5. Specify the type of category for your appointment, so that it can be grouped with other related appointments. Tap Categories, then select a preset category (Business, Holiday, Personal, or Seasonal), or tap New to create your own category. 6. When finished, tap OK to return to the calendar. Notes • All-day events do not occupy blocks of time in Calendar; instead, they appear in banners at the top of the calendar. • To cancel an appointment, tap the appointment and tap Menu > Delete Appointment. Tips To have the time entered automatically in Day view, tap the time slot for the new appointment, and tap Menu > New Appointment.
-
 1
1 -
2
-
3
-
4
-
5
-
6
-
7
-
8
-
9
-
10
-
11
-
12
-
13
-
14
-
15
-
16
-
17
-
18
-
19
-
20
-
21
-
22
-
23
-
24
-
25
-
26
-
27
-
28
-
29
-
30
-
31
-
32
-
33
-
34
-
35
-
36
-
37
-
38
-
39
-
40
-
41
-
42
-
43
-
44
-
45
-
46
-
47
-
48
-
49
-
50
-
51
-
52
-
53
-
54
-
55
-
56
-
57
-
58
-
59
-
60
-
61
-
62
-
63
-
64
-
65
-
66
-
67
-
68
-
69
-
70
-
71
-
72
-
73
-
74
-
75
-
76
-
77
-
78
-
79
-
80
-
81
-
82
-
83
-
 84
84 -
 85
85 -
 86
86 -
 87
87 -
 88
88 -
 89
89 -
 90
90 -
 91
91 -
 92
92 -
 93
93 -
 94
94 -
95
-
96
-
97
-
98
-
99
-
100
-
101
-
102
-
103
-
104
-
105
-
106
-
107
-
108
-
109
-
110
-
111
-
112
-
113
-
114
-
115
-
116
-
117
-
118
-
119
-
120
-
121
-
122
-
123
-
124
-
125
-
126
-
127
-
128
-
129
-
130
-
131
-
132
-
133
-
134
-
135
-
136
-
137
-
138
-
139
-
140
-
141
-
142
-
143
-
144
-
145
-
146
-
147
-
148
-
149
-
150
-
151
-
152
-
153
-
154
-
155
-
156
-
157
-
158
-
159
-
160
-
161
-
162
-
163
-
164
-
165
-
166
-
167
-
168
-
169
-
170
-
171
-
172
-
173
-
174
-
175
-
176
-
177
-
178
-
179
-
180
-
181
-
182
-
183
-
184
-
185
-
186
-
187
-
188
-
189
-
190
-
191
-
192
-
193
-
194
-
195
-
196
-
197
-
198
-
199
-
200
-
201
-
202
-
203
-
204
-
205
-
206
-
207
-
208
-
209
-
210
-
211
-
212
-
213
-
214
-
215
-
216
-
217
-
218
-
219
-
220
-
221
-
222
-
223
-
224
-
225
-
226
-
227
-
228
-
229
-
230
-
231
-
232
-
233
-
234
-
235
-
236
-
237
-
238
-
239
-
240
 |
 |
