HP Designjet L28500 HP Designjet L28500 Printer Series - User's guide - Page 108
Maintain the ink cartridges, Move or store the printer
 |
View all HP Designjet L28500 manuals
Add to My Manuals
Save this manual to your list of manuals |
Page 108 highlights
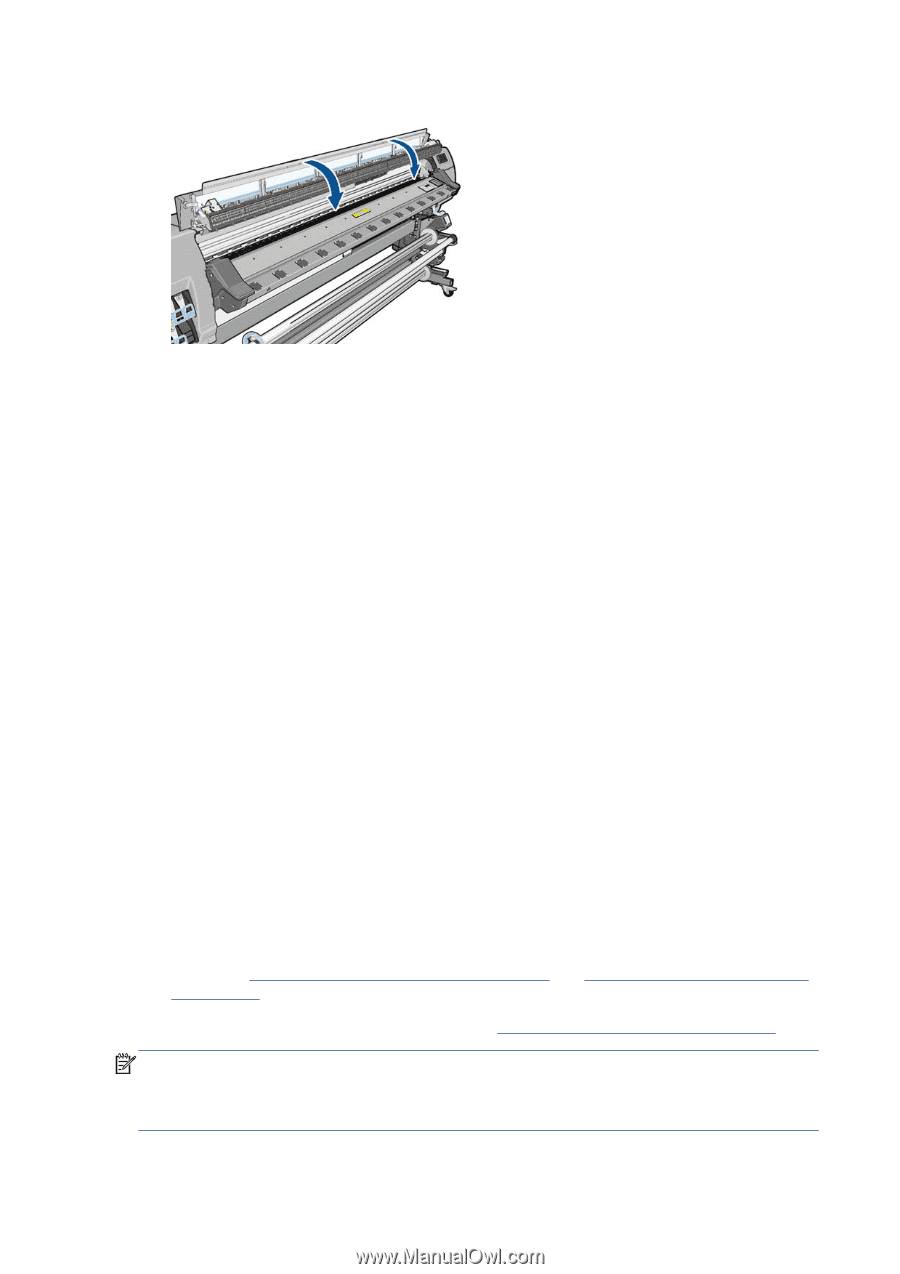
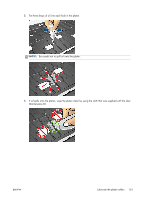
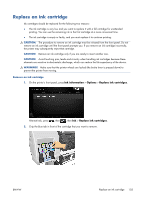
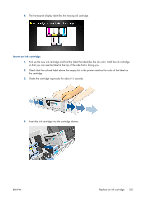
5. Close and lock the printer window. Maintain the ink cartridges During the normal lifetime of a cartridge, no specific maintenance is required. You should replace a cartridge when it has reached its expiration date. See the ink cartridge information on the front panel for the expiration date. Move or store the printer If you need to move your printer or store it for an extended period of time, prepare it correctly to avoid possible damage. 1. Do not remove the ink cartridges, printheads or printhead cleaning cartridge. 2. Make sure that no substrate is loaded. 3. Make sure that the printhead carriage is located in the service station (at the right end of the printer). 4. Make sure that the Ready message appears on the front panel. 5. Turn off the power by using the Power button on the front panel. 6. Also switch off the power switch at the rear of the printer. 7. Disconnect any cables that connect the printer to a network, a computer, or a scanner. 8. If you have a take-up reel installed, remove the take-up reel sensor and cable-housing unit from the foot of the printer stand. When reinstalling the housing unit, make sure that the wheel on the foot of the printer stand is pointing forward. 9. If you intend to turn the printer upside down or on its side, first remove the waste management system (see Replace the ink maintenance kit on page 107 and Replace the printhead cleaning kit on page 118). 10. For correct environmental storage conditions, see Environmental specifications on page 162. NOTE: If the printer or ink cartridges are moved from a cold location to a warm and humid location, water from the atmosphere can condensate on the printer parts and cartridges and can result in ink leaks and printer errors. In this case, HP recommends that you wait at least 3 hours before turning on the printer or installing the ink cartridges, to allow the condensate to evaporate. 102 Chapter 12 Hardware maintenance ENWW
-
 1
1 -
2
-
3
-
4
-
5
-
6
-
7
-
8
-
9
-
10
-
11
-
12
-
13
-
14
-
15
-
16
-
17
-
18
-
19
-
20
-
21
-
22
-
23
-
24
-
25
-
26
-
27
-
28
-
29
-
30
-
31
-
32
-
33
-
34
-
35
-
36
-
37
-
38
-
39
-
40
-
41
-
42
-
43
-
44
-
45
-
46
-
47
-
48
-
49
-
50
-
51
-
52
-
53
-
54
-
55
-
56
-
57
-
58
-
59
-
60
-
61
-
62
-
63
-
64
-
65
-
66
-
67
-
68
-
69
-
70
-
71
-
72
-
73
-
74
-
75
-
76
-
77
-
78
-
79
-
80
-
81
-
82
-
83
-
84
-
85
-
86
-
87
-
88
-
89
-
90
-
91
-
92
-
93
-
94
-
95
-
96
-
97
-
98
-
99
-
100
-
101
-
102
-
 103
103 -
 104
104 -
 105
105 -
 106
106 -
 107
107 -
 108
108 -
 109
109 -
 110
110 -
 111
111 -
 112
112 -
 113
113 -
114
-
115
-
116
-
117
-
118
-
119
-
120
-
121
-
122
-
123
-
124
-
125
-
126
-
127
-
128
-
129
-
130
-
131
-
132
-
133
-
134
-
135
-
136
-
137
-
138
-
139
-
140
-
141
-
142
-
143
-
144
-
145
-
146
-
147
-
148
-
149
-
150
-
151
-
152
-
153
-
154
-
155
-
156
-
157
-
158
-
159
-
160
-
161
-
162
-
163
-
164
-
165
-
166
-
167
-
168
-
169
-
170
-
171
-
172
-
173
-
174
-
175
-
176
 |
 |