HP Designjet L28500 HP Designjet L28500 Printer Series - User's guide - Page 25
Enable AutoSend, Test and Apply, Success, Partial Success, Enable Proxy Server, URL Address
 |
View all HP Designjet L28500 manuals
Add to My Manuals
Save this manual to your list of manuals |
Page 25 highlights
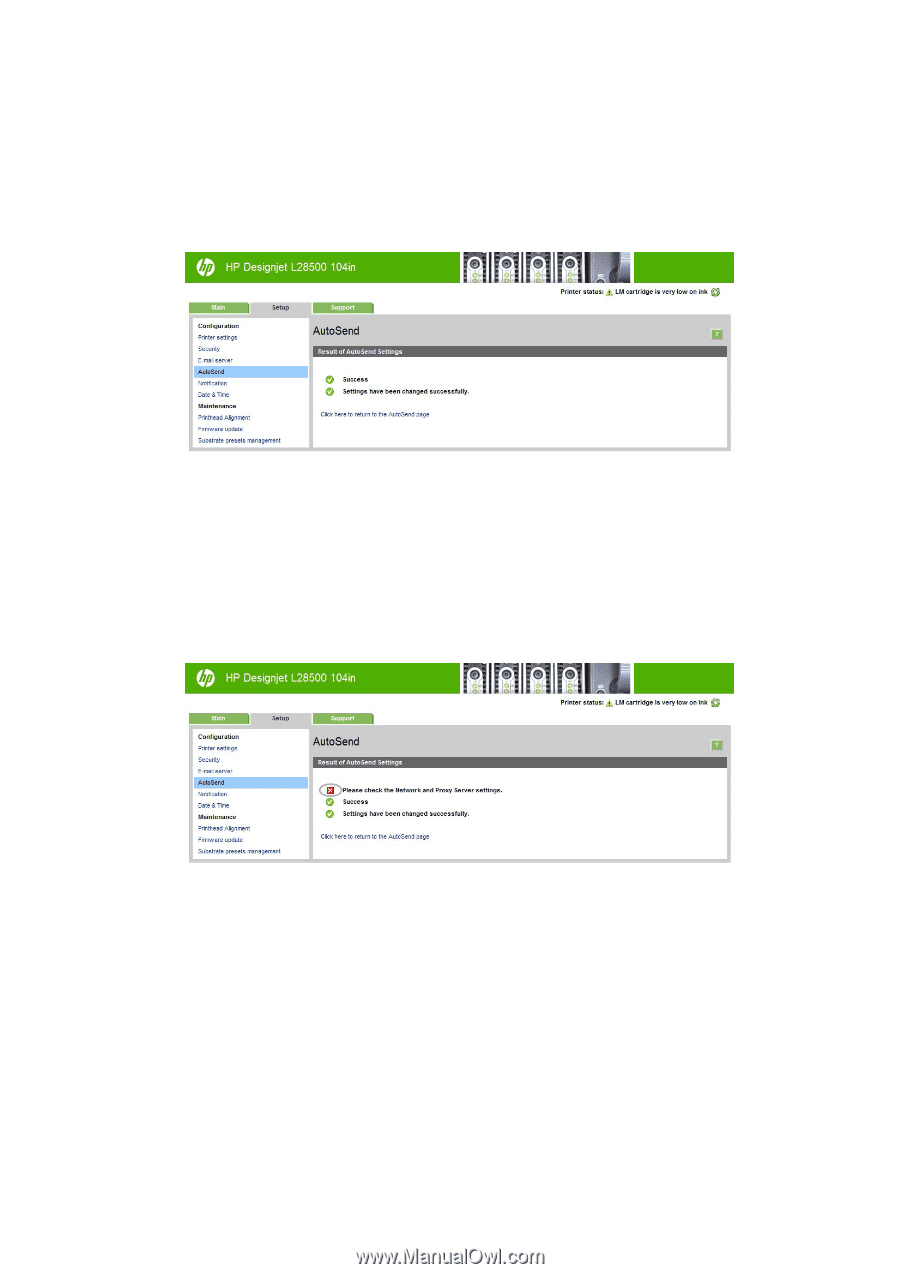
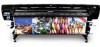
To sign up for the CIP, perform the following configuration steps. 1. Check the Enable AutoSend box. This is the main control for the CIP program. If it is checked you may be participating, depending on the rest of the configuration. If it is unchecked, you are not. 2. Click the Test and Apply button in the lower right corner of the screen. After a while you will see the result of the test in a window like the following: 3. If the first message in the Result of AutoSend Settings window is Success and all items have a green check mark in front of them, as shown above, then the configuration is complete. At this point you can browse to another tab of the Embedded Web Server, or close your browser window. If the message is anything else, for instance Partial Success, and there are red cross marks in front of any items, then you may need to configure a proxy server: an 'intermediary' computer which sits in between your printer and the Internet, and can 'talk' to both. The resulting window may look like this. ENWW Return to the AutoSend page, and perform the following steps: a. Enable (check) the Enable Proxy Server box in the lower part of the window. b. If you know the URL of your proxy server (for example, http://proxy.mycompany.com; ask your network administrator or IT staff), select the URL Address button and enter the URL in the corresponding box. If you know the IP address of your proxy server (for example, 192.0.0.1), select the IP address button and enter the address into the corresponding boxes. c. Enter the proxy port in the Port box; the value is site-specific, but usually it is port 80. d. User name and password may be required for some proxy servers; if so, enter them into the corresponding boxes. If you're not sure, leave these fields empty. For example, the AutoSend tab page might now look like this. Embedded Web Server setup options 19
-
 1
1 -
2
-
3
-
4
-
5
-
6
-
7
-
8
-
9
-
10
-
11
-
12
-
13
-
14
-
15
-
16
-
17
-
18
-
19
-
 20
20 -
 21
21 -
 22
22 -
 23
23 -
 24
24 -
 25
25 -
 26
26 -
 27
27 -
 28
28 -
 29
29 -
 30
30 -
31
-
32
-
33
-
34
-
35
-
36
-
37
-
38
-
39
-
40
-
41
-
42
-
43
-
44
-
45
-
46
-
47
-
48
-
49
-
50
-
51
-
52
-
53
-
54
-
55
-
56
-
57
-
58
-
59
-
60
-
61
-
62
-
63
-
64
-
65
-
66
-
67
-
68
-
69
-
70
-
71
-
72
-
73
-
74
-
75
-
76
-
77
-
78
-
79
-
80
-
81
-
82
-
83
-
84
-
85
-
86
-
87
-
88
-
89
-
90
-
91
-
92
-
93
-
94
-
95
-
96
-
97
-
98
-
99
-
100
-
101
-
102
-
103
-
104
-
105
-
106
-
107
-
108
-
109
-
110
-
111
-
112
-
113
-
114
-
115
-
116
-
117
-
118
-
119
-
120
-
121
-
122
-
123
-
124
-
125
-
126
-
127
-
128
-
129
-
130
-
131
-
132
-
133
-
134
-
135
-
136
-
137
-
138
-
139
-
140
-
141
-
142
-
143
-
144
-
145
-
146
-
147
-
148
-
149
-
150
-
151
-
152
-
153
-
154
-
155
-
156
-
157
-
158
-
159
-
160
-
161
-
162
-
163
-
164
-
165
-
166
-
167
-
168
-
169
-
170
-
171
-
172
-
173
-
174
-
175
-
176
 |
 |