HP Designjet L28500 HP Designjet L28500 Printer Series - User's guide - Page 40
Banner, HP Photorealistic, Substrate, Change loaded substrate, Move substrate
 |
View all HP Designjet L28500 manuals
Add to My Manuals
Save this manual to your list of manuals |
Page 40 highlights
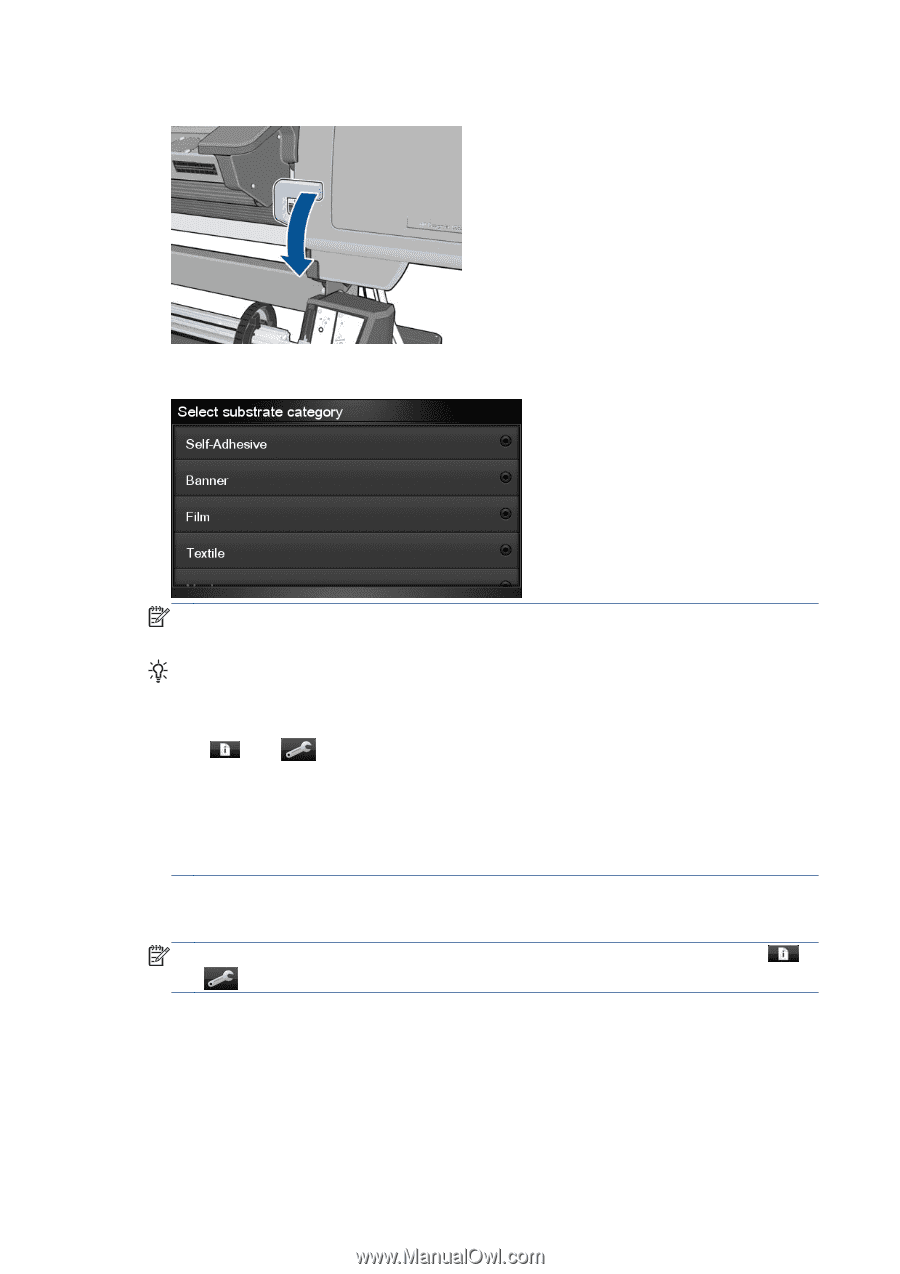
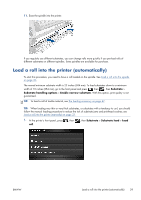
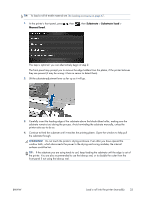
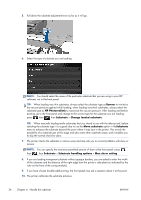
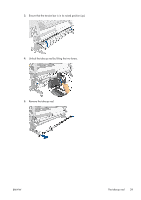
5. Pull down the substrate-adjustment lever as far as it will go. 6. Select the type of substrate you are loading. NOTE: You should select the name of the particular substrate that you are using in your RIP software, not in the front panel. TIP: When loading very thin substrates, always select the substrate type as Banner to minimize the vacuum pressure applied while loading; when loading very thick substrates, always select the substrate type as HP Photorealistic to maximize the vacuum pressure. After loading and before printing, go to the front panel and change to the correct type for the substrate you are loading: press , then , then Substrate > Change loaded substrate. TIP: When manually loading textile substrates that you intend to use with the take-up reel, before selecting the substrate type it is a good idea to use the Move substrate option in theSubstrate menu to advance the substrate beyond the point where it may jam in the printer. This avoids the possibility of a substrate jam at this stage and also some other substrate issues; and it enables you to skip the normal check for skew. 7. The printer checks the substrate in various ways and may ask you to correct problems with skew or tension. NOTE: You can specify the maximum permitted amount of skew at the front panel: press , then , then Substrate > Substrate handling options > Max skew setting. 8. If you are loading transparent substrate without opaque borders, you are asked to enter the width of the substrate and the distance of the right edge from the printer's side plate (as indicated by the ruler on the front of the curing module). 9. If you have chosen double-sided printing, the front panel may ask a question about it at this point. 10. The printer calibrates the substrate advance. 34 Chapter 4 Handle the substrate ENWW
-
 1
1 -
2
-
3
-
4
-
5
-
6
-
7
-
8
-
9
-
10
-
11
-
12
-
13
-
14
-
15
-
16
-
17
-
18
-
19
-
20
-
21
-
22
-
23
-
24
-
25
-
26
-
27
-
28
-
29
-
30
-
31
-
32
-
33
-
34
-
 35
35 -
 36
36 -
 37
37 -
 38
38 -
 39
39 -
 40
40 -
 41
41 -
 42
42 -
 43
43 -
 44
44 -
 45
45 -
46
-
47
-
48
-
49
-
50
-
51
-
52
-
53
-
54
-
55
-
56
-
57
-
58
-
59
-
60
-
61
-
62
-
63
-
64
-
65
-
66
-
67
-
68
-
69
-
70
-
71
-
72
-
73
-
74
-
75
-
76
-
77
-
78
-
79
-
80
-
81
-
82
-
83
-
84
-
85
-
86
-
87
-
88
-
89
-
90
-
91
-
92
-
93
-
94
-
95
-
96
-
97
-
98
-
99
-
100
-
101
-
102
-
103
-
104
-
105
-
106
-
107
-
108
-
109
-
110
-
111
-
112
-
113
-
114
-
115
-
116
-
117
-
118
-
119
-
120
-
121
-
122
-
123
-
124
-
125
-
126
-
127
-
128
-
129
-
130
-
131
-
132
-
133
-
134
-
135
-
136
-
137
-
138
-
139
-
140
-
141
-
142
-
143
-
144
-
145
-
146
-
147
-
148
-
149
-
150
-
151
-
152
-
153
-
154
-
155
-
156
-
157
-
158
-
159
-
160
-
161
-
162
-
163
-
164
-
165
-
166
-
167
-
168
-
169
-
170
-
171
-
172
-
173
-
174
-
175
-
176
 |
 |