HP Designjet L28500 HP Designjet L28500 Printer Series - User's guide - Page 113
Replace the ink maintenance kit, Ink information, Cancel
 |
View all HP Designjet L28500 manuals
Add to My Manuals
Save this manual to your list of manuals |
Page 113 highlights
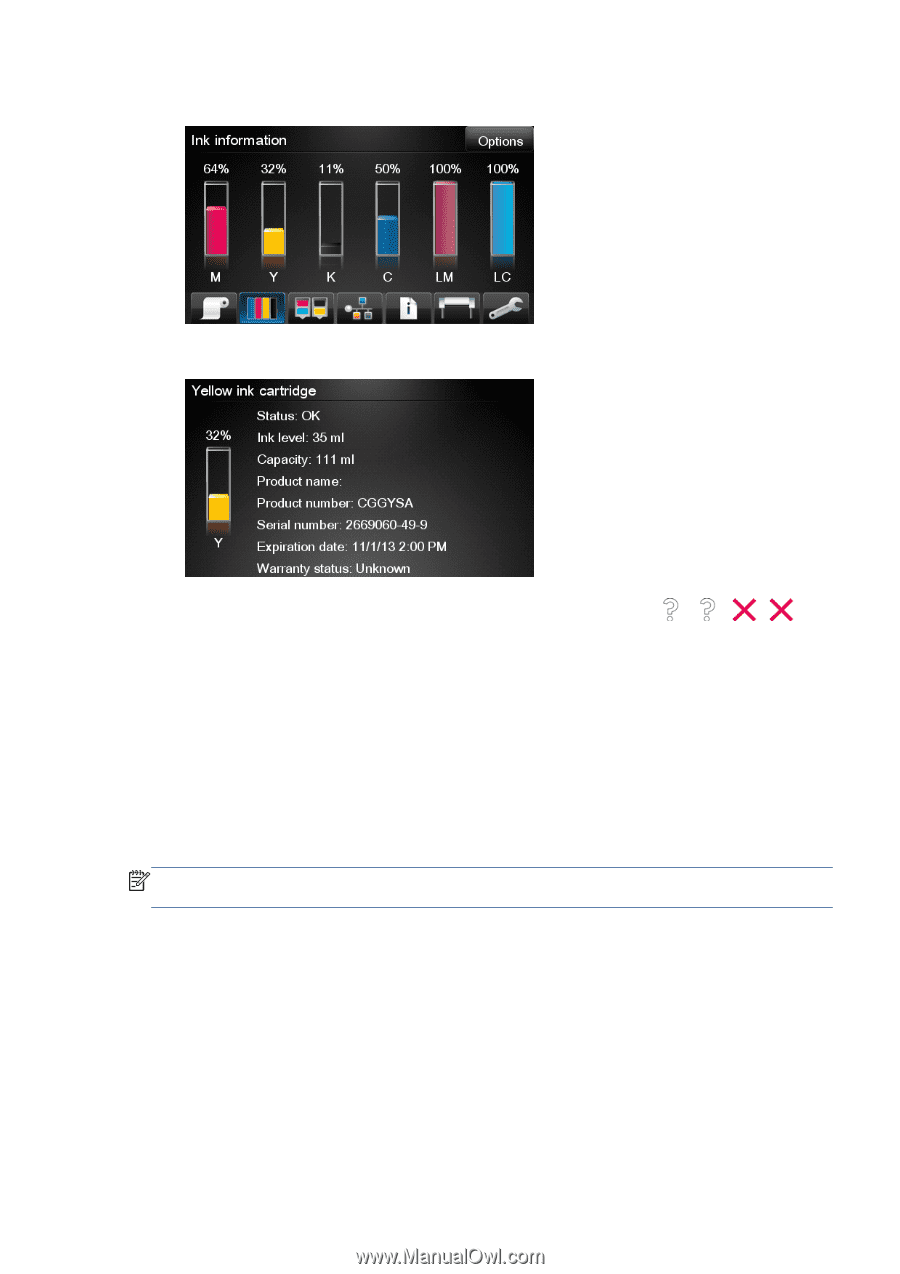
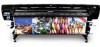
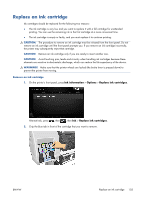
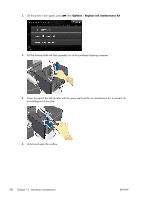
3. On the front panel's home screen, press Ink information to display the following screen. 4. Press any cartridge to see more detailed information. 5. On the right-hand side of the front panel, press the following sequence: , , , . These icons are not illuminated; but, if you press them successfully, the front panel displays a series of warning messages. In response to each message, press Cancel to cancel the process, or OK to confirm that you wish to continue. 6. When you have pressed OK in response to all warning messages, the front panel gives the usual ink cartridge status display, but the cartridge is shown as empty with a warning sign. Replace the ink maintenance kit The ink maintenance kit contains the ink funnel, the ink tube assembly, and the ink filter. The front panel prompts you when these components need to be replaced. NOTE: When you have removed the ink tube assembly, you cannot reuse it: you must install a new assembly. 1. Open the ink maintenance kit and remove the spare ink tube cap, which will be used to cover the end of the old ink tube. ENWW Replace the ink maintenance kit 107
-
 1
1 -
2
-
3
-
4
-
5
-
6
-
7
-
8
-
9
-
10
-
11
-
12
-
13
-
14
-
15
-
16
-
17
-
18
-
19
-
20
-
21
-
22
-
23
-
24
-
25
-
26
-
27
-
28
-
29
-
30
-
31
-
32
-
33
-
34
-
35
-
36
-
37
-
38
-
39
-
40
-
41
-
42
-
43
-
44
-
45
-
46
-
47
-
48
-
49
-
50
-
51
-
52
-
53
-
54
-
55
-
56
-
57
-
58
-
59
-
60
-
61
-
62
-
63
-
64
-
65
-
66
-
67
-
68
-
69
-
70
-
71
-
72
-
73
-
74
-
75
-
76
-
77
-
78
-
79
-
80
-
81
-
82
-
83
-
84
-
85
-
86
-
87
-
88
-
89
-
90
-
91
-
92
-
93
-
94
-
95
-
96
-
97
-
98
-
99
-
100
-
101
-
102
-
103
-
104
-
105
-
106
-
107
-
 108
108 -
 109
109 -
 110
110 -
 111
111 -
 112
112 -
 113
113 -
 114
114 -
 115
115 -
 116
116 -
 117
117 -
 118
118 -
119
-
120
-
121
-
122
-
123
-
124
-
125
-
126
-
127
-
128
-
129
-
130
-
131
-
132
-
133
-
134
-
135
-
136
-
137
-
138
-
139
-
140
-
141
-
142
-
143
-
144
-
145
-
146
-
147
-
148
-
149
-
150
-
151
-
152
-
153
-
154
-
155
-
156
-
157
-
158
-
159
-
160
-
161
-
162
-
163
-
164
-
165
-
166
-
167
-
168
-
169
-
170
-
171
-
172
-
173
-
174
-
175
-
176
 |
 |