HP Designjet L28500 HP Designjet L28500 Printer Series - User's guide - Page 50
Take-up reel has been successfully installed, The cutter is disabled when the take-up reel is in use.
 |
View all HP Designjet L28500 manuals
Add to My Manuals
Save this manual to your list of manuals |
Page 50 highlights
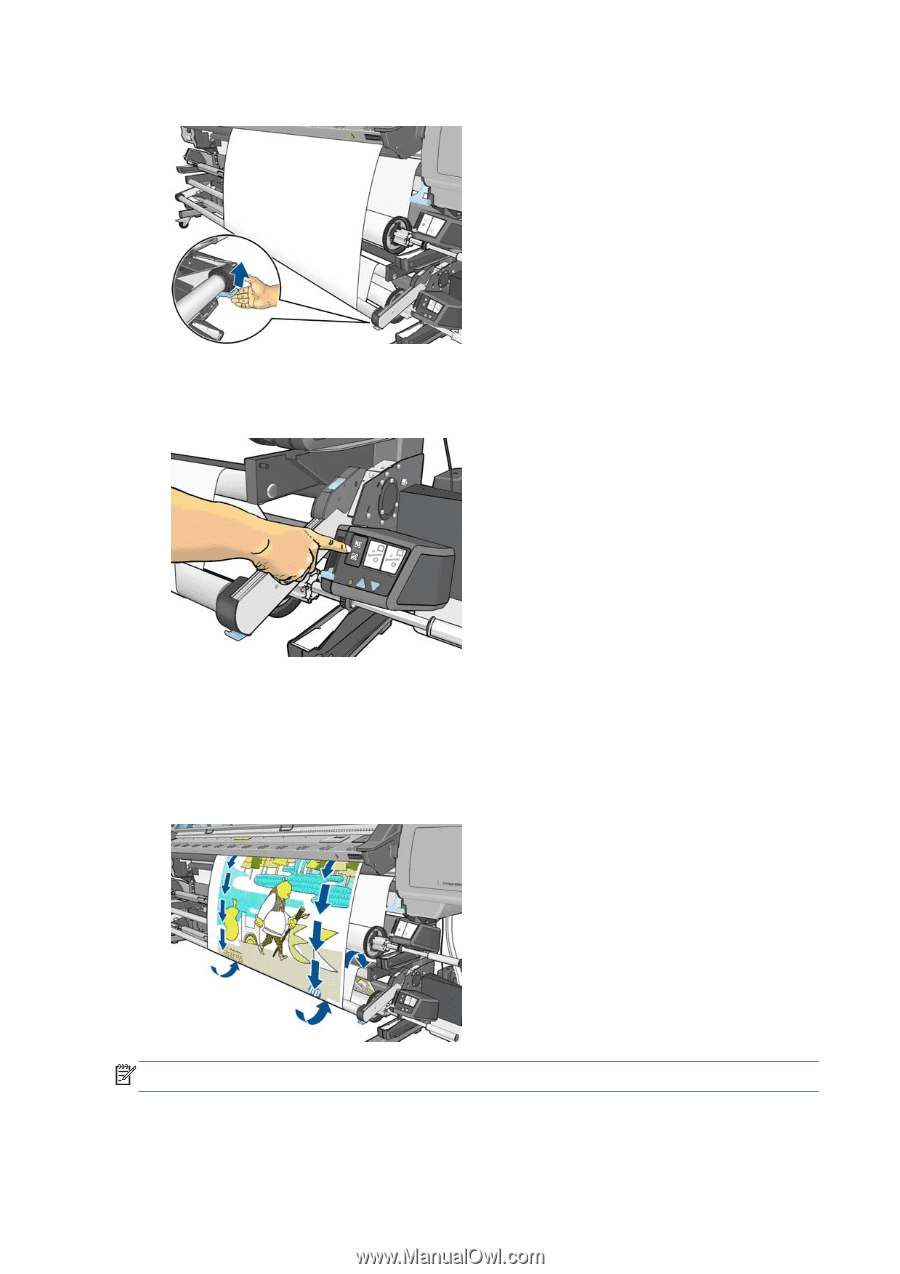
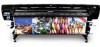
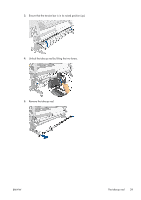
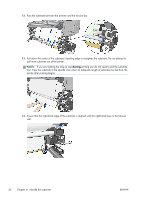
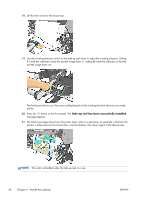
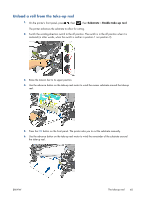
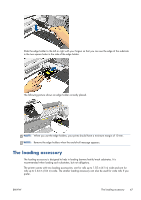
18. Lift the lever to lower the tension bar. 19. Use the winding-direction switch on the take-up reel motor to select the winding direction. Setting 1 winds the substrate so that the printed image faces in. Setting 2 winds the substrate so that the printed image faces out. The front panel shows you the correct setting based on the winding-direction decision you made earlier. 20. Press the OK button on the front panel. The Take-up reel has been successfully installed message appears. 21. The following image shows how the printer looks when it is operating. As substrate is fed from the printer, it drops down to the tension bar, over the diverter, then down again to the take-up reel. NOTE: The cutter is disabled when the take-up reel is in use. 44 Chapter 4 Handle the substrate ENWW
-
 1
1 -
2
-
3
-
4
-
5
-
6
-
7
-
8
-
9
-
10
-
11
-
12
-
13
-
14
-
15
-
16
-
17
-
18
-
19
-
20
-
21
-
22
-
23
-
24
-
25
-
26
-
27
-
28
-
29
-
30
-
31
-
32
-
33
-
34
-
35
-
36
-
37
-
38
-
39
-
40
-
41
-
42
-
43
-
44
-
 45
45 -
 46
46 -
 47
47 -
 48
48 -
 49
49 -
 50
50 -
 51
51 -
 52
52 -
 53
53 -
 54
54 -
 55
55 -
56
-
57
-
58
-
59
-
60
-
61
-
62
-
63
-
64
-
65
-
66
-
67
-
68
-
69
-
70
-
71
-
72
-
73
-
74
-
75
-
76
-
77
-
78
-
79
-
80
-
81
-
82
-
83
-
84
-
85
-
86
-
87
-
88
-
89
-
90
-
91
-
92
-
93
-
94
-
95
-
96
-
97
-
98
-
99
-
100
-
101
-
102
-
103
-
104
-
105
-
106
-
107
-
108
-
109
-
110
-
111
-
112
-
113
-
114
-
115
-
116
-
117
-
118
-
119
-
120
-
121
-
122
-
123
-
124
-
125
-
126
-
127
-
128
-
129
-
130
-
131
-
132
-
133
-
134
-
135
-
136
-
137
-
138
-
139
-
140
-
141
-
142
-
143
-
144
-
145
-
146
-
147
-
148
-
149
-
150
-
151
-
152
-
153
-
154
-
155
-
156
-
157
-
158
-
159
-
160
-
161
-
162
-
163
-
164
-
165
-
166
-
167
-
168
-
169
-
170
-
171
-
172
-
173
-
174
-
175
-
176
 |
 |