HP Designjet L28500 HP Designjet L28500 Printer Series - User's guide - Page 97
Clean the electrical connections on a printhead
 |
View all HP Designjet L28500 manuals
Add to My Manuals
Save this manual to your list of manuals |
Page 97 highlights
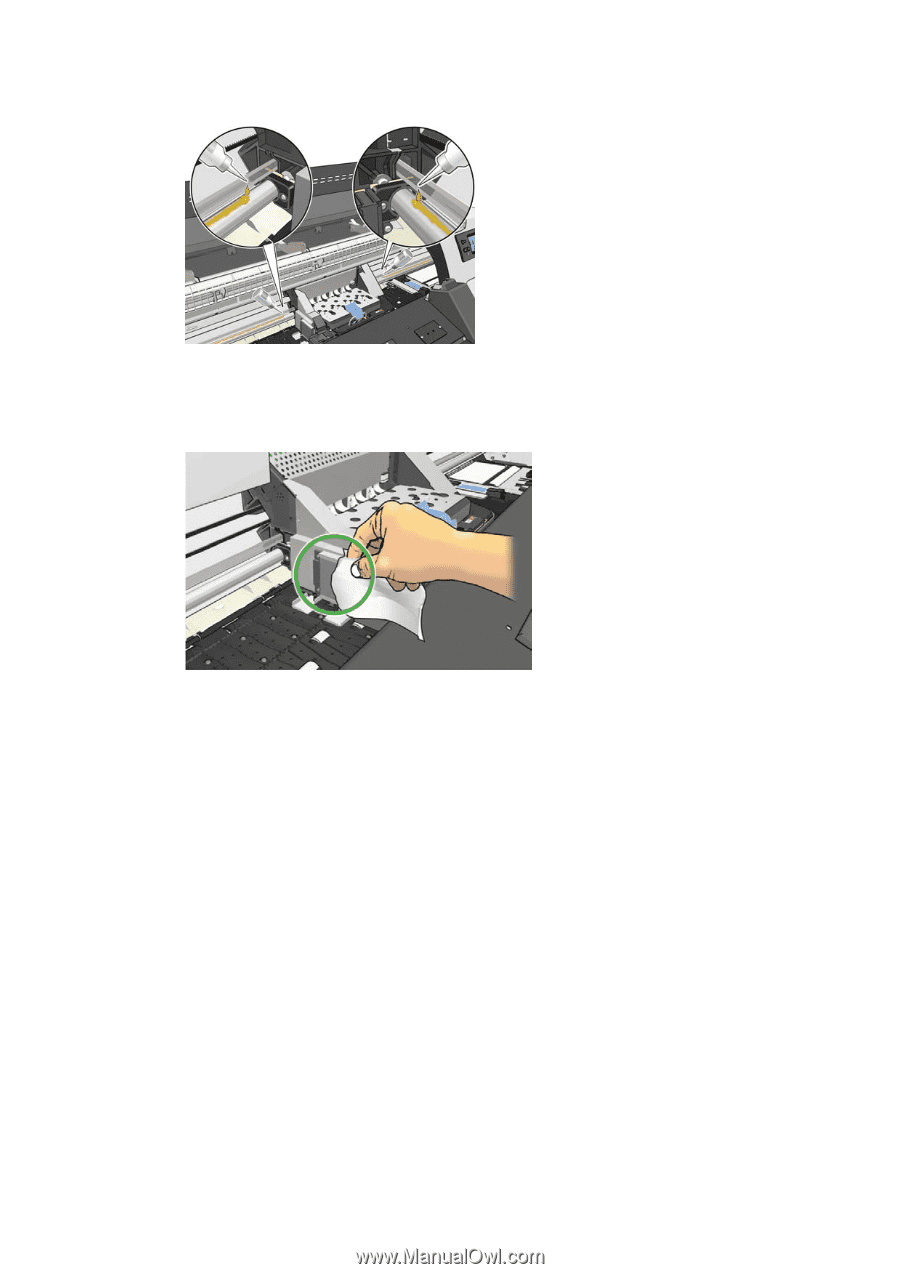
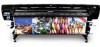
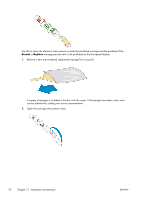
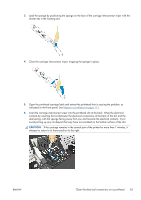
9. Deposit a thin trickle of oil along the rail on both sides of the carriage. 10. Clean the substrate jam reflector using a lint-free cloth dampened with distilled water. If you find dried ink that you cannot remove, try using a lint-free cloth dampened with 95% ethanol. 11. Press OK at the front panel. 12. Close and lock the window. Clean the electrical connections on a printhead It is possible that the printer will not recognize a printhead after it has been installed. This can happen when ink builds up on the electrical connections between the printhead and the printhead carriage. Under these circumstances, HP recommends that you clean the electrical connections on the printhead. However, routine cleaning of the connections when no problems are apparent is not recommended. A carriage interconnect wiper is included with your printer in the User Maintenance Kit. ENWW Clean the electrical connections on a printhead 91
-
 1
1 -
2
-
3
-
4
-
5
-
6
-
7
-
8
-
9
-
10
-
11
-
12
-
13
-
14
-
15
-
16
-
17
-
18
-
19
-
20
-
21
-
22
-
23
-
24
-
25
-
26
-
27
-
28
-
29
-
30
-
31
-
32
-
33
-
34
-
35
-
36
-
37
-
38
-
39
-
40
-
41
-
42
-
43
-
44
-
45
-
46
-
47
-
48
-
49
-
50
-
51
-
52
-
53
-
54
-
55
-
56
-
57
-
58
-
59
-
60
-
61
-
62
-
63
-
64
-
65
-
66
-
67
-
68
-
69
-
70
-
71
-
72
-
73
-
74
-
75
-
76
-
77
-
78
-
79
-
80
-
81
-
82
-
83
-
84
-
85
-
86
-
87
-
88
-
89
-
90
-
91
-
 92
92 -
 93
93 -
 94
94 -
 95
95 -
 96
96 -
 97
97 -
 98
98 -
 99
99 -
 100
100 -
 101
101 -
 102
102 -
103
-
104
-
105
-
106
-
107
-
108
-
109
-
110
-
111
-
112
-
113
-
114
-
115
-
116
-
117
-
118
-
119
-
120
-
121
-
122
-
123
-
124
-
125
-
126
-
127
-
128
-
129
-
130
-
131
-
132
-
133
-
134
-
135
-
136
-
137
-
138
-
139
-
140
-
141
-
142
-
143
-
144
-
145
-
146
-
147
-
148
-
149
-
150
-
151
-
152
-
153
-
154
-
155
-
156
-
157
-
158
-
159
-
160
-
161
-
162
-
163
-
164
-
165
-
166
-
167
-
168
-
169
-
170
-
171
-
172
-
173
-
174
-
175
-
176
 |
 |