Sharp MX-M450N Operation Manual - Page 124
Checking, editing, and deleting cover/insert s, Touch the [ LAYOUT] key.
 |
View all Sharp MX-M450N manuals
Add to My Manuals
Save this manual to your list of manuals |
Page 124 highlights
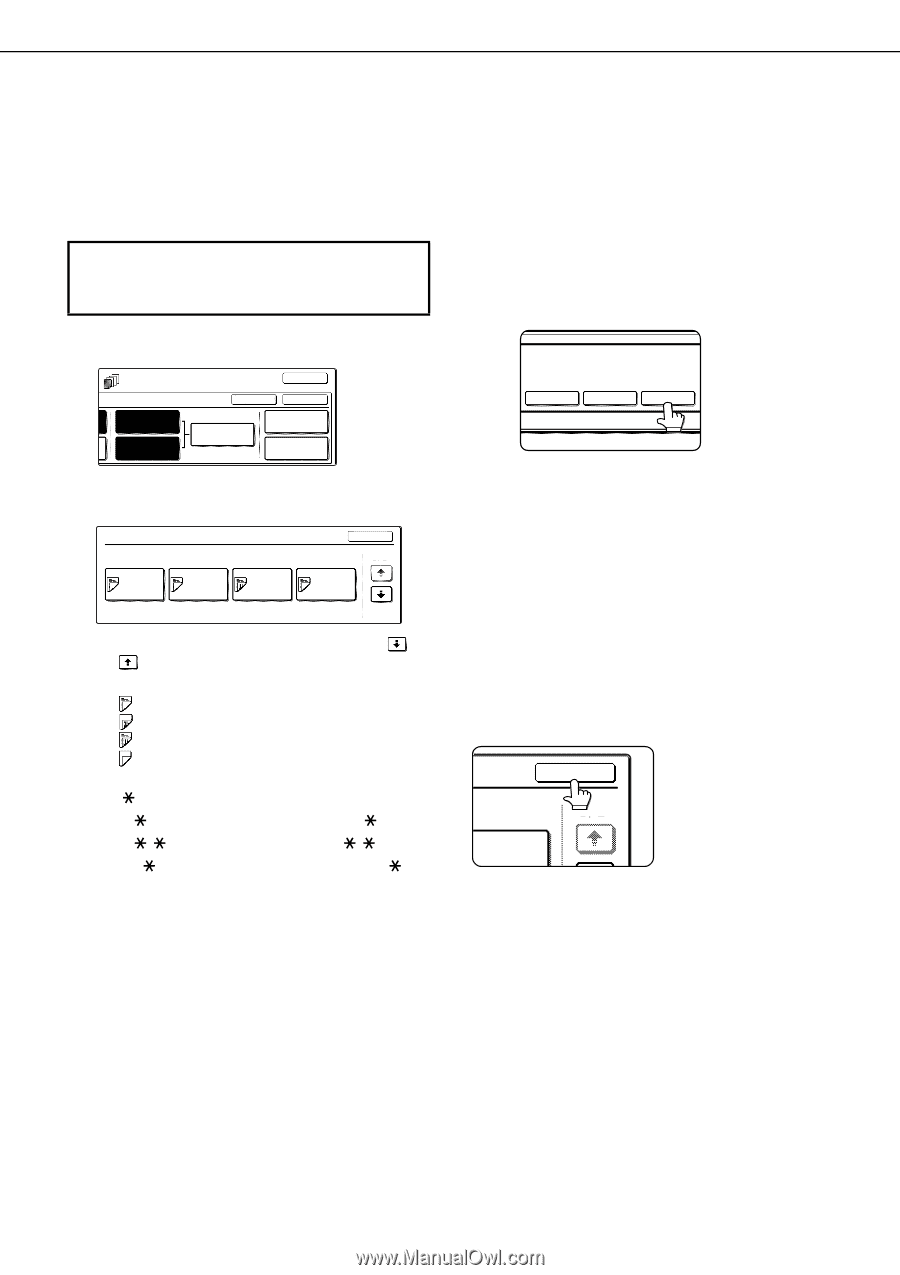
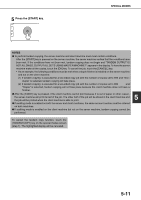
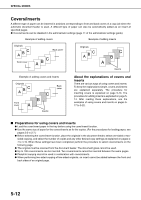
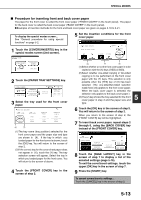
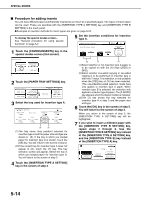
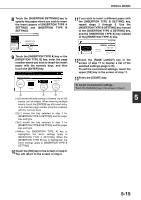
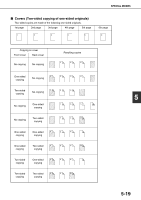
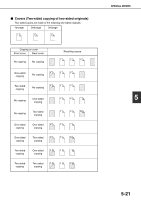
SPECIAL MODES ■ Checking, editing, and deleting cover/insert pages The [PAGE LAYOUT] key appears after covers/inserts settings are configured (the settings of step 1 through step 7 on pages 5-13 and 5-14). The [PAGE LAYOUT] key is used for the following: ● To display the status of covers/inserts pages ● To edit, delete, or add inserted pages To display the [PAGE LAYOUT] key... Configure the settings in step 1 through step 7 on pages 5-13 and 5-14. 1 Touch the [PAGE LAYOUT] key. (3)To edit or delete the insertion page of an insert, touch the key of the insert that you wish to edit or delete in the page layout screen. When the key is touched, the [CANCEL], [DELETE], or [AMEND] keys appear. AMEND THE INSERTION? OK TS INSERTION TYPE A SETTING INSERTION TYPE B SETTING CANCEL OK INSERTION SETTINGS PAPER TRAY SETTINGS PAGE LAYOUT CANCEL DELETE AMEND 2 The set covers/inserts pages are shown. PAGE LAYOUT FRONT COVER INSERTION TYPE A
-
 1
1 -
2
-
3
-
4
-
5
-
6
-
7
-
8
-
9
-
10
-
11
-
12
-
13
-
14
-
15
-
16
-
17
-
18
-
19
-
20
-
21
-
22
-
23
-
24
-
25
-
26
-
27
-
28
-
29
-
30
-
31
-
32
-
33
-
34
-
35
-
36
-
37
-
38
-
39
-
40
-
41
-
42
-
43
-
44
-
45
-
46
-
47
-
48
-
49
-
50
-
51
-
52
-
53
-
54
-
55
-
56
-
57
-
58
-
59
-
60
-
61
-
62
-
63
-
64
-
65
-
66
-
67
-
68
-
69
-
70
-
71
-
72
-
73
-
74
-
75
-
76
-
77
-
78
-
79
-
80
-
81
-
82
-
83
-
84
-
85
-
86
-
87
-
88
-
89
-
90
-
91
-
92
-
93
-
94
-
95
-
96
-
97
-
98
-
99
-
100
-
101
-
102
-
103
-
104
-
105
-
106
-
107
-
108
-
109
-
110
-
111
-
112
-
113
-
114
-
115
-
116
-
117
-
118
-
 119
119 -
 120
120 -
 121
121 -
 122
122 -
 123
123 -
 124
124 -
 125
125 -
 126
126 -
 127
127 -
 128
128 -
 129
129 -
130
-
131
-
132
-
133
-
134
-
135
-
136
-
137
-
138
-
139
-
140
-
141
-
142
-
143
-
144
-
145
-
146
-
147
-
148
-
149
-
150
-
151
-
152
-
153
-
154
-
155
-
156
-
157
-
158
-
159
-
160
-
161
-
162
-
163
-
164
-
165
-
166
-
167
-
168
-
169
-
170
-
171
-
172
-
173
-
174
-
175
-
176
-
177
-
178
-
179
-
180
-
181
-
182
-
183
-
184
-
185
-
186
-
187
-
188
-
189
-
190
-
191
-
192
-
193
-
194
-
195
-
196
-
197
-
198
-
199
-
200
 |
 |