Sharp MX-M450N Operation Manual - Page 164
the file name, folder name, or user name, Enter a 5-digit password with the numeric
 |
View all Sharp MX-M450N manuals
Add to My Manuals
Save this manual to your list of manuals |
Page 164 highlights
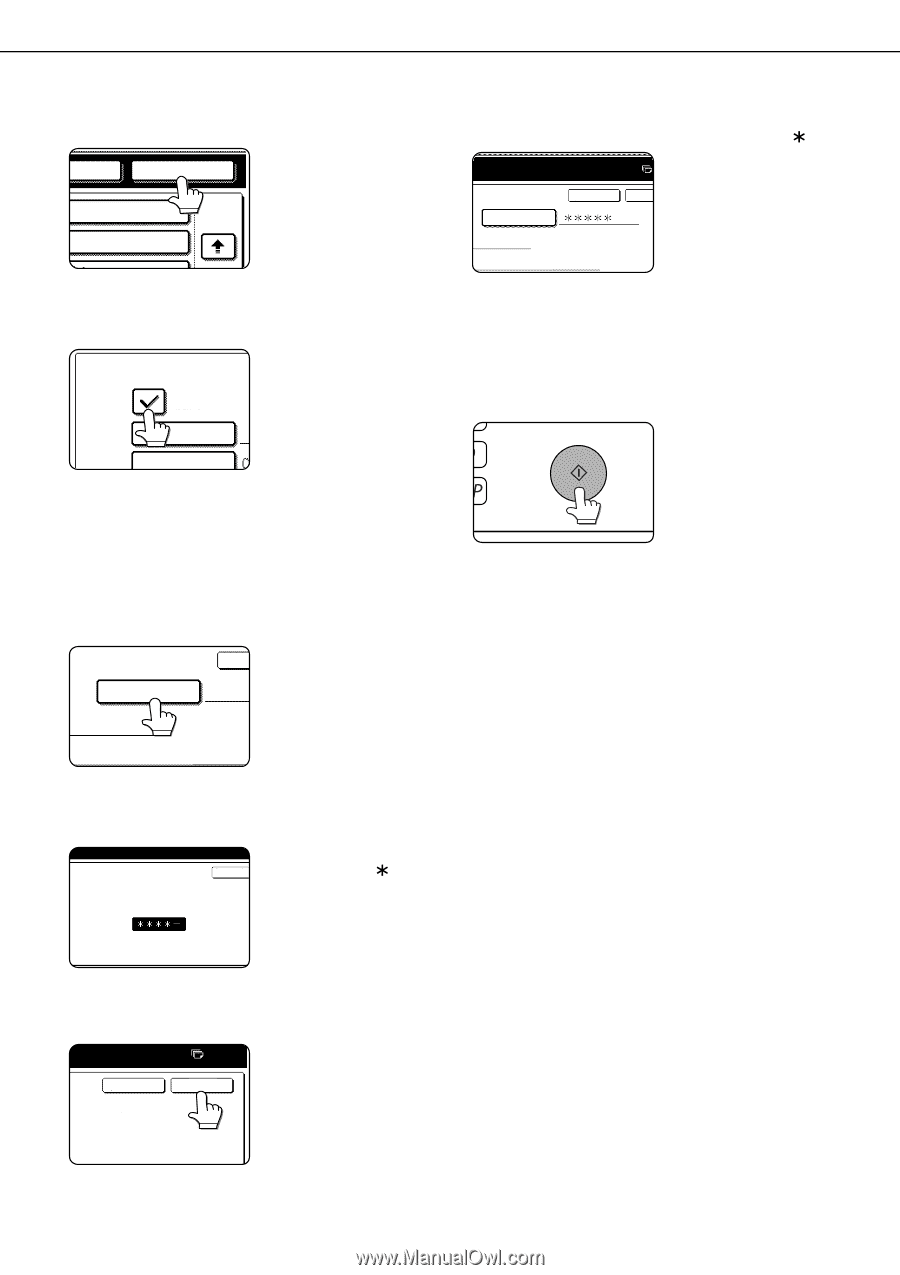
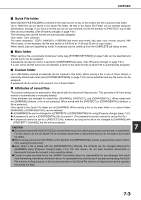
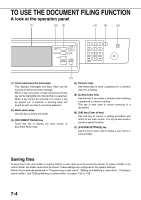
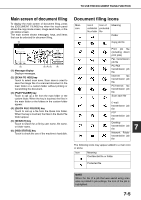
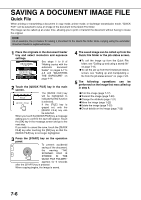
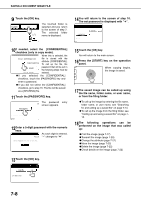
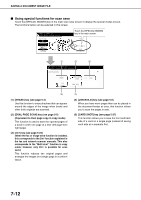
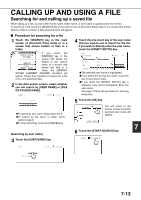
SAVING A DOCUMENT IMAGE FILE 9 Touch the [OK] key. FOLDER OK 2/2 The touched folder is selected and you return to the screen of step 7. The selected folder name is displayed. 14You will return to the screen of step 10. The set password is displayed with " ". PASSWORD CANCEL OK XYYY 10If needed, select the [CONFIDENTIAL] checkbox (only in copy mode). When this is selected, the FILE INFORMATION file is stored with the attribute [CONFIDENTIAL]. CONFIDENTIAL To call up the file, the USER NAME password that will be set in the following steps must be FILE NAME entered. ●If you selected the [CONFIDENTIAL] checkbox, touch the [PASSWORD] key and enter a password. ●If you did not select the [CONFIDENTIAL] checkbox, go to step 16. The file will be saved as a [SHARING] file. 11Touch the [PASSWORD] key. The password CAN screen appears. PASSWORD entry XYYY 12Enter a 5-digit password with the numeric keys. As each digit is entered, CANCEL "-" changes to " ". ENTER PASSWORD VIA THE 10-KEY PAD. 15Touch the [OK] key. You will return to the main screen. 16Press the [START] key on the operation panel. When copying begins, the image is saved. 17The saved image can be called up using the file name, folder name, or user name, or from the filing folder. ●To call up the image by entering the file name, folder name, or user name, see "Searching for and calling up a saved file" on page 7-13. ●To call up the image from the filing folder, see "Calling up and using a saved file" on page 715. 18The following operations can be performed on the image that was called up: ●Print the image (page 7-17) ●Transmit the image (page 7-20) ●Change the attribute (page 7-21) ●Move the image (page 7-22) ●Delete the image (page 7-22) ●Check details on the image (page 7-22) 13Touch the [OK] key. 0 CANCEL OK 10-KEY PAD. 7-8
-
 1
1 -
2
-
3
-
4
-
5
-
6
-
7
-
8
-
9
-
10
-
11
-
12
-
13
-
14
-
15
-
16
-
17
-
18
-
19
-
20
-
21
-
22
-
23
-
24
-
25
-
26
-
27
-
28
-
29
-
30
-
31
-
32
-
33
-
34
-
35
-
36
-
37
-
38
-
39
-
40
-
41
-
42
-
43
-
44
-
45
-
46
-
47
-
48
-
49
-
50
-
51
-
52
-
53
-
54
-
55
-
56
-
57
-
58
-
59
-
60
-
61
-
62
-
63
-
64
-
65
-
66
-
67
-
68
-
69
-
70
-
71
-
72
-
73
-
74
-
75
-
76
-
77
-
78
-
79
-
80
-
81
-
82
-
83
-
84
-
85
-
86
-
87
-
88
-
89
-
90
-
91
-
92
-
93
-
94
-
95
-
96
-
97
-
98
-
99
-
100
-
101
-
102
-
103
-
104
-
105
-
106
-
107
-
108
-
109
-
110
-
111
-
112
-
113
-
114
-
115
-
116
-
117
-
118
-
119
-
120
-
121
-
122
-
123
-
124
-
125
-
126
-
127
-
128
-
129
-
130
-
131
-
132
-
133
-
134
-
135
-
136
-
137
-
138
-
139
-
140
-
141
-
142
-
143
-
144
-
145
-
146
-
147
-
148
-
149
-
150
-
151
-
152
-
153
-
154
-
155
-
156
-
157
-
158
-
 159
159 -
 160
160 -
 161
161 -
 162
162 -
 163
163 -
 164
164 -
 165
165 -
 166
166 -
 167
167 -
 168
168 -
 169
169 -
170
-
171
-
172
-
173
-
174
-
175
-
176
-
177
-
178
-
179
-
180
-
181
-
182
-
183
-
184
-
185
-
186
-
187
-
188
-
189
-
190
-
191
-
192
-
193
-
194
-
195
-
196
-
197
-
198
-
199
-
200
 |
 |