Xerox 8860MFP User Guide - Page 67
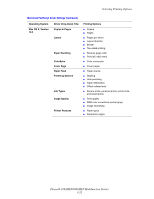
Printing Side Two, 2nd Side, Change setup, Paper Tray Setup, Tray 2 Paper, Tray 3, Paper
 |
UPC - 095205735574
View all Xerox 8860MFP manuals
Add to My Manuals
Save this manual to your list of manuals |
Page 67 highlights
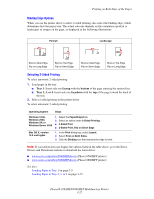
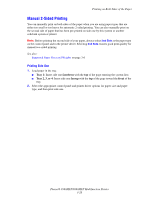
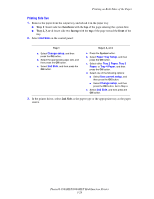
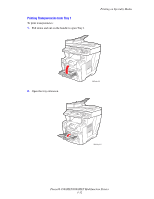
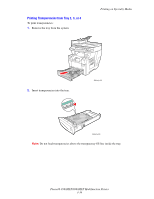
Printing on Both Sides of the Paper Printing Side Two 1. Remove the paper from the output tray and reload it in the paper tray: ■ Tray 1: Insert side two facedown with the top of the page entering the system first. ■ Tray 2, 3, or 4: Insert side two faceup with the top of the page toward the front of the tray. 2. Select 2nd Side on the control panel: Tray 1 a. Select Change setup, and then press the OK button. b. Select the appropriate paper size, and then press the OK button. c. Select 2nd Side, and then press the OK button. Tray 2, 3, or 4 a. Press the System button. b. Select Paper Tray Setup, and then press the OK button. c. Select either Tray 2 Paper, Tray 3 Paper, or Tray 4 Paper, and then press the OK button. d. Select one of the following options: ■ Select Use current setup, and then press the OK button. ■ Select Change setup, and then press the OK button. Go to Step e. e. Select 2nd Side, and then press the OK button. 3. In the printer driver, select 2nd Side as the paper type or the appropriate tray as the paper source. Phaser® 8560MFP/8860MFP Multifunction Printer 3-29
-
 1
1 -
2
-
3
-
4
-
5
-
6
-
7
-
8
-
9
-
10
-
11
-
12
-
13
-
14
-
15
-
16
-
17
-
18
-
19
-
20
-
21
-
22
-
23
-
24
-
25
-
26
-
27
-
28
-
29
-
30
-
31
-
32
-
33
-
34
-
35
-
36
-
37
-
38
-
39
-
40
-
41
-
42
-
43
-
44
-
45
-
46
-
47
-
48
-
49
-
50
-
51
-
52
-
53
-
54
-
55
-
56
-
57
-
58
-
59
-
60
-
61
-
 62
62 -
 63
63 -
 64
64 -
 65
65 -
 66
66 -
 67
67 -
 68
68 -
 69
69 -
 70
70 -
 71
71 -
 72
72 -
73
-
74
-
75
-
76
-
77
-
78
-
79
-
80
-
81
-
82
-
83
-
84
-
85
-
86
-
87
-
88
-
89
-
90
-
91
-
92
-
93
-
94
-
95
-
96
-
97
-
98
-
99
-
100
-
101
-
102
-
103
-
104
-
105
-
106
-
107
-
108
-
109
-
110
-
111
-
112
-
113
-
114
-
115
-
116
-
117
-
118
-
119
-
120
-
121
-
122
-
123
-
124
-
125
-
126
-
127
-
128
-
129
-
130
-
131
-
132
-
133
-
134
-
135
-
136
-
137
-
138
-
139
-
140
-
141
-
142
-
143
-
144
-
145
-
146
-
147
-
148
-
149
-
150
-
151
-
152
-
153
-
154
-
155
-
156
-
157
-
158
-
159
-
160
-
161
-
162
-
163
-
164
-
165
-
166
-
167
-
168
-
169
-
170
-
171
-
172
-
173
-
174
-
175
-
176
-
177
-
178
-
179
-
180
-
181
-
182
-
183
-
184
-
185
-
186
-
187
-
188
-
189
-
190
-
191
-
192
-
193
-
194
-
195
-
196
-
197
-
198
-
199
-
200
-
201
-
202
-
203
-
204
-
205
-
206
-
207
-
208
-
209
-
210
-
211
-
212
-
213
-
214
-
215
-
216
-
217
-
218
-
219
-
220
-
221
-
222
-
223
-
224
-
225
-
226
-
227
-
228
-
229
-
230
-
231
-
232
-
233
-
234
-
235
-
236
-
237
-
238
-
239
-
240
-
241
-
242
-
243
-
244
-
245
-
246
-
247
-
248
-
249
-
250
-
251
-
252
-
253
-
254
-
255
-
256
-
257
-
258
-
259
-
260
-
261
-
262
-
263
-
264
-
265
-
266
-
267
-
268
-
269
-
270
-
271
-
272
-
273
-
274
-
275
-
276
-
277
-
278
-
279
-
280
-
281
 |
 |