Netgear R7300DST User Manual - Page 159
Specify Basic WiFi Settings for the DST Adapter, admin, password, Setup > Wireless Settings
 |
View all Netgear R7300DST manuals
Add to My Manuals
Save this manual to your list of manuals |
Page 159 highlights
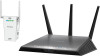
Nighthawk DST AC1900 DST Router and DST Adpater Model R7300DST Specify Basic WiFi Settings for the DST Adapter To specify basic WiFi settings for the DST adapter: 1. With an Ethernet cable, temporarily connect your computer to the Ethernet port on the DST adapter. 2. Launch a web browser from the computer. 3. Enter http://www.mywifiext.net. A login window displays. 4. Enter the DST adapter user name and password. The user name is admin. The default password is password. The user name and password are case-sensitive. The Status page displays. 5. Select Setup > Wireless Settings. 6. To change the network name (SSID), type a new name in the Name (SSID) field. 7. The name can be up to 32 characters long and it is case-sensitive.If you change the name, make sure to write down the new name and keep it in a safe place. 8. To change the WiFi channel, select a number in the Channel menu. In some regions, not all channels are available. Do not change the channel unless you experience interference (shown by lost connections or slow data transfers). If this happens, experiment with different channels to see which is the best. When you use multiple access points, it is better if adjacent access points use different channels to reduce interference. The recommended channel spacing between adjacent access points is four channels (for example, use Channels 1 and 5, or 6 and 10). 9. To change the mode, select it from the Mode menu. For 2.4 GHz, Up to 200 Mbps is the default setting. The other settings are Up to 65 Mbps and Up to 54 Mbps. Specify Network Settings for the DST Adapter 159
-
 1
1 -
2
-
3
-
4
-
5
-
6
-
7
-
8
-
9
-
10
-
11
-
12
-
13
-
14
-
15
-
16
-
17
-
18
-
19
-
20
-
21
-
22
-
23
-
24
-
25
-
26
-
27
-
28
-
29
-
30
-
31
-
32
-
33
-
34
-
35
-
36
-
37
-
38
-
39
-
40
-
41
-
42
-
43
-
44
-
45
-
46
-
47
-
48
-
49
-
50
-
51
-
52
-
53
-
54
-
55
-
56
-
57
-
58
-
59
-
60
-
61
-
62
-
63
-
64
-
65
-
66
-
67
-
68
-
69
-
70
-
71
-
72
-
73
-
74
-
75
-
76
-
77
-
78
-
79
-
80
-
81
-
82
-
83
-
84
-
85
-
86
-
87
-
88
-
89
-
90
-
91
-
92
-
93
-
94
-
95
-
96
-
97
-
98
-
99
-
100
-
101
-
102
-
103
-
104
-
105
-
106
-
107
-
108
-
109
-
110
-
111
-
112
-
113
-
114
-
115
-
116
-
117
-
118
-
119
-
120
-
121
-
122
-
123
-
124
-
125
-
126
-
127
-
128
-
129
-
130
-
131
-
132
-
133
-
134
-
135
-
136
-
137
-
138
-
139
-
140
-
141
-
142
-
143
-
144
-
145
-
146
-
147
-
148
-
149
-
150
-
151
-
152
-
153
-
 154
154 -
 155
155 -
 156
156 -
 157
157 -
 158
158 -
 159
159 -
 160
160 -
 161
161 -
 162
162 -
 163
163 -
 164
164 -
165
-
166
-
167
-
168
-
169
-
170
-
171
-
172
-
173
-
174
-
175
-
176
-
177
-
178
-
179
-
180
-
181
-
182
-
183
-
184
-
185
-
186
-
187
-
188
-
189
-
190
-
191
-
192
-
193
-
194
-
195
-
196
-
197
-
198
-
199
-
200
-
201
-
202
-
203
-
204
-
205
-
206
-
207
-
208
-
209
-
210
-
211
-
212
-
213
-
214
-
215
-
216
-
217
-
218
-
219
-
220
-
221
-
222
-
223
-
224
-
225
-
226
-
227
-
228
-
229
-
230
-
231
-
232
-
233
-
234
-
235
-
236
-
237
-
238
-
239
-
240
-
241
-
242
-
243
-
244
-
245
-
246
-
247
-
248
-
249
-
250
-
251
-
252
-
253
-
254
-
255
-
256
-
257
-
258
-
259
-
260
-
261
-
262
-
263
-
264
-
265
-
266
 |
 |
