Netgear R7300DST User Manual - Page 215
Use WPS With the Push Button Method, admin, password, Add WPS Client, Push Button recommended
 |
View all Netgear R7300DST manuals
Add to My Manuals
Save this manual to your list of manuals |
Page 215 highlights
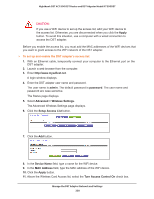
Nighthawk DST AC1900 DST Router and DST Adpater Model R7300DST Note: For instructions about how to use the physical WPS button on the DST adapter, see Connect to the DST Adapter Network With a WPS Connection on page 36. Use WPS With the Push Button Method For you to use the push button method to connect a WiFi device to the DST adapter's WiFi network, the WiFi device that you are trying to connect must provide either a physical button or a software button. You can use the physical button and software button to let a WiFi device join only the main WiFi network, not the guest WiFi network. To use WPS with the push button method to join the DST adapter's main WiFi network: 1. With an Ethernet cable, temporarily connect your computer to the Ethernet port on the DST adapter. 2. Launch a web browser from the computer. 3. Enter http://www.mywifiext.net. A login window displays. 4. Enter the DST adapter user name and password. The user name is admin. The default password is password. The user name and password are case-sensitive. The Status page displays. 5. Select Add WPS Client. The Add WPS Client page displays. 6. Click the Next button. By default, the Push Button (recommended) radio button is selected. 7. Either click the button onscreen or press the WPS button on the DST adapter. For two minutes, the DST adapter attempts to find the WiFi device (that is, the client) that you want to join the DST adapter's main WiFi network. 8. Within two minutes, go to the WiFi device and use its WPS button to connect to the DST adapter's WiFi network. Manage the DST Adapter Network and Settings 215
-
 1
1 -
2
-
3
-
4
-
5
-
6
-
7
-
8
-
9
-
10
-
11
-
12
-
13
-
14
-
15
-
16
-
17
-
18
-
19
-
20
-
21
-
22
-
23
-
24
-
25
-
26
-
27
-
28
-
29
-
30
-
31
-
32
-
33
-
34
-
35
-
36
-
37
-
38
-
39
-
40
-
41
-
42
-
43
-
44
-
45
-
46
-
47
-
48
-
49
-
50
-
51
-
52
-
53
-
54
-
55
-
56
-
57
-
58
-
59
-
60
-
61
-
62
-
63
-
64
-
65
-
66
-
67
-
68
-
69
-
70
-
71
-
72
-
73
-
74
-
75
-
76
-
77
-
78
-
79
-
80
-
81
-
82
-
83
-
84
-
85
-
86
-
87
-
88
-
89
-
90
-
91
-
92
-
93
-
94
-
95
-
96
-
97
-
98
-
99
-
100
-
101
-
102
-
103
-
104
-
105
-
106
-
107
-
108
-
109
-
110
-
111
-
112
-
113
-
114
-
115
-
116
-
117
-
118
-
119
-
120
-
121
-
122
-
123
-
124
-
125
-
126
-
127
-
128
-
129
-
130
-
131
-
132
-
133
-
134
-
135
-
136
-
137
-
138
-
139
-
140
-
141
-
142
-
143
-
144
-
145
-
146
-
147
-
148
-
149
-
150
-
151
-
152
-
153
-
154
-
155
-
156
-
157
-
158
-
159
-
160
-
161
-
162
-
163
-
164
-
165
-
166
-
167
-
168
-
169
-
170
-
171
-
172
-
173
-
174
-
175
-
176
-
177
-
178
-
179
-
180
-
181
-
182
-
183
-
184
-
185
-
186
-
187
-
188
-
189
-
190
-
191
-
192
-
193
-
194
-
195
-
196
-
197
-
198
-
199
-
200
-
201
-
202
-
203
-
204
-
205
-
206
-
207
-
208
-
209
-
 210
210 -
 211
211 -
 212
212 -
 213
213 -
 214
214 -
 215
215 -
 216
216 -
 217
217 -
 218
218 -
 219
219 -
 220
220 -
221
-
222
-
223
-
224
-
225
-
226
-
227
-
228
-
229
-
230
-
231
-
232
-
233
-
234
-
235
-
236
-
237
-
238
-
239
-
240
-
241
-
242
-
243
-
244
-
245
-
246
-
247
-
248
-
249
-
250
-
251
-
252
-
253
-
254
-
255
-
256
-
257
-
258
-
259
-
260
-
261
-
262
-
263
-
264
-
265
-
266
 |
 |
