Netgear R7300DST User Manual - Page 30
Help Me Choose, Me Choose, Router, Access Point Mode, Log In to the DST Router, Use the Internet
 |
View all Netgear R7300DST manuals
Add to My Manuals
Save this manual to your list of manuals |
Page 30 highlights
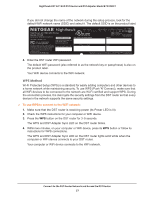
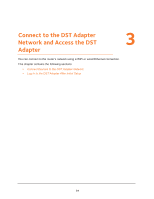
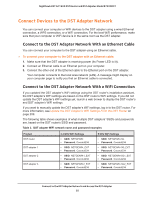
Nighthawk DST AC1900 DST Router and DST Adpater Model R7300DST - If the DST router's installation assistant detects that the DST router is connected to another router or gateway, the following page displays and prompts you to set up the DST router in router mode or access point mode: • If you already set up the Internet connection, enter http://www.routerlogin.net in the address field of your web browser to view or manually change your DST network setting. For more information, see Log In to the DST Router on page 31. 4. If a modem is detected, select how you want to set up your Internet and click the Next button. 5. If an existing router or gateway is detected, select the Help Me Choose radio button or Let Me Choose radio button: • Help Me Choose. If you select the Help Me Choose radio button, NETGEAR genie asks you a few questions to determine if you should set the DST router in router mode or access point mode. We recommend that you select the Help Me Choose radio button. • Let Me Choose. If you select the Let Me Choose radio, you must select the Router Mode radio button or the Access Point Mode radio button. You can change the mode by running the Setup Wizard again. For more information, see Use the Internet Setup Wizard on page 45. For more information about how to set up your DST router with an existing router or gateway, see Set Up the DST Router With an Existing Router or Gateway on page 154. 6. Follow the onscreen instructions. The DST router connects to the Internet. 7. After the DST router detects your Internet connection, you are prompted to download the free genie app and free ReadySHARE Vault app. 8. Select the check box next to the apps that you want to download and click the Next button. The DST router's installation assistant checks the DST router's firmware version. 9. If the DST router's firmware needs to be updated, follow the onscreen instructions to update the firmware. Connect to the DST Router Network and Access the DST Router 30
-
 1
1 -
2
-
3
-
4
-
5
-
6
-
7
-
8
-
9
-
10
-
11
-
12
-
13
-
14
-
15
-
16
-
17
-
18
-
19
-
20
-
21
-
22
-
23
-
24
-
 25
25 -
 26
26 -
 27
27 -
 28
28 -
 29
29 -
 30
30 -
 31
31 -
 32
32 -
 33
33 -
 34
34 -
 35
35 -
36
-
37
-
38
-
39
-
40
-
41
-
42
-
43
-
44
-
45
-
46
-
47
-
48
-
49
-
50
-
51
-
52
-
53
-
54
-
55
-
56
-
57
-
58
-
59
-
60
-
61
-
62
-
63
-
64
-
65
-
66
-
67
-
68
-
69
-
70
-
71
-
72
-
73
-
74
-
75
-
76
-
77
-
78
-
79
-
80
-
81
-
82
-
83
-
84
-
85
-
86
-
87
-
88
-
89
-
90
-
91
-
92
-
93
-
94
-
95
-
96
-
97
-
98
-
99
-
100
-
101
-
102
-
103
-
104
-
105
-
106
-
107
-
108
-
109
-
110
-
111
-
112
-
113
-
114
-
115
-
116
-
117
-
118
-
119
-
120
-
121
-
122
-
123
-
124
-
125
-
126
-
127
-
128
-
129
-
130
-
131
-
132
-
133
-
134
-
135
-
136
-
137
-
138
-
139
-
140
-
141
-
142
-
143
-
144
-
145
-
146
-
147
-
148
-
149
-
150
-
151
-
152
-
153
-
154
-
155
-
156
-
157
-
158
-
159
-
160
-
161
-
162
-
163
-
164
-
165
-
166
-
167
-
168
-
169
-
170
-
171
-
172
-
173
-
174
-
175
-
176
-
177
-
178
-
179
-
180
-
181
-
182
-
183
-
184
-
185
-
186
-
187
-
188
-
189
-
190
-
191
-
192
-
193
-
194
-
195
-
196
-
197
-
198
-
199
-
200
-
201
-
202
-
203
-
204
-
205
-
206
-
207
-
208
-
209
-
210
-
211
-
212
-
213
-
214
-
215
-
216
-
217
-
218
-
219
-
220
-
221
-
222
-
223
-
224
-
225
-
226
-
227
-
228
-
229
-
230
-
231
-
232
-
233
-
234
-
235
-
236
-
237
-
238
-
239
-
240
-
241
-
242
-
243
-
244
-
245
-
246
-
247
-
248
-
249
-
250
-
251
-
252
-
253
-
254
-
255
-
256
-
257
-
258
-
259
-
260
-
261
-
262
-
263
-
264
-
265
-
266
 |
 |