HP LaserJet 4345 HP LaserJet 4345mfp - User Guide - Page 118
Modifying copy settings for the current job, Adjusting the copy contrast, Reducing or enlarging copies - mfp scan
 |
View all HP LaserJet 4345 manuals
Add to My Manuals
Save this manual to your list of manuals |
Page 118 highlights
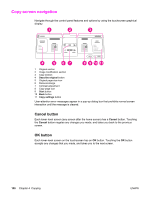
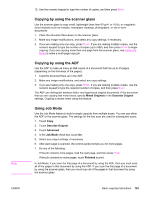
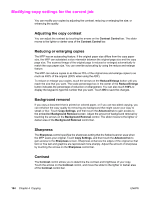
Modifying copy settings for the current job You can modify your copies by adjusting the contrast, reducing or enlarging the size, or enhancing the quality. Adjusting the copy contrast You can adjust the contrast by touching the arrows on the Contrast Control bar. The slider moves to the lighter or darker area of the Contrast Control bar. Reducing or enlarging copies The MFP has an autoscaling feature. If the original paper size differs from the copy paper size, the MFP can autodetect a size mismatch between the original page size and the copy page size. The scanned image of the original page is reduced or enlarged automatically to match the copy paper size. You can override autoscaling by using the reduce and enlarge feature. The MFP can reduce copies to as little as 25% of the original size and enlarge copies to as much as 400% of the original (200% when using the ADF). To reduce or enlarge your copies, touch the arrows on the Reduce/Enlarge button until you reach the size that you want. The scale percentage box in the center of the Reduce/Enlarge button indicates the percentage of reduction or enlargement. You can also touch 100% to display the keypad to type the number that you want. Touch OK to save the changes. Background removal If you copy a document that is printed on colored paper, or if you use two-sided copying, you can enhance the copy quality by removing any background that might cause your copy to streak or blur. Touch Copy Settings, and then touch the Advanced tab to gain access to the embedded Background Removal screen. Adjust the amount of background removal by touching the arrows on the Background Removal control. The slider moves to the lighter or darker area of the Background Removal control bar. Sharpness The Sharpness control specifies the sharpness setting that the flatbed scanner uses when the MFP scans your original. Touch Copy Settings, and then touch the Advanced tab to gain access to the Sharpness screen. Sharpness enhances the edges of the original so that faint or fine text and graphics are reproduced more sharply. Adjust the amount of sharpness by touching the arrows on the Sharpness control bar. Contrast The Contrast control allows you to determine the contrast and brightness of your copy. Touch the arrows on the Contrast control, and move the slider to the lighter or darker area of the Contrast control bar. 104 Chapter 4 Copying ENWW
-
 1
1 -
2
-
3
-
4
-
5
-
6
-
7
-
8
-
9
-
10
-
11
-
12
-
13
-
14
-
15
-
16
-
17
-
18
-
19
-
20
-
21
-
22
-
23
-
24
-
25
-
26
-
27
-
28
-
29
-
30
-
31
-
32
-
33
-
34
-
35
-
36
-
37
-
38
-
39
-
40
-
41
-
42
-
43
-
44
-
45
-
46
-
47
-
48
-
49
-
50
-
51
-
52
-
53
-
54
-
55
-
56
-
57
-
58
-
59
-
60
-
61
-
62
-
63
-
64
-
65
-
66
-
67
-
68
-
69
-
70
-
71
-
72
-
73
-
74
-
75
-
76
-
77
-
78
-
79
-
80
-
81
-
82
-
83
-
84
-
85
-
86
-
87
-
88
-
89
-
90
-
91
-
92
-
93
-
94
-
95
-
96
-
97
-
98
-
99
-
100
-
101
-
102
-
103
-
104
-
105
-
106
-
107
-
108
-
109
-
110
-
111
-
112
-
 113
113 -
 114
114 -
 115
115 -
 116
116 -
 117
117 -
 118
118 -
 119
119 -
 120
120 -
 121
121 -
 122
122 -
 123
123 -
124
-
125
-
126
-
127
-
128
-
129
-
130
-
131
-
132
-
133
-
134
-
135
-
136
-
137
-
138
-
139
-
140
-
141
-
142
-
143
-
144
-
145
-
146
-
147
-
148
-
149
-
150
-
151
-
152
-
153
-
154
-
155
-
156
-
157
-
158
-
159
-
160
-
161
-
162
-
163
-
164
-
165
-
166
-
167
-
168
-
169
-
170
-
171
-
172
-
173
-
174
-
175
-
176
-
177
-
178
-
179
-
180
-
181
-
182
-
183
-
184
-
185
-
186
-
187
-
188
-
189
-
190
-
191
-
192
-
193
-
194
-
195
-
196
-
197
-
198
-
199
-
200
-
201
-
202
-
203
-
204
-
205
-
206
-
207
-
208
-
209
-
210
-
211
-
212
-
213
-
214
-
215
-
216
-
217
-
218
-
219
-
220
-
221
-
222
-
223
-
224
-
225
-
226
-
227
-
228
-
229
-
230
-
231
-
232
-
233
-
234
-
235
-
236
-
237
-
238
-
239
-
240
-
241
-
242
-
243
-
244
-
245
-
246
-
247
-
248
-
249
-
250
-
251
-
252
-
253
-
254
-
255
-
256
-
257
-
258
-
259
-
260
-
261
-
262
-
263
-
264
-
265
-
266
-
267
-
268
-
269
-
270
-
271
-
272
-
273
-
274
-
275
-
276
-
277
-
278
-
279
-
280
-
281
-
282
-
283
-
284
-
285
-
286
-
287
-
288
-
289
-
290
-
291
-
292
-
293
-
294
-
295
-
296
-
297
-
298
-
299
-
300
-
301
-
302
-
303
-
304
-
305
-
306
-
307
-
308
-
309
-
310
-
311
-
312
-
313
-
314
-
315
-
316
-
317
-
318
-
319
-
320
-
321
-
322
-
323
-
324
 |
 |